
Your First Tattoo Appointment: A Calm Walkthrough
The morning of your first tattoo appointment often starts with a quiet kitchen and too many thoughts. Light comes through the window, your coffee sits untouched while you wonder whether caffeine is a smart idea, and you keep checking the small bag by the door: identification, phone, water, perhaps a snack. The tattoo itself has occupied your imagination for weeks, but the parts that make the day go well happen before the needle touches your skin.
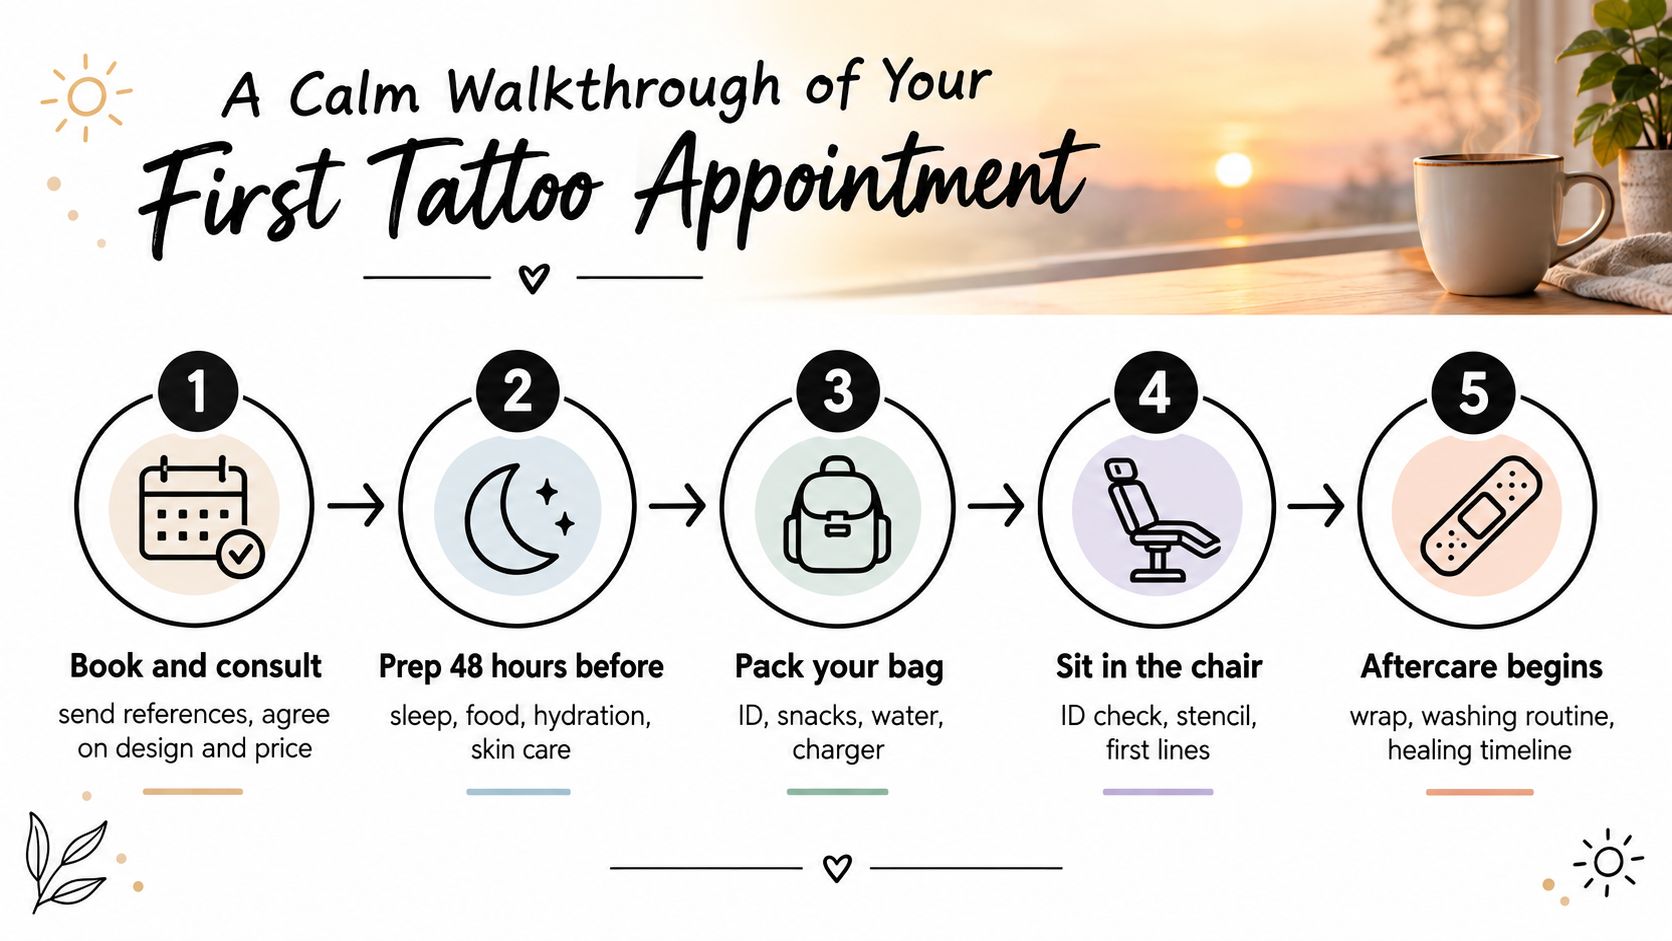
A professional appointment is easier to handle when you treat it as a controlled workflow, not one intimidating leap. You'll move through five phases: booking, consultation, pre-appointment preparation, the session in the chair, and aftercare. Each phase answers a practical question, protects your time, or gives your artist a better surface and clearer brief to work with.
Tattooing has a documented history of at least 5,200 years, linked to Ötzi the Iceman, and tattooed skin has also been found on Egyptian mummies dated to around 2000 B.C.E. The Smithsonian's history of tattooing shows how the practice developed toward professional studios and appointment-based work. Think Tank Tattoo, a Denver studio established in 2002, follows that modern studio model for both small first pieces and larger multi-session projects.
Practical rule: Your job isn't to tolerate uncertainty. Ask the question while there's still time to make a better decision.
The sections below follow the day as it unfolds. You'll see where deposits fit, how placement changes pain and healing, what to do during the final two days, what happens at the station, and how to protect the tattoo once you leave.
Table of Contents
A Calm Walkthrough of Your First Tattoo Appointment - What a working studio is managing
Booking, Deposits, and the Consultation - Why the deposit exists - Use the consultation to make decisions
Choosing Placement, Size, and Pain Trade-Offs - Pain and healing don't always move together - Size protects detail
The 48 Hours Before You Sit in the Chair - The night before - The morning of the appointment
What Happens During the Session - The stencil is a decision point
Aftercare, Healing, and When to Call the Shop - The first two weeks - Protect the healing surface
A Calm Walkthrough of Your First Tattoo Appointment
The appointment starts before you enter the studio. Your artist needs a clear idea, a workable placement, and enough time to prepare. You need to know what you're agreeing to, how the design will be adapted to your body, and what the studio expects from you.
Think of the workflow this way:
Book and communicate: Send a useful brief, references, and placement information.
Consult and decide: Work through size, style, color, timing, and price with the artist.
Prepare your body and bag: Eat, hydrate, sleep, protect the skin, and bring what you'll need.
Settle into the chair: Complete checks, approve the stencil, and communicate during the tattoo.
Start aftercare immediately: Follow the artist's wrap and washing instructions while the skin repairs.
The order matters. A rushed booking creates an unclear consultation. An unclear consultation creates last-minute design changes. Poor preparation can make an otherwise straightforward session harder, while careless aftercare can compromise the result after the artist has finished their work.
What a working studio is managing
Inside a busy shop, your artist is balancing drawing time, station setup, sterile supplies, appointment length, and other clients' bookings. That's why punctuality, clear references, and honest conversations about discomfort are more useful than trying to appear relaxed.
Think Tank Tattoo's established Denver workflow is built around communication and consultation. You don't need to arrive knowing every technical term. You do need to arrive ready to explain what you like, what you don't like, where the tattoo should sit, and how visible you want it to be.
The process has room for nerves. You can ask to see the stencil in a mirror, request a placement adjustment, and tell the artist when you need a break. A first tattoo appointment should feel structured, not improvised. Once you understand the purpose of each stage, the unfamiliar parts become ordinary studio procedure.
Booking, Deposits, and the Consultation
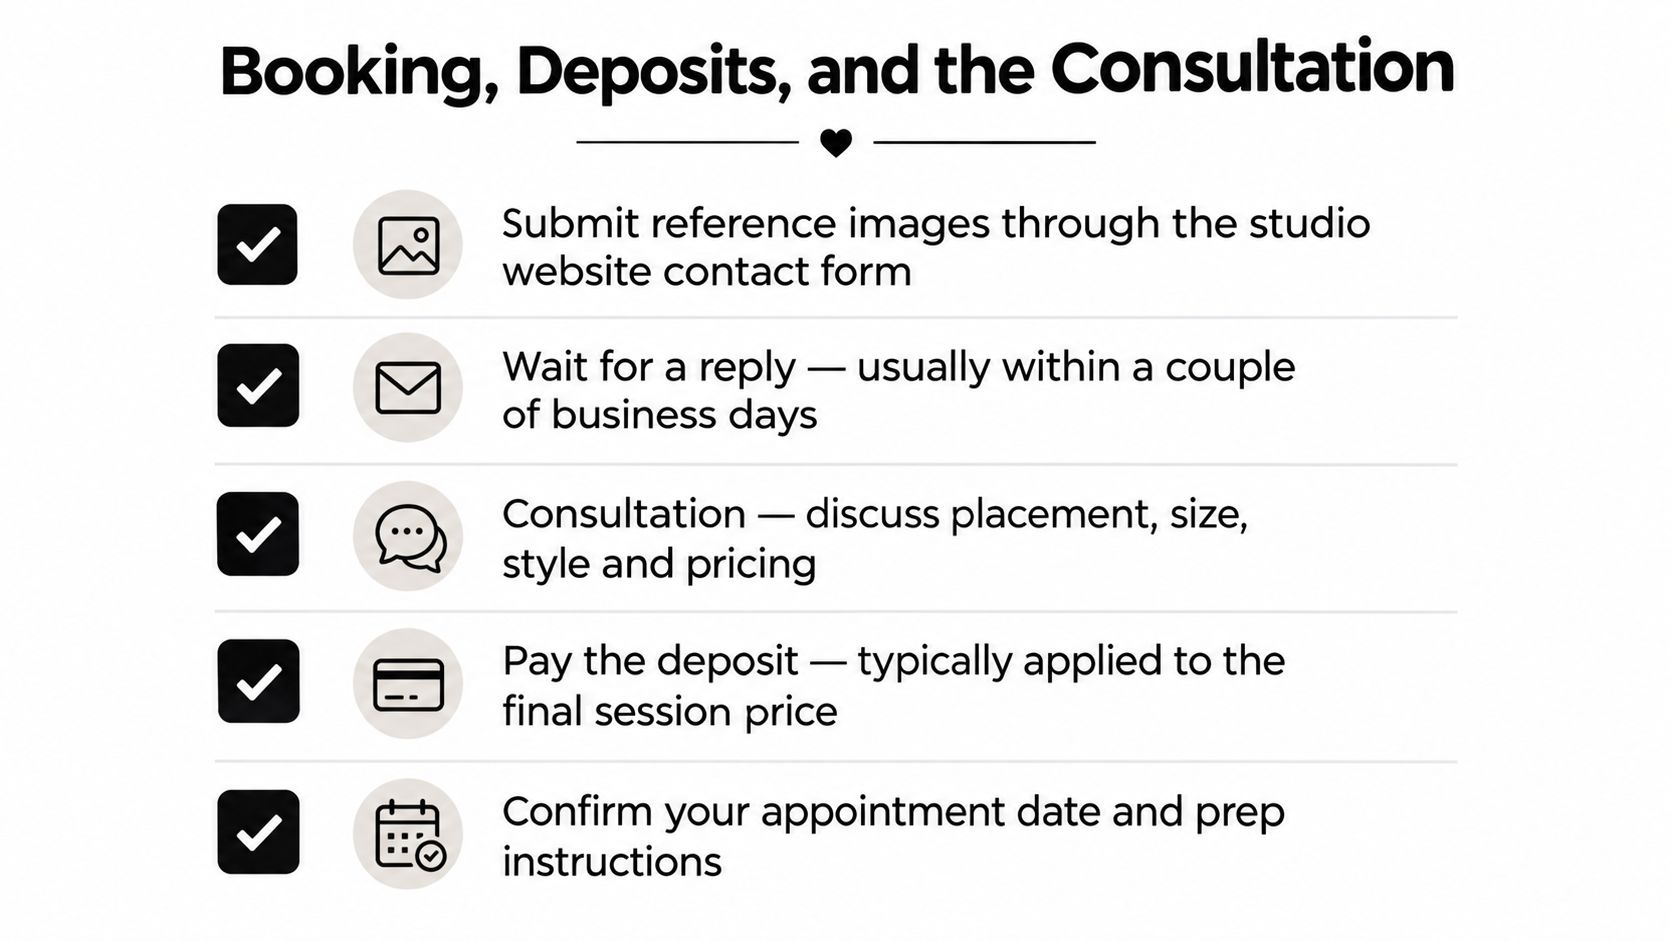
Start with the idea, not a vague request for “something cool.” Send reference images through the studio's contact form or the booking channel it specifies, then explain the subject, preferred style, approximate size, body area, and whether the work is custom or based on flash. A few relevant images help an artist identify your visual direction. A large folder of unrelated images usually creates more ambiguity than clarity.
At Think Tank Tattoo, the booking process includes a non-refundable $100 deposit to reserve the appointment, and that deposit goes toward the final piece. The studio also lists a $100 shop minimum. Think Tank Tattoo's tattoo deposit policy should be read before you pay, because deposit terms define what happens if you reschedule, cancel, or substantially change the agreed project.
Why the deposit exists
A reserved appointment represents more than the time spent tattooing. The artist may draw, communicate with you, prepare references, and hold a slot that can't be offered to another client. The deposit protects that reserved time for both sides, provided you understand the studio's conditions before confirming.
Pricing can be structured around a minimum, an hourly rate, or a project estimate. Detail, color, size, body position, and the number of sessions all affect the conversation. Hourly work makes sense when the final scope is difficult to predict. A smaller, clearly defined piece may be easier to estimate as a project. Ask which model applies, what the estimate includes, and when the remaining balance is due.
If you're comparing digital scheduling tools for a beauty or personal-care business, this guide to the best booking platform for salons offers useful context on booking workflows, although tattoo studios may use different policies and intake steps.
Use the consultation to make decisions
The complimentary in-person consultation is where an idea becomes a tattoo plan. Bring three to five reference images, wear clothing that exposes the intended area, and write your questions down before you arrive. Expect roughly 20 to 30 minutes of face-to-face discussion with the artist at Think Tank Tattoo, based on the studio information supplied for this article.
Discuss:
Scale: Will the design have enough room for its lines and details?
Placement: Does it follow the body's shape, or will it fight the movement of the area?
Line weight: Should the artist simplify or strengthen details for the chosen skin and location?
Color approach: Would color support the design, or would black-and-grey give it better structure?
Source material: Is the piece custom, selected from flash, or a combination?
Timing: Can it be completed in one session, or should the project be staged?
Don't treat the consultation as a formality. It's the point where you can discover that a design needs to be larger, a placement may experience too much friction, or a reference won't translate well to skin. Clear decisions here reduce surprises at the station.
Choosing Placement, Size, and Pain Trade-Offs
Pain isn't a universal ranking. Skin thickness, proximity to bone, nerve density, your physical state, and the length of the session all matter. A short tattoo on a sensitive spot may be manageable, while a long session on a less sensitive area can become demanding because the skin has been worked repeatedly.
The practical decision is a trade-off among pain, healing, friction, and visibility. Ribs, sternum, spine, and inner bicep often feel more intense. Outer arm, thigh, and shoulder blade are commonly more approachable, but individual experiences vary.
Placement | Pain Level (1-5) | Healing Ease | Visibility |
|---|---|---|---|
Ribs | 4-5 | More friction from clothing and movement | Easy to hide |
Sternum | 4-5 | Sensitive area, clothing contact can matter | Usually hidden |
Spine | 4-5 | Bone proximity can increase discomfort | Visible with open clothing |
Inner bicep | 4-5 | Movement and rubbing may irritate it | Easy to cover |
Outer arm | 2-3 | Generally practical to protect | Frequently visible |
Thigh | 2-3 | Clothing choice affects comfort | Easy to hide |
Shoulder blade | 2-3 | Usually manageable, though clothing can rub | Variable |
These levels are a planning framework, not a promise. A professional artist should evaluate the actual design and your anatomy before making a final recommendation. Think Tank Tattoo's guidance on first tattoo placement can help you think through visibility, body contours, and the practical implications of choosing a location.
Pain and healing don't always move together
A sensitive placement can sometimes be easier to protect from sunlight, but an area that hurts less during tattooing may still heal inconveniently if clothing rubs against it. Ribs are a useful example. They can be painful because the skin is close to bone and moves with breathing, while bras, shirts, and sleeping positions can continue to irritate the area afterward.
Outer arm tattoos may be easier for many clients to tolerate, but they can be more exposed to sunlight and everyday contact. Thigh work may offer a comfortable surface and good concealment, provided your clothing doesn't press against fresh skin. Ask your artist which problems are most likely for your lifestyle, not just which area is reputed to hurt less.
Size protects detail
Tiny isn't automatically simpler. Fine detail packed into a very small footprint has less room to breathe, and delicate lines can soften as a tattoo ages. A slightly larger design often gives the artist better space to separate shapes, preserve contrast, and make the image readable over time.
Your first visible tattoo deserves a separate decision. Hands, neck, lower arms, and other exposed areas can affect how you dress and how strangers respond to you in professional settings. A hidden placement gives you more privacy while you learn how your body reacts to tattooing and healing. Neither choice is morally better. Choose based on the life you lead, not the version of yourself you hope to become.
The 48 Hours Before You Sit in the Chair
The final two days should be boring. That's a success. Sleep normally, eat properly, drink water, and avoid turning the appointment into a late-night event followed by a rushed commute.
A reliable preparation sequence looks like this:
The night before
Eat a full meal: Have a substantial meal with protein and carbohydrates before the appointment. Expert guidance commonly recommends eating roughly 30 minutes to two hours before tattooing, depending on your schedule and tolerance, as outlined in Allure's first tattoo guide.
Drink water steadily: Hydration supports your general comfort and helps you avoid arriving light-headed. Don't try to compensate by drinking an excessive amount immediately before the session.
Sleep properly: A rested body generally handles a long appointment more predictably than one running on exhaustion.
Clean the area: Shower with a mild, unscented soap. Arrive with clean skin, but don't apply a heavy product immediately before the appointment unless your artist has instructed you to.
Protect the placement: Avoid arriving with sunburn, cuts, abrasions, or freshly irritated skin. Skip aggressive exfoliation and other treatments that leave the area sensitive.
Medication requires care rather than guesswork. Some medical-style tattoo guidance warns that aspirin and ibuprofen can thin the blood, while other guidance cautions against too much caffeine and emphasizes food and hydration. Healthline's guide to preparing for a tattoo discusses those trade-offs. Don't stop prescribed medication without speaking to the clinician who prescribed it. Tell your artist about relevant medication, allergies, or health concerns before the session.
The morning of the appointment
Wear loose clothing that exposes the design without compressing it. Dark, comfortable fabric is practical, especially if the placement makes changing awkward. Choose clothes you can move in and that won't scrape the area while you travel home.
Pack photo identification, your payment method, reference images on your phone, water, and a simple snack. A charger helps during longer sessions. Keep your bag compact, and follow the studio's instructions for personal belongings rather than assuming the lobby will have secure storage.
Don't drink alcohol before your appointment, and don't arrive dehydrated or hungry. The aim is steady energy and calm communication, not artificial bravery.
What Happens During the Session
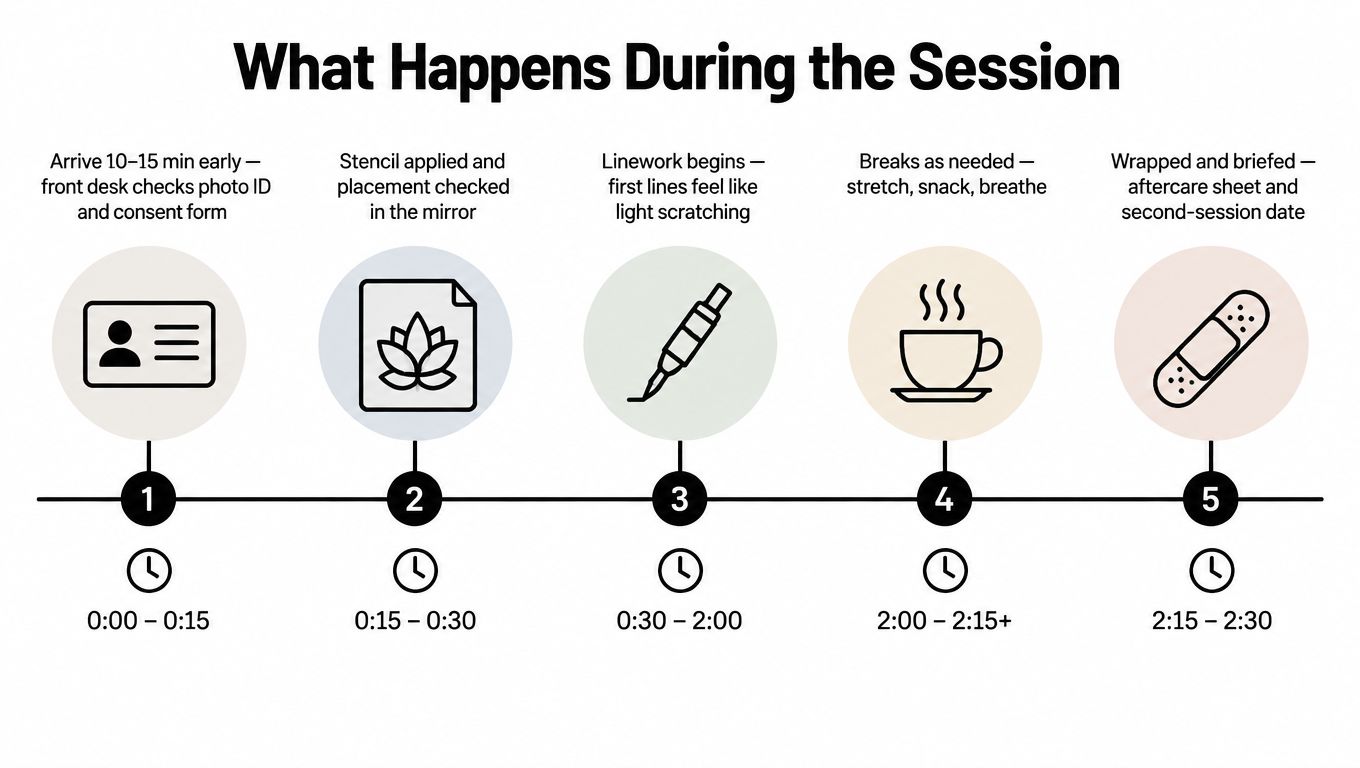
Arrive early enough to enter without rushing. At the front desk, the studio confirms your photo ID, consent information, appointment details, and placement. Any payment step should be settled according to the shop's policy before the artist begins.
The artist then prepares the station. You should see professional hygiene practices, including hand washing and the use of sterile, single-use equipment. If you're unsure about a tool, barrier, or cleaning step, ask directly. A reputable artist won't treat a reasonable hygiene question as an insult.
The stencil is a decision point
The stencil shows the design's position, angle, and scale before permanent work starts. The artist cleans the skin, applies the transfer, and checks the result with you. Stand, sit, move naturally, and use a mirror. A placement that looks right while you're still can look different when your arm hangs or your torso turns.
Speak up before the first line. “Can we move it slightly?” is a normal request at this stage. Once you approve the position, the artist prepares the area and begins.
The first needle pass may feel like a hot scratch or a repetitive scraping sensation. Sensation differs by location and person, and it can change as the session continues. You don't need to perform toughness. Tell the artist if you feel faint, nauseous, unusually overwhelmed, or just need a pause.
Your best communication is specific: “I need a two-minute break,” “That position is cramping,” or “I'm feeling light-headed” gives the artist something useful to act on.
Breaks let you stretch, drink water, eat, and reset your breathing. Longer work may require several pauses, and a responsible artist would rather adjust the session than have you push past your limit. Keep your phone accessible if you need reference images, but don't move the tattooed area unnecessarily while the artist is working.
This first tattoo preparation guide from TattoosAI is another practical checklist to review before you arrive. Use it as a supplement to your artist's instructions, not a replacement for them.
At the end, the artist cleans the skin, applies the recommended covering, explains the first washing step, and tells you what to do if the wrap lifts or leaks. Take a clear photo if the studio requests one, and ask when to send a healed update or discuss a touch-up.
Aftercare, Healing, and When to Call the Shop
Aftercare begins as soon as the session ends. Your artist's instructions take priority because wrap type, ink saturation, placement, and skin response differ. Initial coverings may stay on for a few hours, while some protective films remain for three to five days. Other guidance allows a wrap to remain for 24 to 48 hours, as described in Allure's first tattoo aftercare guidance.
The first two weeks
Hours 0 to 24: Keep the covering on for the period your artist specifies. Avoid rubbing, soaking, hot water, and unnecessary handling. If the wrap fails early, contact the studio rather than improvising a complicated replacement.
Days 1 to 3: Once your artist says it's time, wash gently with lukewarm water and mild, unscented soap. Pat the area dry with a clean towel or paper towel, then apply only the recommended thin layer of ointment or gentle moisturizer. Heavy application traps moisture and can leave the skin feeling congested.
Days 3 to 7: Light flaking, tightness, and itching can occur as the surface repairs. Don't scratch or pick. If your artist approves a switch from ointment to fragrance-free lotion, use a thin layer and let the skin breathe.
Days 7 to 14: Peeling should settle, but the tattoo may look dull or cloudy before the surface clears. Avoid judging the final appearance while the skin is still changing. Clinical tattoo-aftercare research has used follow-up points through day 21 to monitor healing, which is why a same-day view can't tell you everything about the finished result. The peer-reviewed clinical review in PMC also reports reduced early discomfort and good skin-quality repair with suitable aftercare products.
Protect the healing surface
Avoid swimming, hot tubs, saunas, picking, and direct sun while the tattoo heals. The common technical guidance is to avoid these exposures for about two weeks, while some studios recommend longer protection depending on the wound and activity. After the skin has fully healed, use sunscreen as part of ordinary tattoo maintenance.
Contact the shop if redness spreads outward, red streaks appear, pain becomes hot and throbbing rather than gradually settling, yellow-green discharge develops, or you have a fever. Don't diagnose a complication from a social-media photograph. Send the studio a clear image and seek medical care when symptoms suggest infection or your artist tells you to do so.
A healed photo, a brief check-in, and an honest conversation about a touch-up keep the client and studio connected. For product-specific guidance, review Think Tank Tattoo's article on the best tattoo lotion, then follow the product recommendation your artist gives you for your skin and wrap.
Think Tank Tattoo offers complimentary consultations, custom tattoo planning, diverse artistic styles, and appointment guidance from booking through aftercare in its Denver studio. If you're preparing for your first tattoo appointment, visit Think Tank Tattoo with your references and placement idea ready, and start the conversation before committing to the chair.
Comments