
Biomechanical Tattoo Sleeve: Your Complete Planning Guide
You've saved a folder of mechanical arms, polished metal highlights, and impossibly deep shadows. You know you want a biomechanical tattoo sleeve, but you're less sure how those images will work around your elbow, how the appointments will fit your life, or whether the finished arm will look as convincing as the rendering.
Those are the right questions. A successful sleeve starts with the arm you have, not the image you'd like to copy. The decisions that matter most happen before tattooing begins: where the mechanisms sit, how the design moves, and how much skin the artist deliberately leaves visually quiet.
Table of Contents
What a Biomechanical Tattoo Sleeve Actually Is - An arm, not a flat illustration - Negative space is part of the mechanism
Building the Design Before the First Session - Map movement before committing to detail - Check the stencil as a complete arm
Choosing the Right Artist for Biomechanical Work - What the portfolio should answer - Discuss healed contrast on your skin
Session Planning, Timelines, and Staging - Plan around recovery rather than ambition - Make the calendar usable
Pain, Placement, and How Each Zone Changes the Design - Give each area an appropriate visual job - Separate comfort resources from fresh-tattoo care
Aftercare That Protects the Sleeve Long Term - Leave with written instructions - Know when the studio isn't the next stop
Cost, Consult Prep, and Your Next Steps - Bring decisions the artist can use
What a Biomechanical Tattoo Sleeve Actually Is
Consider a familiar consultation scenario: a client holds up a dramatic reference and asks for that exact piece across their entire arm. The useful response isn't an immediate yes. It's asking them to lower their shoulder, turn their wrist, and bend their elbow so the artist can understand the surface they're designing for.
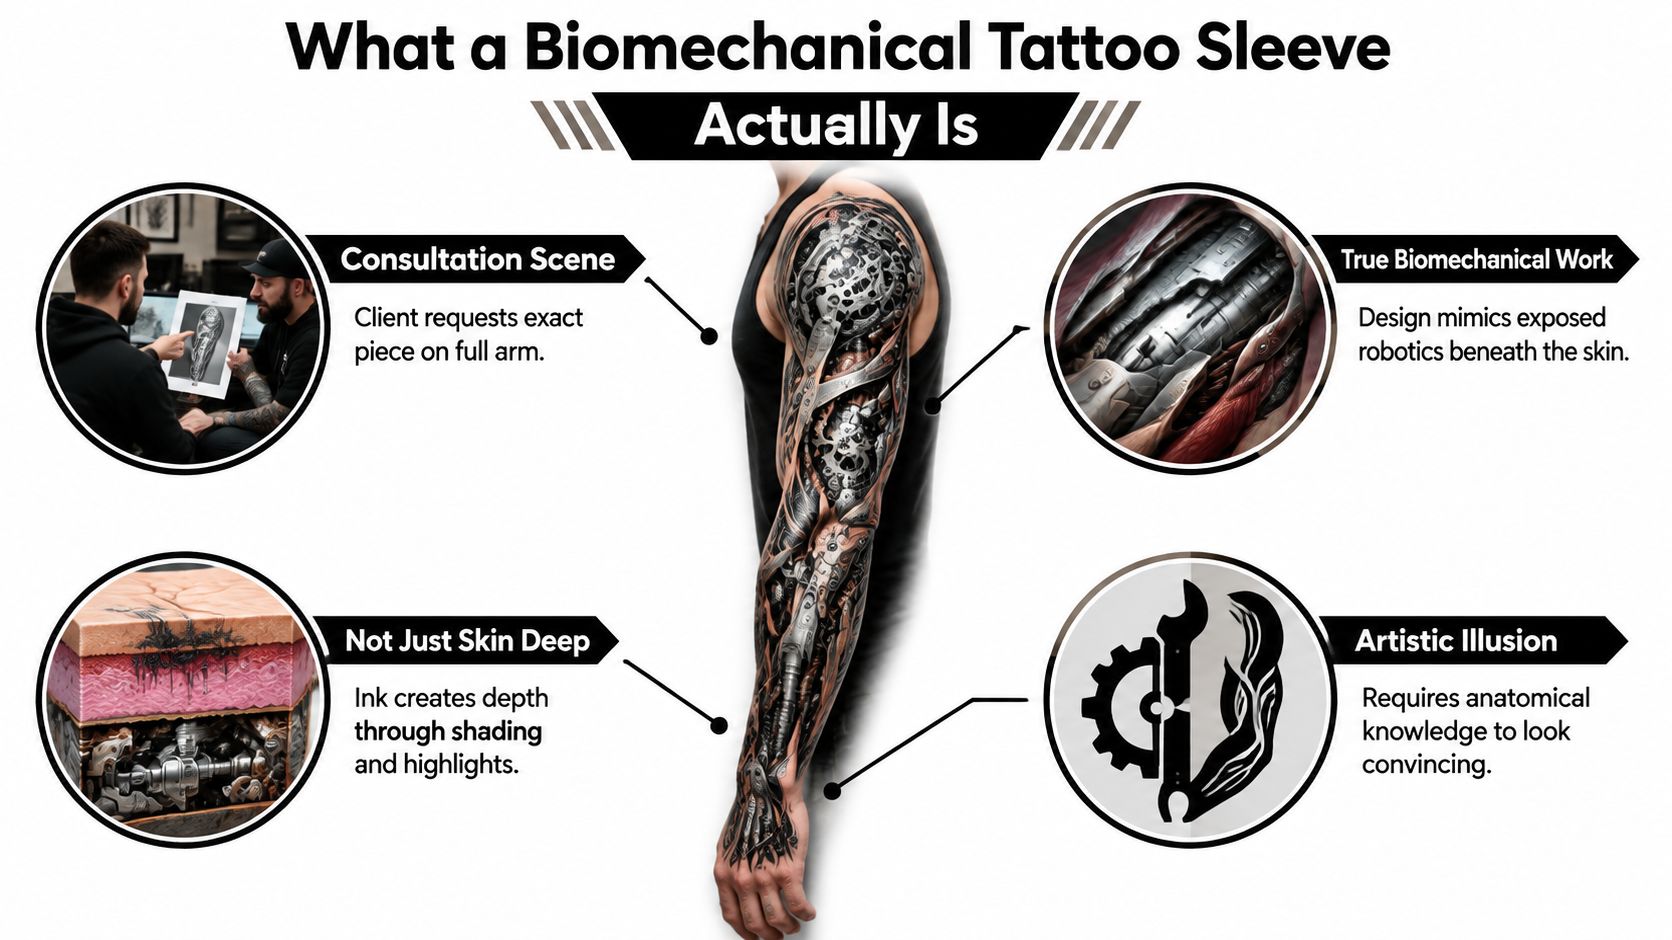
Biomechanical tattooing combines organic anatomy with imagined machinery. A convincing sleeve suggests that the machinery belongs inside that particular body. Tendons can become cables, joints can suggest hinges, and muscle transitions can support overlapping plates. These are design relationships, not instructions to cover every available space with hardware.
An arm, not a flat illustration
The style's roots help explain this approach. Swiss artist H.R. Giger developed an influential fusion of machinery and anatomy, with his creature work for Alien bringing that visual language to a worldwide audience. Tattooers including Guy Aitchison and Aaron Cain subsequently helped develop biomechanical work into original, anatomy-led compositions rather than direct film references, as described in the history of biomechanical art.
The sleeve format gives those relationships room to develop. A broad structure above the elbow can narrow into a connecting passage and open again across the forearm. Without those transitions, even beautifully rendered components can look like unrelated illustrations.
The diagram below introduces the visual logic of an integrated sleeve.
Negative space is part of the mechanism
Negative space isn't unfinished work. It separates layers, establishes edges, and gives the eye somewhere to rest between dense passages. An artist who fills every opening with another tube can make the sleeve more complicated without making it more convincing.
A believable mechanical arm needs hierarchy, not an equal amount of detail everywhere.
Choose the overall character before choosing individual components. Ribbed organic structures, polished industrial plates, and exposed skeletal forms can coexist, but they need a shared visual language. The consultation should establish what holds the composition together before anyone starts discussing tiny bolts or final highlights.
Building the Design Before the First Session
Bring references that explain your preferences rather than asking the artist to reproduce another person's arm. Separate what you like about each image: the surface texture, the openness of the composition, the mechanical shapes, or the balance between organic and manufactured forms.
A useful reference folder also includes things you don't want. Saying that you dislike torn-skin borders or densely packed gears gives the artist a clearer direction than asking for something futuristic.
Map movement before committing to detail
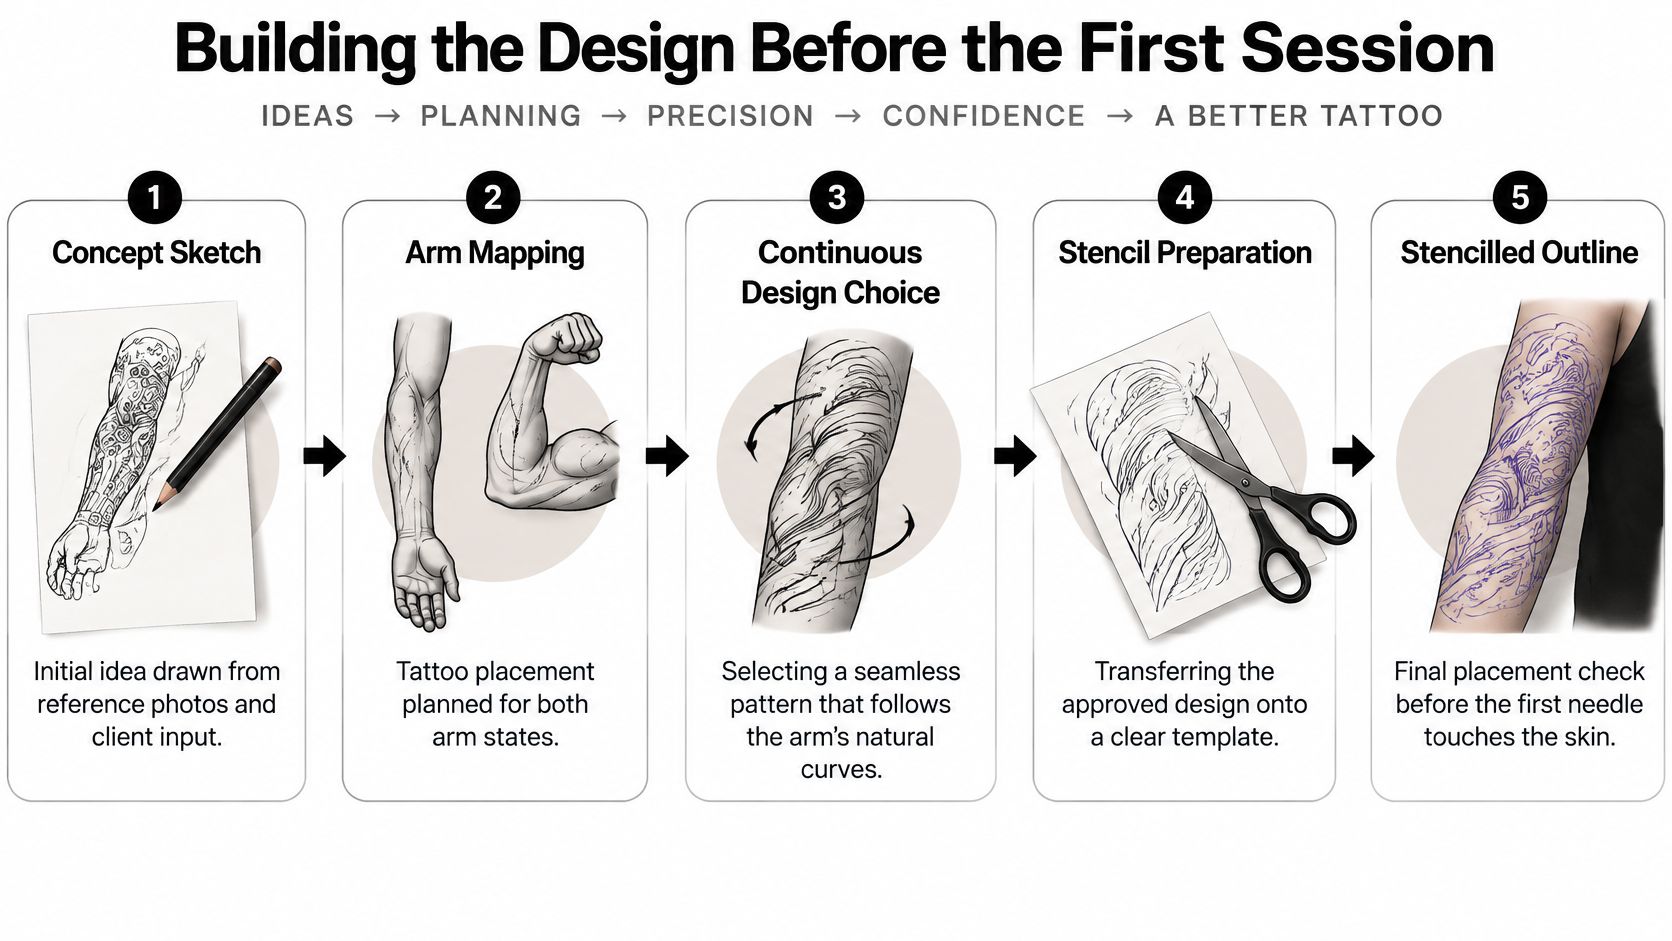
Ask the artist to examine the shoulder, upper arm, elbow, forearm, and wrist with your arm relaxed and flexed. The practical question is where each major structure begins, where it leaves view, and what connects it to the next surface.
This process illustration shows how a concept becomes a placement plan.
Use the design review to settle these decisions:
Primary focal point: Put the dominant mechanism on a broad surface where its shape can be understood without assembling fragments from several viewing angles.
Depth structure: Reserve the darkest values for cavities and contact shadows. Keep intermediate values available for recessed surfaces instead of treating every metal component as equally dark.
Connecting passages: Identify how cables, plates, or organic forms travel around the arm, including the less-photographed inner surfaces.
Open corridors: Mark the areas that remain lighter, including any boundary intended for later expansion.
Check the stencil as a complete arm
Don't approve placement only while looking straight into a mirror with your elbow locked. Let your arm hang naturally, rotate it, and check how the main forms appear from the side and behind. Ask the artist to step back as well as inspect the close detail.
A written design plan should identify focal points, lighter passages, and the intended stopping points. It doesn't have to specify every texture. Its job is to prevent major compositional decisions from being improvised midway through tattooing.
Use the video below as another visual reference when discussing your preferred direction.
Approve the structure before the decoration. If the main forms don't work in the placement preview, extra surface texture isn't the solution.
Choosing the Right Artist for Biomechanical Work
Choose the artist whose completed arms you can understand, not the artist whose close-ups look most dramatic. A tight photograph of a polished piston tells you little about how that artist resolves the inside elbow or connects the shoulder to the forearm.
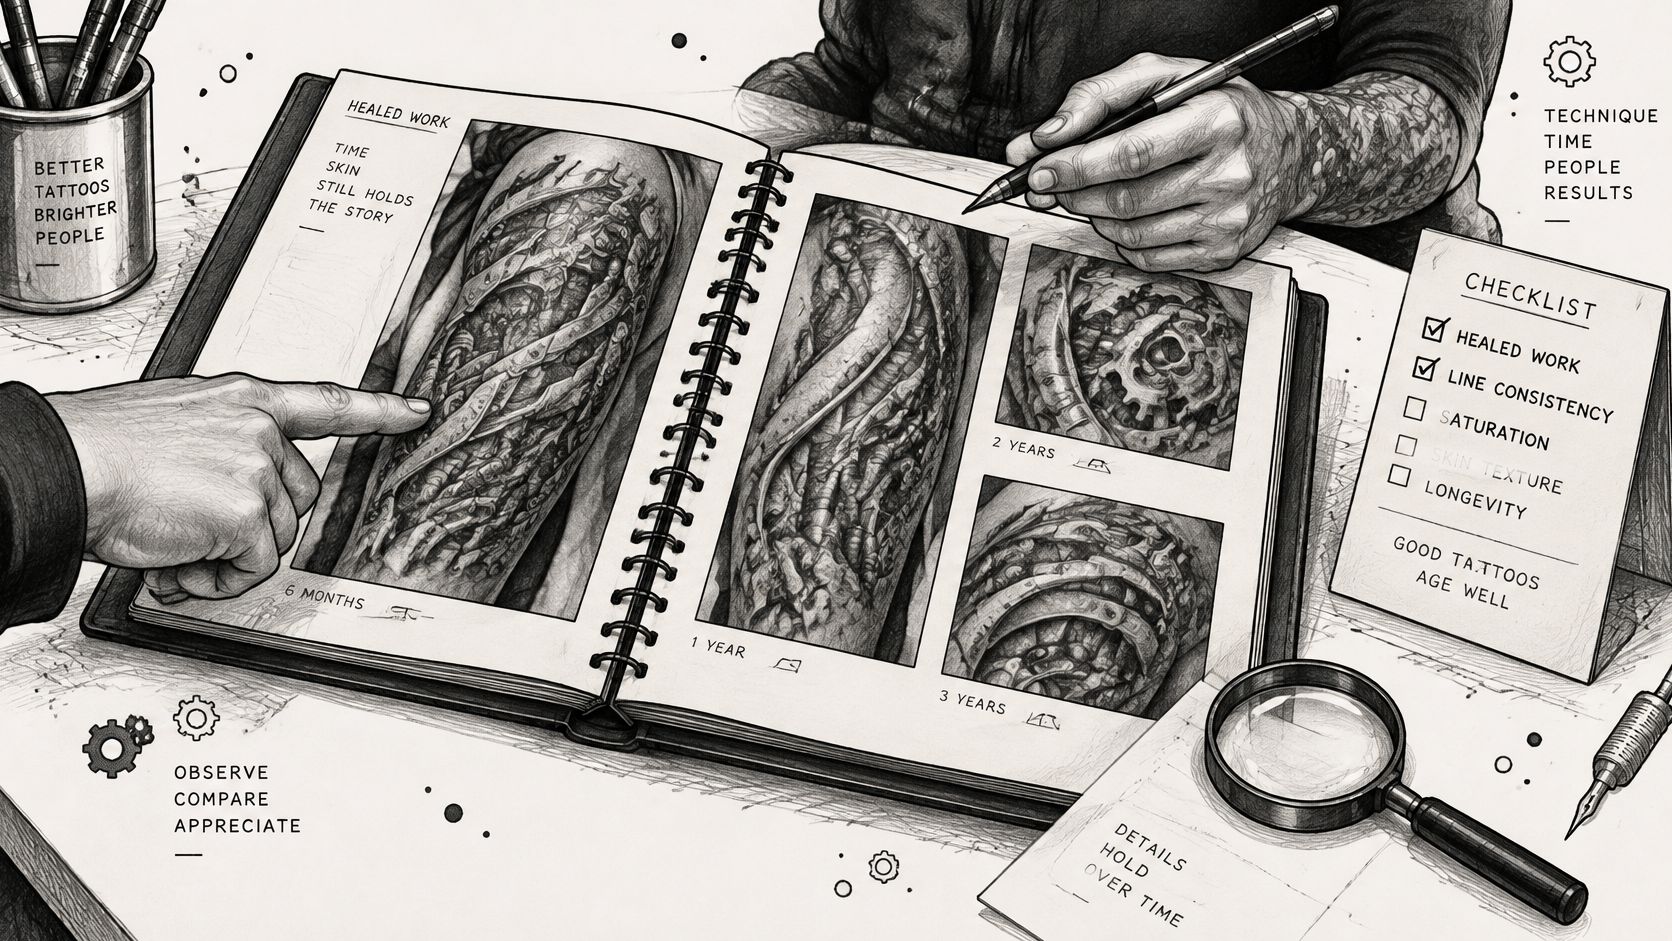
Use a tattoo artist portfolio review to organize your comparison. Look for evidence of whole-project thinking rather than assuming that strength in another style automatically establishes biomechanical experience.
What the portfolio should answer
Portfolio evidence | What to examine |
|---|---|
Healed full-arm photographs | Can you follow the composition around the arm? |
Detail photographs | Are edges distinct without every boundary relying on heavy black? |
Different viewing angles | Do the connecting surfaces look intentional? |
Comparable skin tones | Are the healed results relevant to your own expectations? |
Work shown over time | Can the artist explain what changed after healing or revision? |
A sketchbook can reveal how an artist thinks, but it isn't a substitute for completed work. Look for a relationship between the proposed drawing and the healed tattoos in the portfolio.
Discuss healed contrast on your skin
Ask the artist how they would adapt the design's value range to your skin tone. The answer should address spacing, readable edges, and realistic highlight expectations, not promise that your arm will match a bright digital mockup.
More black isn't automatically more realism. The question is whether adjacent layers remain distinguishable after healing. Ask to see examples where the artist has preserved that separation without relying on fresh redness, wet ink, or flattering lighting.
Future correction deserves a separate conversation. The discussion of tattoo pigment and removal considerations addresses pigmentary changes associated with removal across different skin types. Those concerns shouldn't be presented as predictions of ordinary tattoo healing, but they're a reason to discuss correction thoughtfully rather than treating removal as an effortless backup.
Ask how the artist handles touch-ups and whether they can explain revisions to previous large projects. A strong consultation includes candid limits. Pressure to approve a design immediately, dismissive answers about healed work, or reluctance to discuss changes are reasons to pause before paying a deposit.
Session Planning, Timelines, and Staging
A sleeve schedule should describe what each appointment is intended to accomplish, not just offer a completion date. Ask whether the artist plans to establish the overall structure first, finish selected zones progressively, or combine those approaches.
For a biomechanical tattoo sleeve, possible working zones include the shoulder cap, upper-arm panel, elbow transition, forearm, and wrist boundary. The sequence should serve the composition while keeping recovery manageable. It shouldn't be dictated solely by which section will make the strongest progress photograph.
Plan around recovery rather than ambition
Tattoo healing is commonly described as taking roughly 2–3 weeks, but extensive work can require longer staging; repeated passes over traumatized skin can contribute to inflammation, scarring, pigment loss, and muddy transitions, as discussed in the clinical literature on tattoo healing and skin recovery.
That interval isn't an automatic clearance date. Have the artist assess the area before scheduling another saturation-heavy pass, and seek medical advice when healing isn't progressing normally.
Scheduling approach | Practical trade-off |
|---|---|
Longer appointments | Fewer separate visits, but a larger commitment to sitting and recovery |
Shorter appointments | More calendar coordination, with a smaller target for each visit |
Flexible staged booking | Less certainty about the finish date, but room to respond to healing |
Longer isn't more efficient. Ask what the artist expects to finish cleanly rather than negotiating the longest appointment you think you can endure.
Make the calendar usable
Tell the artist about travel, work clothing, physical duties, and other obligations that could interfere with caring for the tattoo. Discuss what happens if you need to stop early or postpone the next stage.
Scheduling rule: Book for the amount of work your skin can recover from, not the amount your calendar can squeeze in.
The questions in this guide to how long a sleeve tattoo takes can help frame that conversation. Request an estimated sequence and the reasons it might change, rather than treating a full sleeve and a partial sleeve as projects with interchangeable timelines.
Pain, Placement, and How Each Zone Changes the Design
Pain tolerance isn't a reliable design specification. You might be willing to sit through a difficult area, but that doesn't make it the right location for the sleeve's most intricate mechanism.
Be direct about discomfort during the consultation. The artist needs to know whether you're anxious about sitting, have struggled during previous tattoos, or need a plan for breaks. You don't need to prove toughness to earn a well-designed sleeve.
Give each area an appropriate visual job
The shoulder cap can support a broad shell or dominant rounded structure. Across the upper arm, ask how the artist will keep that shape connected to the rest of the sleeve rather than turning it into a separate shoulder tattoo.
The inner upper arm deserves its own discussion about positioning and session comfort. Don't leave that conversation until you're already committed to an appointment's workload.
Elbow transition: Favor a design that still makes sense when folded. Avoid making a tiny, precisely aligned feature the centerpiece of the crease.
Forearm: Consider it for a clearly readable focal mechanism, while checking both the palm-up and resting-arm views.
Wrist boundary: Decide whether the sleeve ends in an open transition, a defined edge, or a connection planned for later work.
Separate comfort resources from fresh-tattoo care
If you're researching discomfort-management products, MEDISTIK's explanation of how Medistik works with treatments is a resource to discuss with a qualified clinician. Don't interpret a general treatment article as evidence that a product is appropriate for broken or freshly tattooed skin.
Ask your artist before applying any topical product around an appointment. Product suitability and instructions matter more than a promise of an easier sitting.
The most important detail belongs where the design works, not where enduring it feels like an achievement.
Agree on a stopping procedure before the session begins. If you're struggling, say so early enough for the artist to finish the current passage deliberately. A realistic comfort plan supports better communication; it doesn't require predicting exactly how every part of the arm will feel.
Aftercare That Protects the Sleeve Long Term
Aftercare starts before the needle touches your arm. Ask how the studio handles single-use needles and cartridges, protective barriers, surface disinfection, dilution water, ink-batch identification, and separate disposable ink caps.
Sealed ink isn't a guarantee of sterility. The FDA's tattoo safety guidance warns that tattoo inks can contain microorganisms, including in sealed containers, and discusses contamination and adverse reactions. Clean-looking surroundings alone don't answer those questions.
Leave with written instructions
Ask for instructions that match the dressing used and the area tattooed. You should know how to clean the sleeve, when to change or remove the covering, and whom to contact if something seems wrong.
Clean gently: Follow the studio's washing instructions without scrubbing or picking flakes.
Reduce friction: Choose clothing that doesn't repeatedly rub the recovering area.
Avoid soaking: Keep pools and baths out of the early-healing plan.
Keep products simple: Don't add fragranced lotions or experiment with products because someone recommended them online.
Respect the dressing instructions: Don't improvise prolonged coverage over a wet tattoo.
The checklist below summarizes the main care priorities.
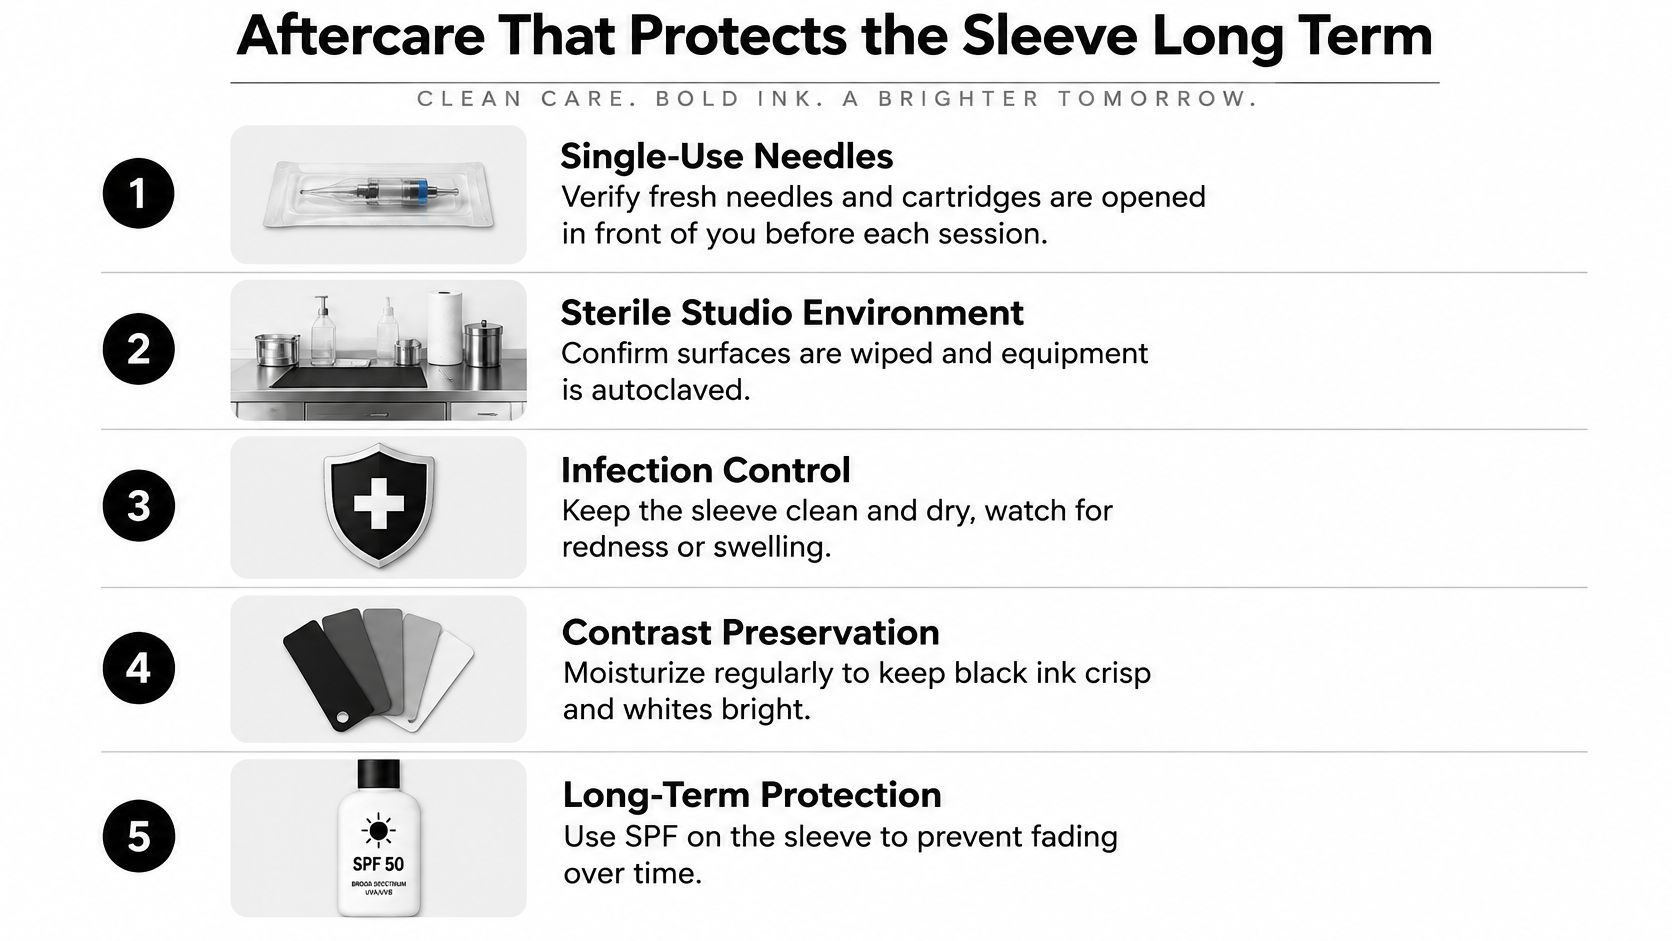
Treat moisturizing as skin care, not a way to restore lost pigment or guarantee bright highlights. Likewise, equipment processing should match the equipment involved; reusable instruments and disposable components don't have identical handling requirements.
Know when the studio isn't the next stop
Spreading redness, worsening pain, pus, fever, chills, or failure to heal warrant clinical evaluation. Don't cover a suspected problem with more lotion or wait for the next tattoo appointment to ask about it.
Tell the artist if a planned area has active irritation, dermatitis, or infection before your visit. The schedule can change. Tattooing through an unresolved skin problem isn't a reasonable compromise to keep a booking.
Once the sleeve has healed, discuss sun protection and ordinary skin care with your artist. Arrange a healed review before deciding whether anything needs touching up, and distinguish a genuine correction from chasing the appearance of a freshly photographed tattoo. Long-term maintenance should preserve the original design decisions, not become an endless attempt to add more saturation.
Cost, Consult Prep, and Your Next Steps
Ask for the studio's pricing method before trying to calculate a sleeve from someone else's bill. A useful estimate explains the proposed scope, what each appointment covers, and how changes to the design affect the price.
Compare like with like. An open black-and-gray composition and a densely layered sleeve with extensive surface treatment aren't interchangeable proposals, even if both cover the same arm. Ask the artist to explain the work involved rather than assuming that coverage alone determines cost.
Bring decisions the artist can use
Prepare the following before contacting a studio:
Selected references: Include healed work where possible, with notes about the specific features you like.
Placement priorities: Identify what must remain visible and where you want the sleeve to stop.
A workable budget: State what you can commit to across the project, not just at the opening appointment.
Scheduling constraints: Bring relevant work, travel, and recovery considerations.
Booking questions: Confirm deposit terms, cancellation rules, minimum charges, eligibility requirements, and how revisions are handled.
Use this sleeve tattoo cost guide to prepare questions, not as a substitute for an individual quote. Get the agreed scope and booking terms in writing before reserving appointments.
A smaller scope is more useful than an unrealistic promise. If the full project doesn't fit your circumstances yet, ask whether a deliberately planned partial sleeve can stand on its own while preserving a sensible route for expansion. Leave the consultation knowing what you're approving, what remains flexible, and what the artist needs before preparing the design.
Think Tank Tattoo offers complimentary consultations for custom sleeve projects, including biomechanical concepts and multi-session planning. Visit Think Tank Tattoo to arrange a consultation, bring your reference folder, and discuss how the design can follow your arm before you reserve your first appointment.
Comments