
Tattoo Placement Upper Arm
The upper arm is a practical tattoo placement for a standalone design or the start of a sleeve, with 41.5% of tattooed respondents in a population study reporting ink there. The right spot depends on how you want the piece to show, what clothing you wear, and whether you're prepared to protect it from sunlight.
You might already have a reference image saved and be standing in front of a mirror, moving it from your shoulder to your inner arm. In a Denver consultation, that's where the useful conversation starts: not just whether the drawing fits, but whether you'll like living with it at work, outdoors, and after you add more tattoos.
Table of Contents
Why the Upper Arm Stays the Most Popular Placement - Popularity isn't a placement prescription
Reading the Anatomy of the Upper Arm - Check the stencil through movement - Put important information where it stays readable
Comparing Outer, Inner, Shoulder Cap, and Wrap Placements - Upper-Arm Sub-Region Trade-Offs - Outer versus inner - Shoulder cap versus wrap
Pain, Visibility, and Workplace Realities - Discuss discomfort without bargaining away the design - Test coverage in your real workwear
Planning for a Sleeve Without Locking Yourself In - Establish an anchor and leave useful space - Plan coverage without overstating health claims
Healing, Sun Exposure, and Long-Term Care - Protect healing skin from your routine - Make outdoor care practical
Getting the Most Out of Your Consultation at Think Tank Tattoo - Questions worth bringing
Why the Upper Arm Stays the Most Popular Placement
Consider a first-time client who wants something personal but coverable, alongside a collector thinking about a connected sleeve. Their projects look different, but both have good reasons to consider the upper arm. It offers room to establish a design without requiring either client to decide immediately how much of the rest of the arm to cover.
The population evidence supports calling this one of the most common placements, rather than claiming it wins in every population. The peer-reviewed placement research behind the opening figure included 1,072 tattooed respondents; it also discusses a Dutch study based on 5,215 completed questionnaires, in which almost 40% of tattooed participants reported an upper-arm piece.
Those findings need careful interpretation. Participants could report tattoos in multiple locations, so the placement percentages aren't slices of a single whole. They describe how many tattooed people used a region, not what proportion of all tattoos appeared there.
Popularity isn't a placement prescription
A broad surface gives an artist options, but it doesn't make every upper-arm position interchangeable. A design intended to face someone standing beside you needs a different orientation from one you want to see when looking down.
Bring the purpose of the piece into the conversation:
Personal visibility: Decide whether seeing the tattoo yourself matters more than presenting it outward.
Privacy: Identify the garments that cover it.
Future collecting: Say whether a sleeve is a possibility, even if you haven't chosen its subject.
Maintenance: Be honest about outdoor work, recreation, and covering habits.
Practical rule: Choose the placement for the life you already lead, not the wardrobe or routine you might adopt afterward.
The useful takeaway from the popularity data isn't that everyone should choose this area. It's that upper-arm placement deserves a detailed consultation, not a quick approval based on a reference photo. Visibility, discomfort, healing logistics, and expansion all need to work together.
Reading the Anatomy of the Upper Arm
Treat the upper arm as a curved surface with changing viewing angles, not a flat rectangle. For consultation purposes, it helps to distinguish the deltoid cap, biceps mound, and triceps plane. These are working landmarks for discussing where a focal point sits and where the design turns out of view.
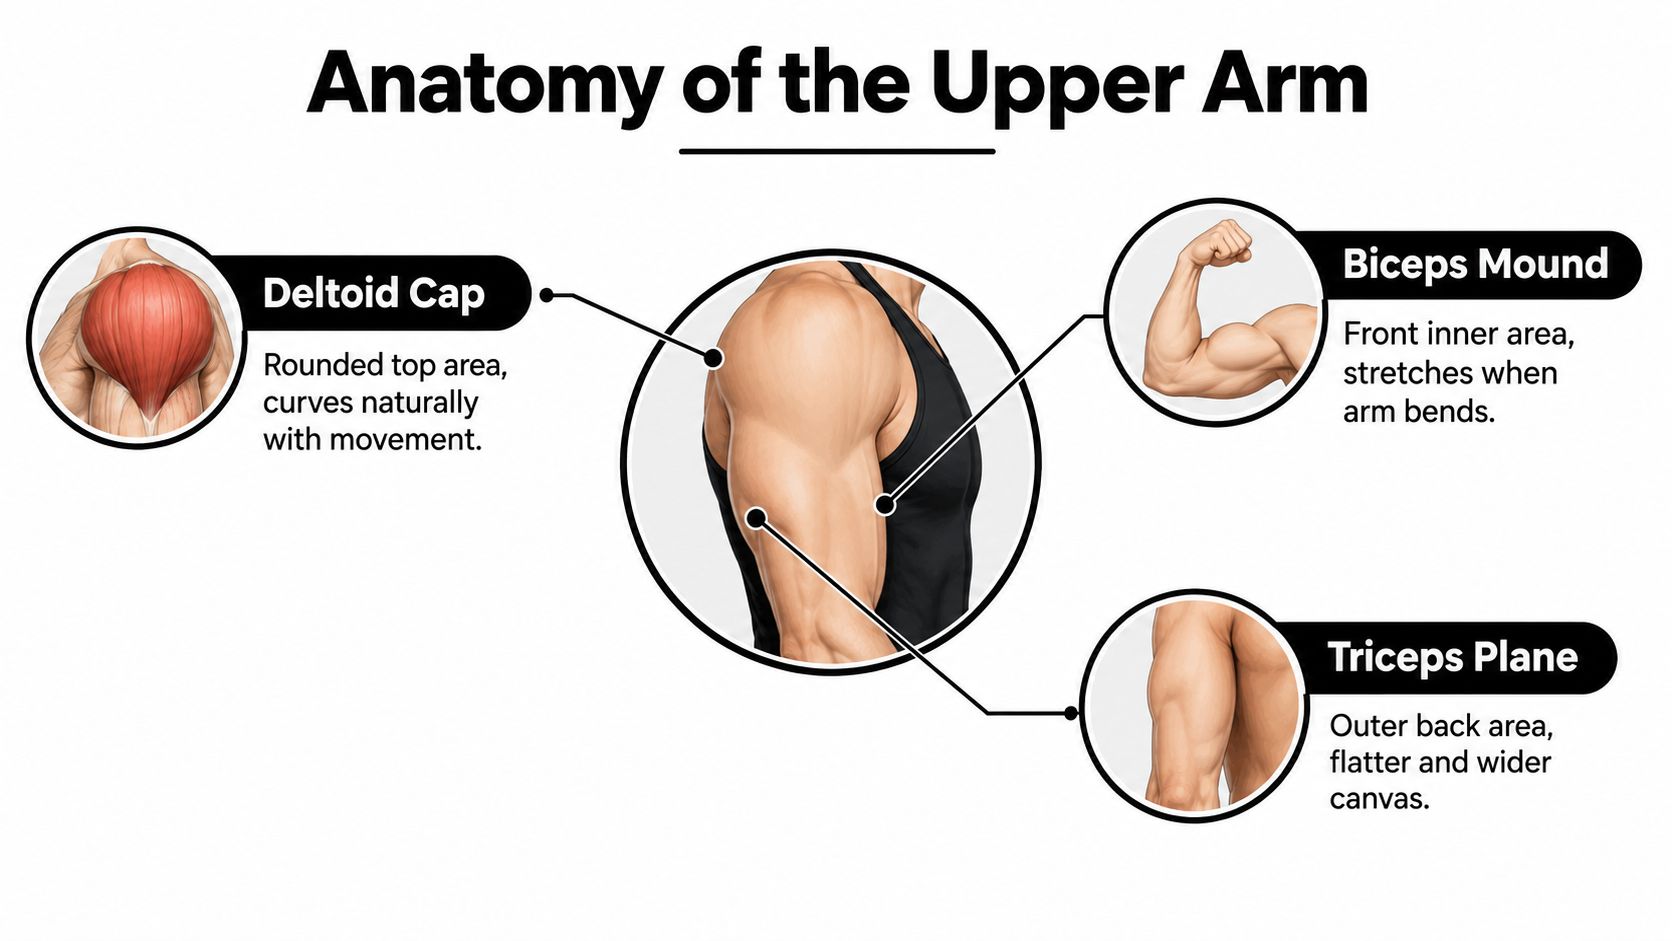
Tattoo pigment is placed in the dermis, beneath the epidermis. The upper arm offers a relatively broad, continuous canvas with less flexion-related creasing than the elbow, wrist, or hand, while the Cleveland Clinic's tattoo aftercare guidance explains the skin injury and healing process that accompany tattooing.
Check the stencil through movement
Start with your arm hanging naturally. That relaxed view should be the main reference for a design you'll usually display while standing or walking. A stencil that only looks balanced when you deliberately pose needs another look.
Then bend the arm and rotate it so the artist can assess the entire composition. Check whether an eye, circular border, or line of lettering disappears around the curve. Don't judge only the portion visible in a straight-on phone photograph.
Deltoid cap: Test the focal element against the rounded shoulder rather than assuming a flat drawing will transfer unchanged.
Biceps mound: Check the design both relaxed and flexed, especially when its symmetry matters.
Triceps plane: Look from behind and from the side so the back-facing portion feels intentional.
Inner transition: Consider narrower or vertically oriented elements where the design turns inward.
Put important information where it stays readable
For a shoulder-centered composition, I'd generally start by testing the main subject against the deltoid's visual center. Supporting shapes can turn around the arm; the feature that makes the tattoo recognizable shouldn't accidentally vanish around its edge.
Lettering needs its own check. Avoid forcing essential words through the deeper folds near the armpit or elbow to preserve the layout of a reference image.
A stencil is a fitting, not a commitment. Ask to see it from the angles you'll actually live with.
If the drawing needs adjustment, changing it before tattooing is the useful part of the process. Don't protect the original sketch at the expense of how it sits on your body.
Comparing Outer, Inner, Shoulder Cap, and Wrap Placements
Choose the sub-region by deciding what you want the tattoo to do. An outward-facing image, a private inner-arm piece, and a continuous wrap solve different problems. None is automatically better because it occupies more space.
Use this comparison as a consultation prompt, not a medical pain scale. Pain descriptions are expectations to discuss, and clothing coverage depends on your actual sleeve cut and tattoo boundary.
Upper-Arm Sub-Region Trade-Offs
Sub-region | Typical pain | Daily visibility | Sun exposure | Best sleeve fit |
|---|---|---|---|---|
Outer upper arm | Discuss as a starting option if discomfort is a concern | Outward-facing when uncovered | Needs a plan for short-sleeve days | Strong location for a main visual anchor |
Inner upper arm | Discuss sensitivity, especially toward the armpit | More inward-facing, but not automatically hidden | More sheltered when the arm rests at your side | Useful for inward-facing subjects or transitions |
Shoulder cap | Assess the exact boundary, not just the center | Depends on neckline and sleeve opening | Exposed in shoulder-baring clothing | Connects an arm composition toward the shoulder |
Wrap-around | Expect the experience to change across its route | Reveals different sections from different angles | Requires attention around the exposed circumference | Useful when continuity is already a goal |
Outer versus inner
For an outward-facing subject, the outer upper arm is a sensible place to begin the stencil discussion. The trade-off is maintenance: if your everyday shirts expose that area, sun protection needs to be realistic rather than aspirational.
The inner arm suits clients who prefer a less public presentation. I wouldn't reject detailed work there on the assumption that inner-arm skin categorically can't support it. Instead, assess the available width, the way the arm rests against the torso, and whether the chosen scale keeps the subject readable.
Privacy and concealment aren't identical. An inward-facing tattoo can still appear when you reach, lift, or change clothing.
Shoulder cap versus wrap
A shoulder-cap design can frame the top of the arm without becoming a full wrap. Establish whether its upper edge should stop at the shoulder or deliberately connect toward adjacent areas. Don't let that boundary happen accidentally during sizing.
A wrap asks you to accept that the whole design won't be visible from one viewpoint. That can be the appeal: the viewer discovers it as you move. It's less suitable if you need every element to read together in a single front-facing image.
Placement test: If the design only makes sense in one carefully posed photograph, reconsider its scale, orientation, or boundaries.
Don't choose a wrap solely because you might eventually want a sleeve. Choose it because the current design benefits from continuity around the arm.
Pain, Visibility, and Workplace Realities
Don't make a permanent placement decision from someone else's pain score. The practical question is whether you and the artist can plan a manageable appointment for the exact area and design you've chosen. A broad upper-arm label doesn't describe every part of that appointment.
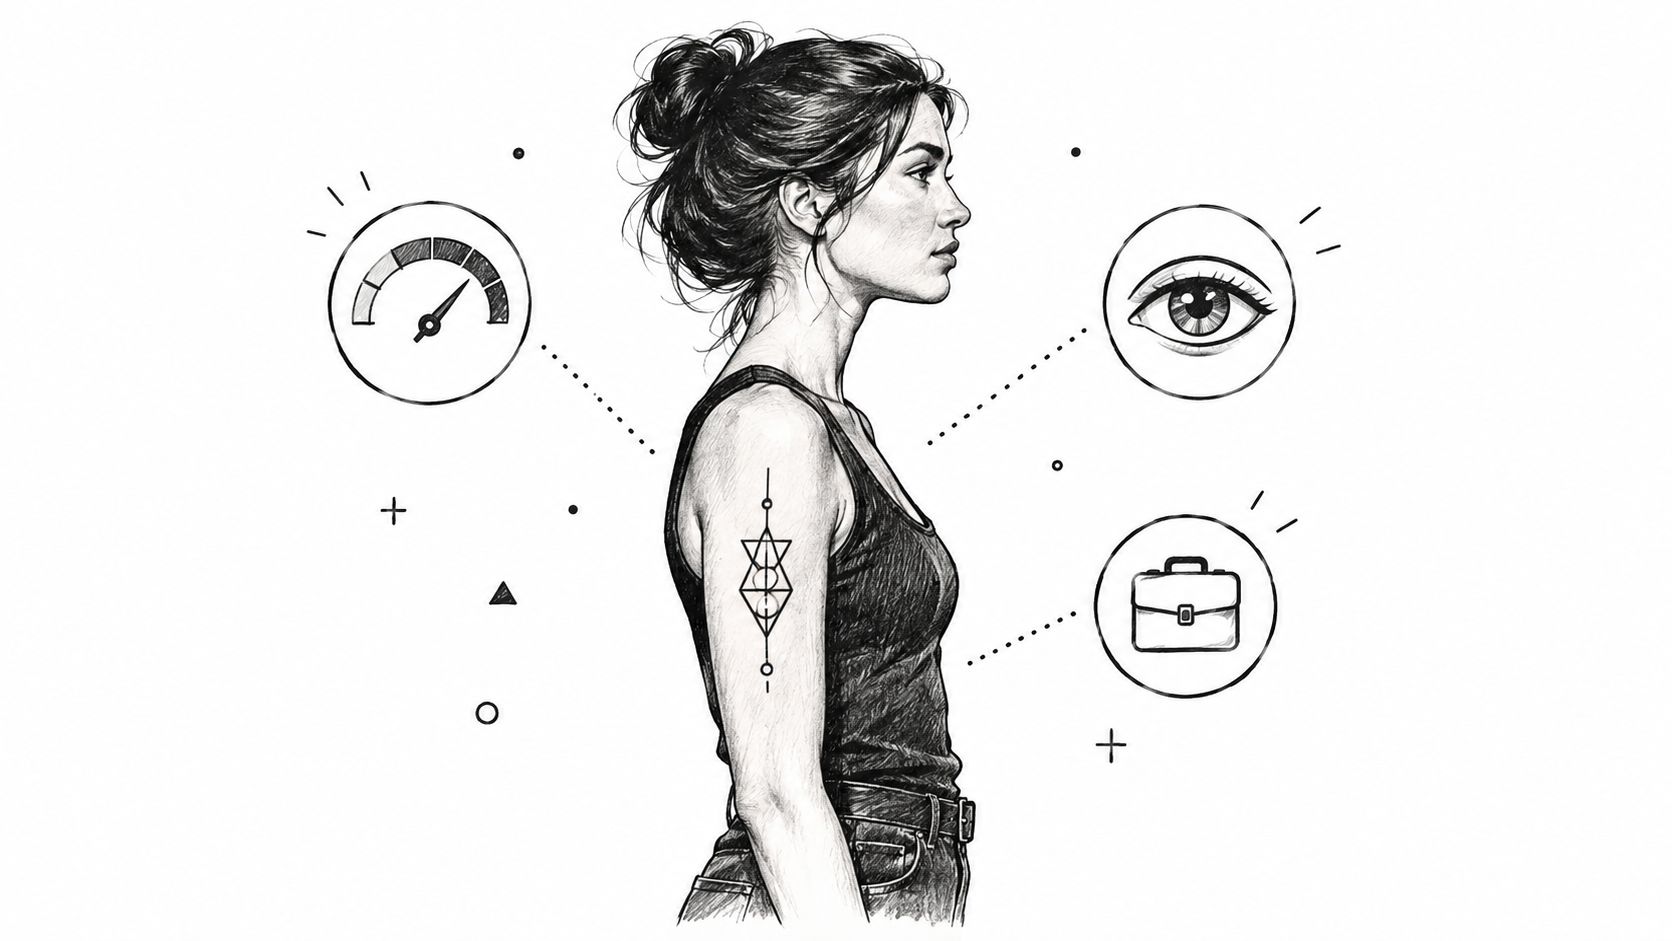
Use the sketch below to consider the outline and boundary of a piece, then compare that boundary with your own clothing.
Discuss discomfort without bargaining away the design
If pain is your main concern, identify the part you're worried about rather than asking whether the entire upper arm hurts. Ask how the artist would approach work near the inner transition or armpit, and discuss appointment pacing before committing.
The studio's guide to inner-arm tattoo pain is a useful starting point for that conversation. It shouldn't replace an individual discussion or become a promise about what you'll feel.
Shrinking a design isn't automatically the right response to anxiety. First ask whether simplifying the composition or changing the session plan would preserve what you want.
Test coverage in your real workwear
The YouGov survey of American tattoo placements found 8% of Americans reported an upper-arm tattoo, matching the 8% reporting a forearm tattoo. The useful distinction for a client isn't popularity, though. It's how easily the chosen boundary can be covered by the clothes they wear.
Bring a work shirt, uniform top, or representative garment to the placement discussion if concealment matters. Don't rely on the claim that any short sleeve will hide any upper-arm tattoo.
Reach forward: Check whether the sleeve pulls back beyond the proposed lower edge.
Raise your arm: Look for exposure through the sleeve opening.
Check the neckline: Confirm that a shoulder extension stays inside the coverage you need.
Confirm workplace expectations: Consult the actual policy rather than guessing from coworkers' tattoos.
Keep must remain covered separate from would prefer to cover. That distinction gives the artist a firm boundary instead of a vague request for something discreet. You can then judge the stencil against a real requirement, not reassurance that it should probably be fine.
Planning for a Sleeve Without Locking Yourself In
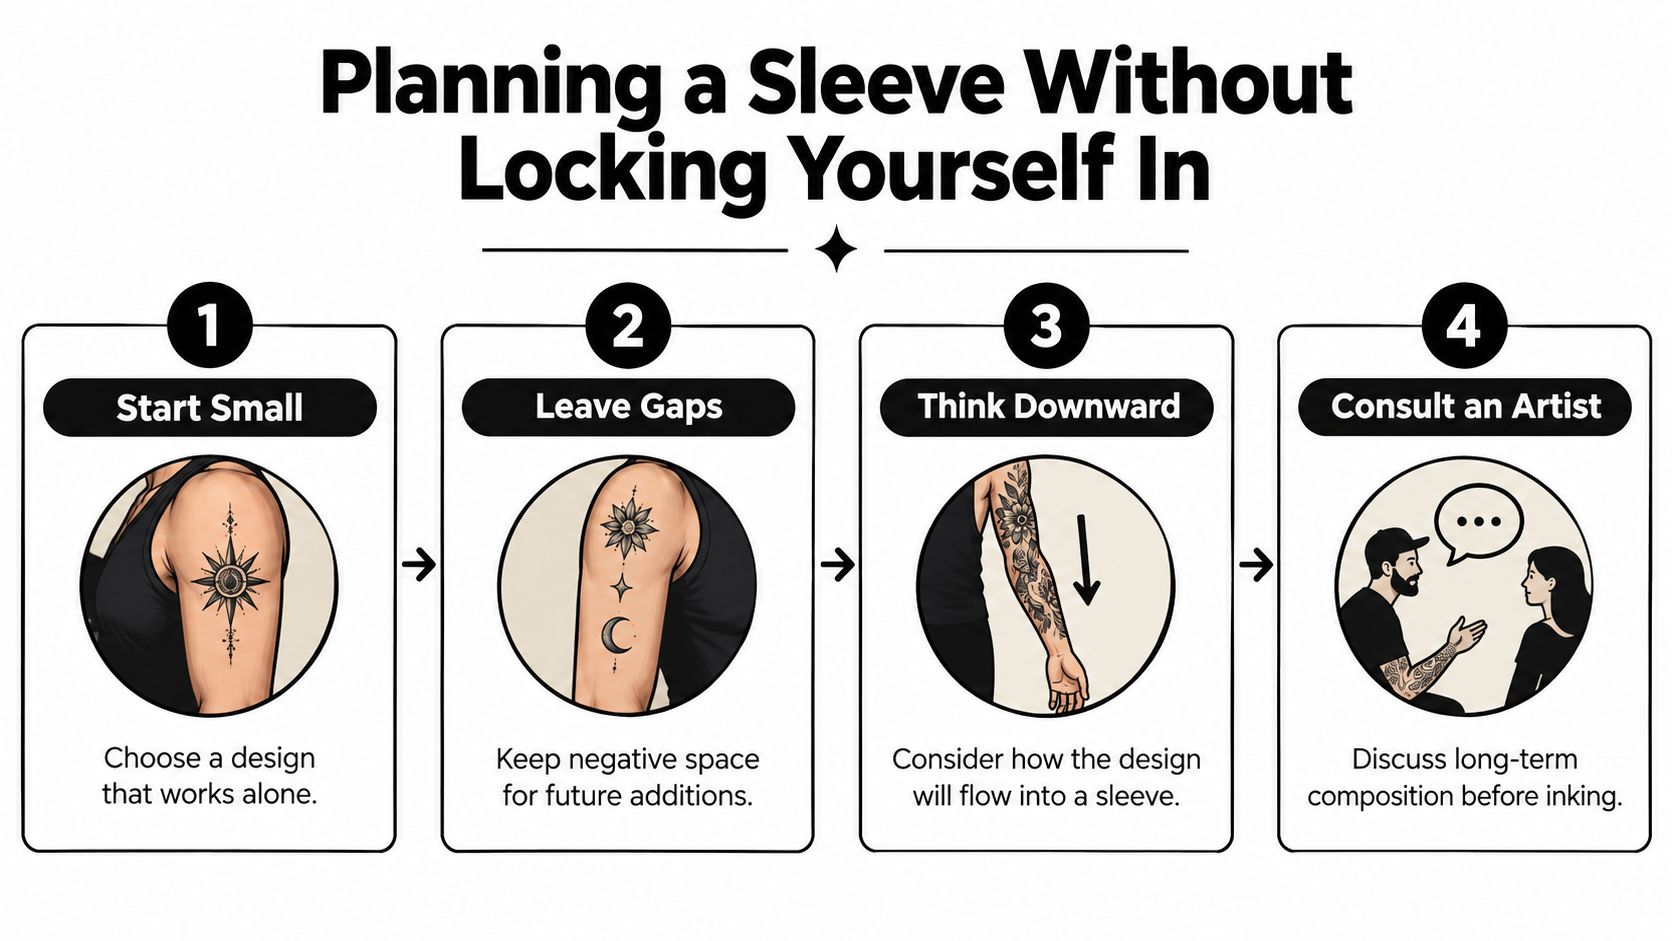
A good standalone tattoo doesn't have to become a sleeve. But if expansion is plausible, decide what role this piece would play before choosing its size and edges. The question isn't whether more tattoos will fit nearby, but whether they can relate to this one without awkward compromises.
Establish an anchor and leave useful space
Start with a subject that works on its own at an appropriate scale. Starting with a standalone piece doesn't mean making it tiny. A small tattoo placed in the center of a future focal area may limit later options more than a deliberately sized anchor.
Ask the artist to distinguish intentional negative space from unused scraps. Leave room with a purpose: a transition, a visual pause, or a route toward the elbow. Random gaps aren't automatically flexible.
The studio's guide to planning a sleeve tattoo can help you prepare questions about composition and session sequence. For a separate wardrobe check, ClothME's practical sleeve sizing help can help you describe garment coverage clearly; clothing measurements don't determine tattoo boundaries.
Plan coverage without overstating health claims
Larger compositions deserve deliberate skin observation and sun-protection planning, not alarmist conclusions. Columbia's discussion of tattoos and skin-cancer research explains that findings remain preliminary and that ultraviolet exposure and tanning are clearer risk factors; it also notes why tattoo count can be misleading when a single piece covers an entire sleeve.
Before approving the upper-arm anchor, resolve these choices:
Visual hierarchy: Decide which subject should remain dominant after additions.
Elbow direction: Identify where the composition could continue downward.
Inner boundary: Choose an intentional stopping point or a future transition.
Session sequence: Discuss which areas should be designed together, even if tattooed separately.
There's no need to commission an entire sleeve before you're ready. You do need to tell the artist whether the current piece should stand alone permanently or leave a credible route forward.
Healing, Sun Exposure, and Long-Term Care
Separate fresh-tattoo care from healed-tattoo maintenance. They aren't interchangeable routines, and sunscreen isn't a substitute for protecting an open or incompletely healed tattoo.
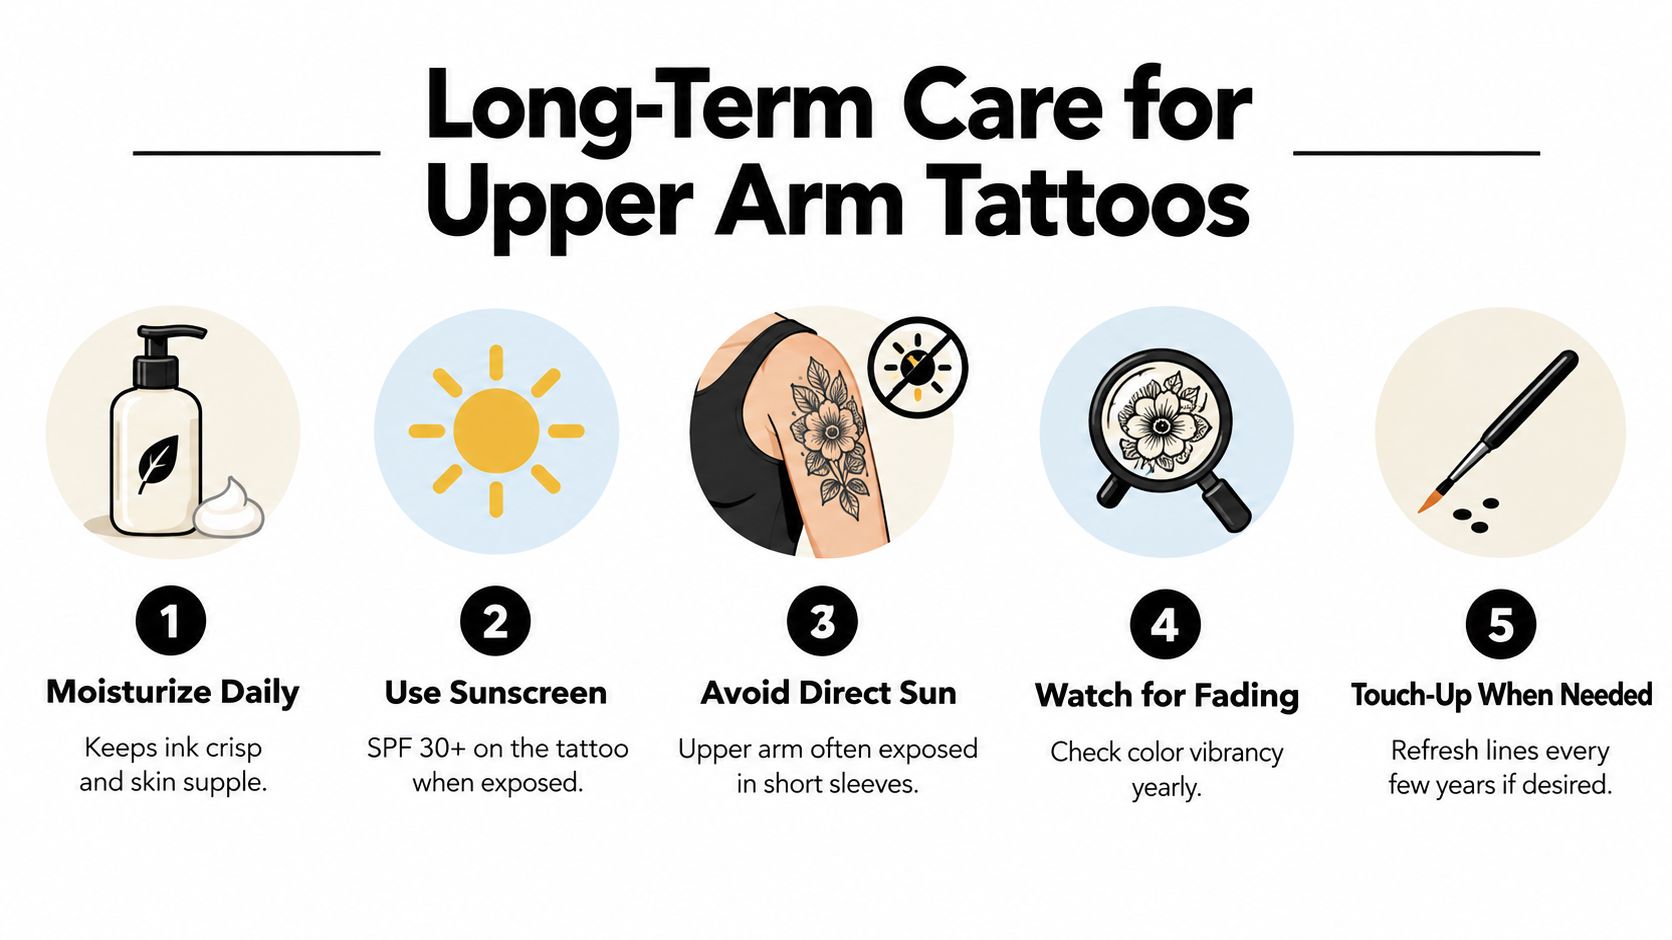
Use the checklist as a reminder of ongoing care, not as a fixed schedule for moisturizing or touch-ups.
Protect healing skin from your routine
Fresh tattoos should generally stay out of direct sunlight under loose clothing during healing, commonly described as roughly one to three weeks; the American Academy of Dermatology's tattooed-skin guidance recommends broad-spectrum, water-resistant SPF 30 or higher once healed, applied 15 minutes before exposure and reapplied at least every two hours.
Follow your artist's instructions for washing, dressings, and moisturizing. Review the studio's tattoo care advice before the appointment so you can ask about anything that conflicts with your work or exercise routine.
Check where backpack straps, fitted gym sleeves, and other equipment contact the planned area. Arrange alternatives where necessary, and discuss soaking and heavy-sweating activities before scheduling. A calendar window is only useful if you can protect the healing skin.
The video below can support that preparation; your artist's specific instructions should guide your routine.
Make outdoor care practical
A population-based study of tattooing and sun exposure found moderate-to-heavy lifestyle sun exposure among 67.5% of tattooed participants, compared with 61.3% of participants without tattoos. That association doesn't establish causation, but it reinforces why outdoor habits belong in the consultation.
For Denver clients, name the activities rather than saying you're outdoors often. Cycling, outdoor work, and weekend recreation each require a workable covering and reapplication plan.
Cover deliberately: Use clothing during prolonged exposure rather than relying on memory alone.
Observe your skin: Seek dermatology advice about new or changing lesions or persistent reactions.
Assess the tattoo individually: Don't schedule touch-ups automatically because a certain interval has passed.
Getting the Most Out of Your Consultation at Think Tank Tattoo
Bring references, but also bring constraints. A clear account of your work clothing, outdoor routine, and future tattoo plans is more useful than a folder of images with no explanation of what you like about them.
A consultation should help you make decisions, not pressure you to approve a placement you're still unsure about. Ask the artist to distinguish a design preference from a practical limitation.
Questions worth bringing
Composition: What would need to change if this eventually became part of a sleeve?
Movement: Does the important part of the design remain readable when I'm not posing?
Coverage: Can we check the proposed boundary against my actual work shirt?
Timing: Which upcoming activities would conflict with protecting this placement?
Maintenance: Does this location make sense for how reliably I can cover and care for it?
Before reserving an appointment, confirm the studio's current deposit terms, minimum charge, eligibility requirements, and booking process directly. Operational details deserve the same clarity as the drawing.
You don't need to arrive with every answer. You should leave understanding what the artist recommends, what trade-offs remain, and what you'll need to do during healing. The strongest placement decision is one you can explain in terms of your body and routine, not just how it looked in someone else's photograph.
For a complimentary consultation about custom upper-arm work, visit Think Tank Tattoo to discuss design direction, placement, and timing. Bring your reference images and a representative shirt, and explain whether you want a self-contained piece or room for a future sleeve.
Comments