
Black and Grey Moth Tattoos: 7 Designs That Stand Out
A black and grey moth doesn't need invented markings to look striking. The black-spotted grey moth, Teleiodes vulgella, already combines muted wings, black patches, and raised scale tufts, as documented in Wellcome Open Research's species account. Few motifs translate so naturally into grayscale tattooing: the texture is there, the contrast is there, and the silhouette can carry the design without a colorful background.
The challenge is deciding what to keep. A photograph can hold delicate wing veins and barely visible gradients that won't translate cleanly into a small tattoo. Good moth designs prioritize readable shapes, deliberate shading, and enough open skin to separate details.
These seven directions range from specimen-style realism to ornamental wings and expressive greywash. Each calls for different decisions about placement, contrast, and aging. Before the needle touches skin, settle which features matter most, how the moth should sit on your body, and what you're willing to simplify.
Table of Contents
1. Realistic Black-and-Grey Luna Moth - Build the Wings for Healed Contrast
5. Grey-Wash Watercolor-Style Moth - Soft Doesn't Have to Mean Indistinct
6. Fine-Line Black-and-Grey Moth Silhouette - Make the Minimum Size a Design Decision
7. Chicano-Influenced Black-and-Grey Moth - Build the Main Shapes Before the Script
Bring Your Moth Design to Life in Denver - Arrive with a Direction, Not a Finished Stencil
1. Realistic Black-and-Grey Luna Moth
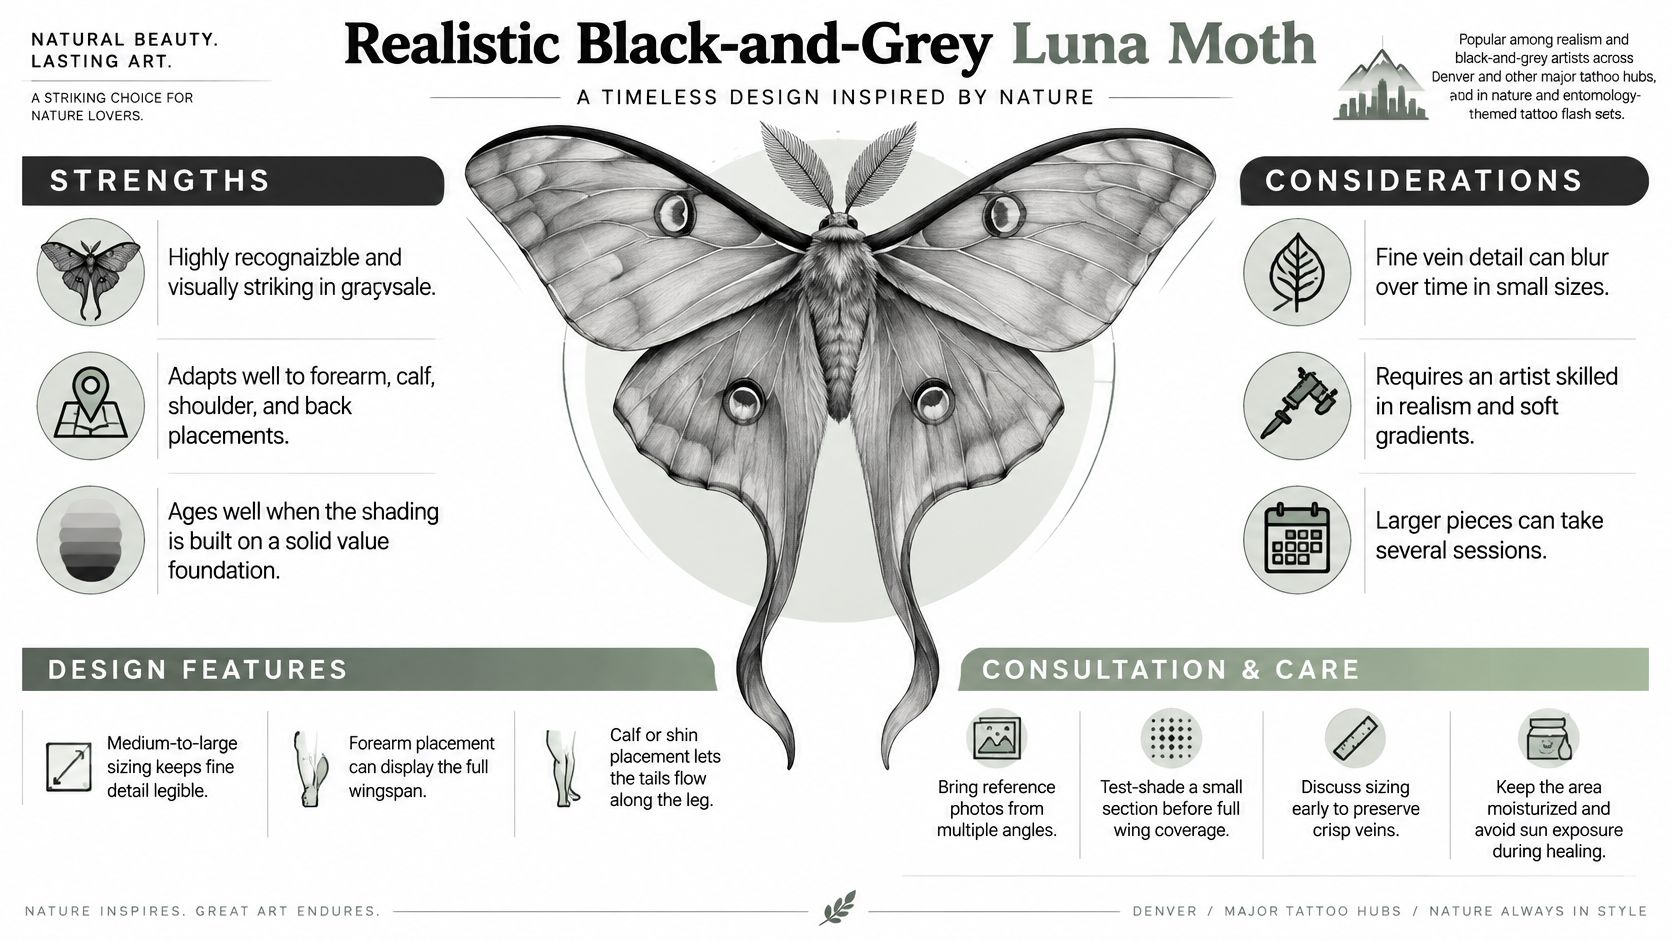
A realistic luna moth works best when its sweeping tails and broad wings remain recognizable before you notice the fine detail. Translate the naturally pale wings into open skin and restrained greywash rather than filling every surface with pigment. Darker markings can then establish structure without making the moth look heavy.
On an inner forearm, position the body along the arm and check how far the wings wrap out of view. A calf or shin offers a longer composition, letting the tails follow the leg instead of bending awkwardly around a narrow wrist.
Build the Wings for Healed Contrast
Pigment isn't a static drawing beneath the skin. An in-vivo tattoo imaging study detected pigment in 75% of tattoos applied up to nine years earlier, with particles located inside several skin-cell types. That finding supports a cautious approach to promising permanently unchanged micro-detail.
For this design, keep the main wing divisions stronger than the secondary veins. Our approach to black-and-grey realism starts with a readable value structure, not a competition to fit in the most lines.
Bring clear references: Include photographs showing the wing shape and tail attachment, not just another tattoo.
Compare stencil sizes: Judge the silhouette on your body before deciding how many veins to include.
Set shading expectations: Review healed work rather than requesting a test patch as though fresh shading predicts the finished result.
2. Death's-Head Hawkmoth with Skull Marking
Decide whether you want a moth with a skull-like marking or a skull illustration wearing wings. Both can work, but they produce different tattoos. A naturalistic thorax marking stays integrated with the insect; an exaggerated skull becomes the main subject.
The upper back and chest suit a broad, centered composition. For an outer-thigh piece, angle the wings with the available space rather than forcing a horizontal specimen pose onto a curved surface.
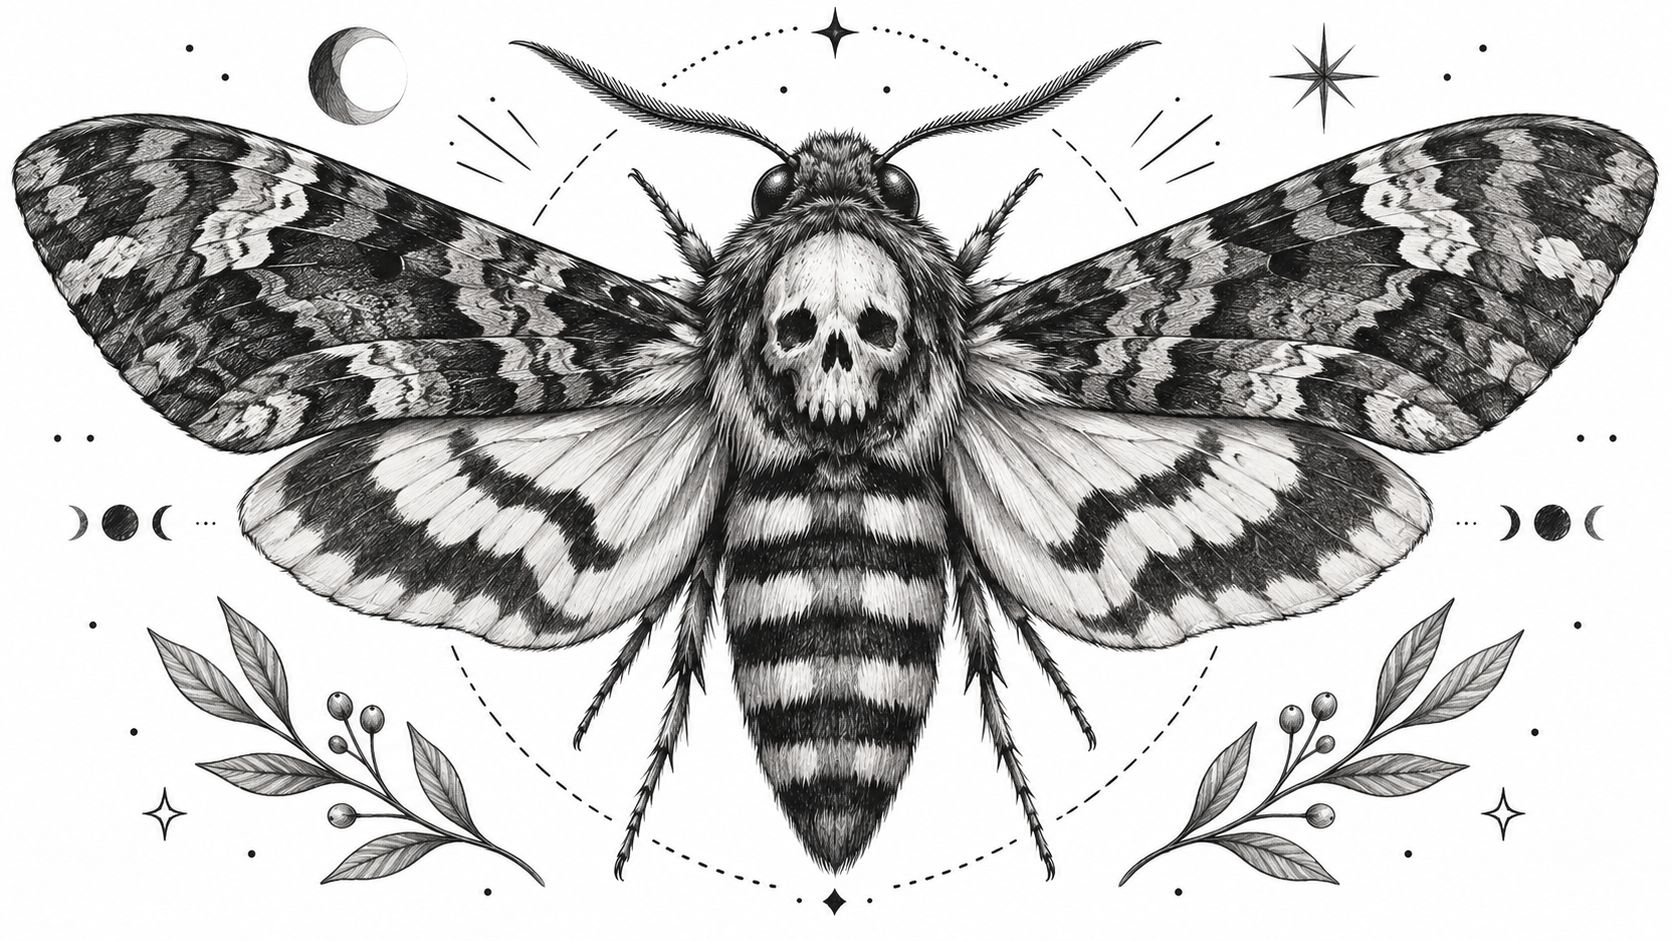
Keep a lighter pocket around the thorax so the skull doesn't disappear between dark wing roots. If the skull needs tiny teeth and separate eye sockets to make sense, the composition probably needs more room or less detail.
Composition rule: Establish the skull's readable shape first. Add surrounding wing texture only while that focal point stays clear.
Meaning deserves the same attention as anatomy. Sortra's discussion of moth tattoo symbolism describes how accompanying imagery and placement personalize the interpretation; grayscale alone doesn't establish grief, danger, or darkness.
For a memorial piece, for example, a restrained moth with a discreet botanical element may communicate your intention better than adding skulls throughout the wings. During consultation, settle the emotional tone, the skull's prominence, and how much surrounding skin should remain open. Don't assume a darker tattoo is automatically a more meaningful one.
3. Moth and Flame in Grey Smoke
For a forearm composition, place the flame below the moth and let the smoke travel toward the elbow. That gives the viewer a clear direction to follow. On the ribs, use a narrower arrangement, with smoke curving around the torso rather than spreading into an indistinct grey background.
The flame needs a distinct silhouette even without color. Leave its center relatively open, establish selected dark edges, and keep the moth's nearest wing separate from the smoke. If every element uses the same middle grey, the scene becomes difficult to read.
This video can serve as a visual reference while you discuss the direction of the piece.
Give the Smoke Boundaries
Smoke doesn't need a hard outline everywhere, but it does need deliberate edges. Use darker folds near the main action and let selected wisps disappear into untouched skin.
Choose the story: Attraction, recovery, and risk suggest different distances between the moth and flame.
Protect separation: Keep a clean skin break where smoke passes behind a wing.
Discuss touch-ups openly: Reassess soft passages after healing rather than booking repeated darkening in advance.
There's also a less familiar interpretation of a dark moth: adaptation rather than self-destruction. The Biological Journal of the Linnean Society's industrial-melanism study connects darker moth coloration with environmental selection in polluted environments. If resilience is your subject, the moth can move beyond the flame instead of directly into it.
4. Ornamental Mandala-Wing Moth
An ornamental moth succeeds through spacing and hierarchy, not the number of patterns packed into its wings. Start with the outer wing shape, establish the major ornamental divisions, then add smaller details only where they remain distinct.
For a sternum design, check the stencil while standing naturally, not just lying on the treatment bed. The centerline, lower wing points, and antennae should relate to your anatomy without requiring you to hold a rigid pose. Across the shoulder blades, leave breathing room around the spine and consider how the wings look when your arms move.
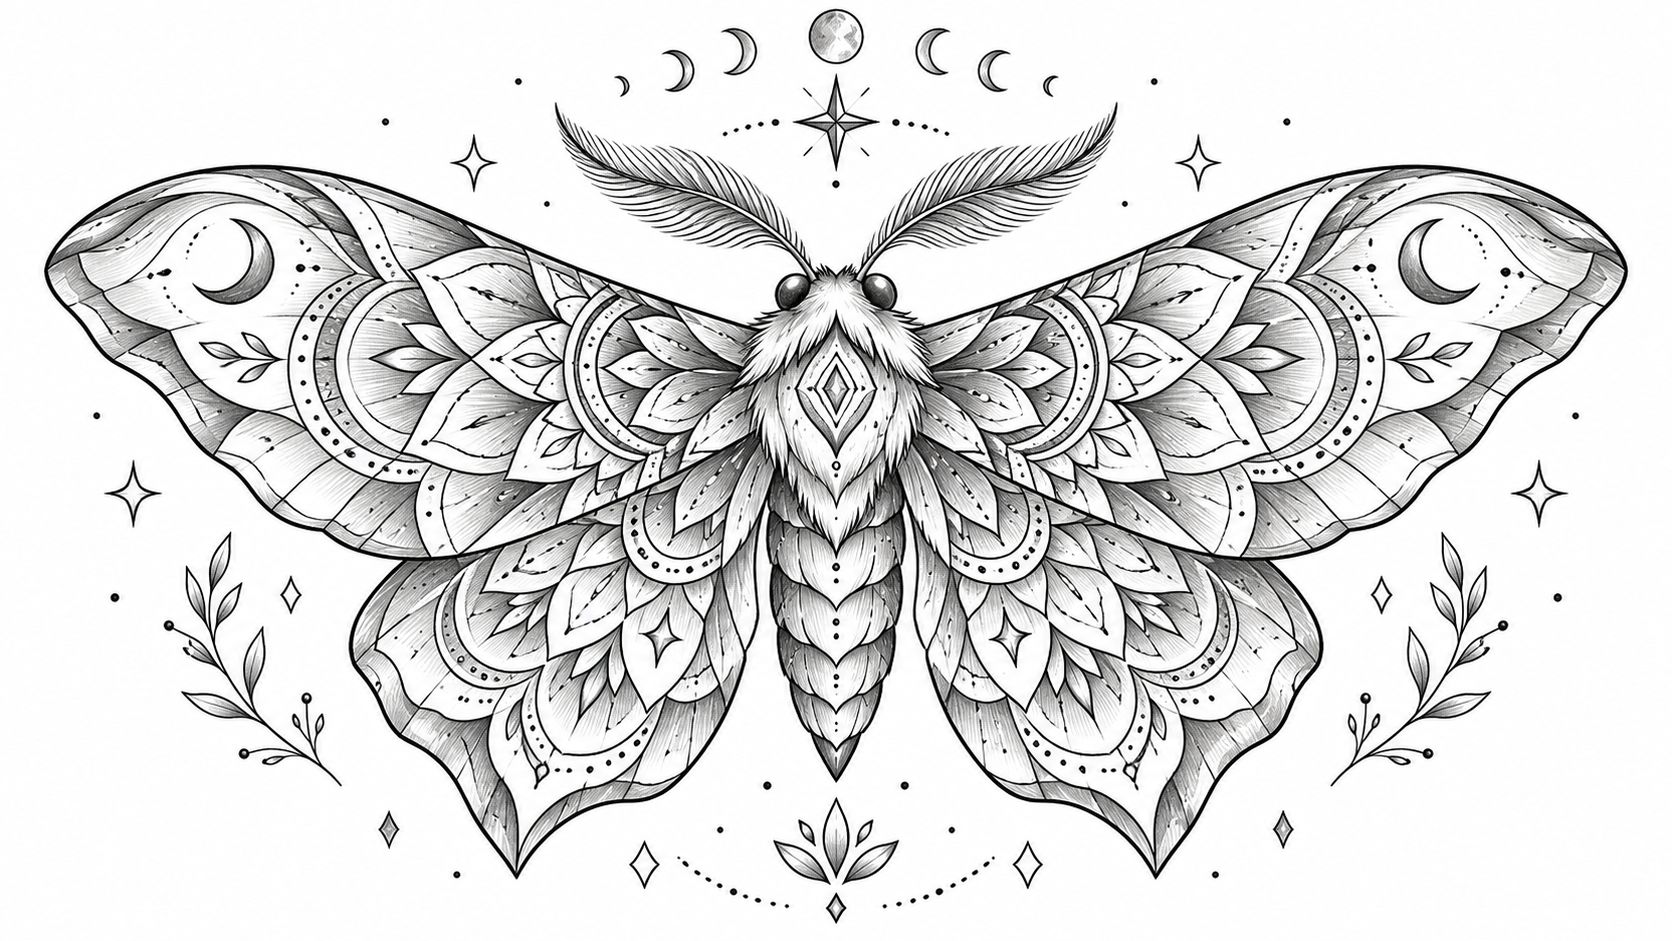
Closely spaced lines don't become better tattooing just because the stencil can print them.
A useful distinction in Tatuantes' moth tattoo guide is the difference between visual inspiration and a design suited to placement, scale, and long-term readability. Reference pictures give you a starting point, not a ready-made stencil.
For example, a chest moth might use broad black panels near the body, open ornamental loops through the middle wings, and sparse dotwork toward the tips. Giving each area a different visual weight prevents the whole piece from becoming equally busy.
Settle whether you want strict mirrored ornament or a slightly organic interpretation. Then compare line weights and the smallest gaps at actual size. Enlarge or simplify crowded patterns, rather than expecting future touch-ups to reopen spaces filled with ink.
5. Grey-Wash Watercolor-Style Moth
A painterly black and grey moth can look airy without being structurally weak. The trick is to anchor the body, selected wing edges, and major markings, then allow the washes and splashes to loosen around them.
Say you want a forearm moth whose outer wing dissolves into brushwork. Keep the opposite wing readable and preserve the body's silhouette, so the viewer understands what's dissolving. For a collarbone or rib placement, use fewer splashes rather than shrinking a broad watercolor composition into a cramped space.
Soft Doesn't Have to Mean Indistinct
Review healed examples of grey ink tattoos, paying attention to whether pale washes still separate from surrounding skin. Fresh redness and surface shine can make subtle shading difficult to judge accurately.
Choose an anchor: A dark body or selective outline can hold the composition together.
Limit competing textures: Brush marks, stippling, and realistic veins don't all need equal emphasis.
Plan for your skin: Let the artist adjust the value range rather than assuming a reference image will translate unchanged.
Ink quality matters even when the result looks light. A regulatory toxicology review of tattoo inks identifies concerns involving contaminants in some carbon-black inks, while noting that direct carcinogenicity hasn't been attributed to tattoo-ink ingredients. That supports traceable products and controlled greywash preparation, not alarmist claims or promises that black ink is automatically risk-free.
Protect healed work from sun exposure, and follow the artist's healing instructions instead of applying extra moisturizer to chase a darker appearance.
6. Fine-Line Black-and-Grey Moth Silhouette
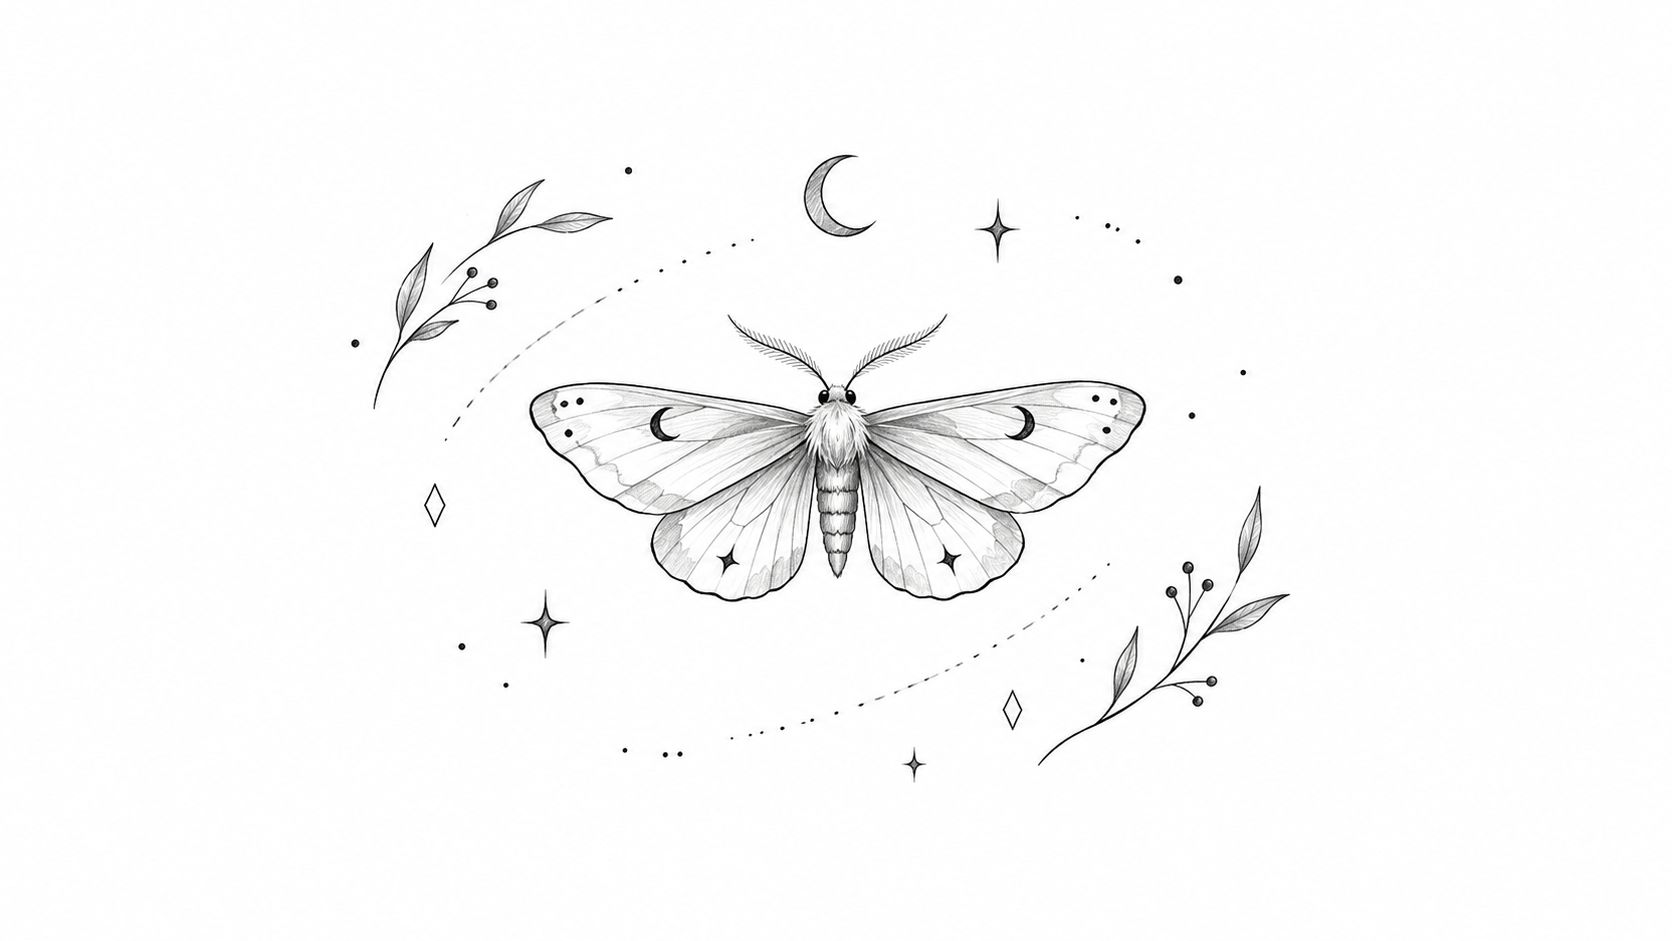
Small is a size, not a design strategy. A fine-line moth still needs an identifiable body, distinct wing lobes, and antennae that don't collide with nearby details. Light grey shading should support those features rather than compensate for an unclear outline.
An inner-forearm moth can remain discreet while allowing more open space than a tightly packed wrist design. Behind the ear or at the ankle, simplify further: prioritize the silhouette and a few internal marks instead of miniature specimen detail.
Make the Minimum Size a Design Decision
Compare actual-size stencils with your fine-line tattoo artist. Don't judge a tiny moth from an enlarged phone image, where every gap appears generous.
For a first tattoo on the wrist, a clean outer contour with a restrained band of shading may work better than an elaborate moth surrounded by tiny stars. If you plan to build a larger collection, leave room around the antennae and wing tips for neighboring tattoos.
Consultation priority: Decide which details you'd remove before deciding how much smaller to make the tattoo.
Ask how the artist expects the lines and open spaces to settle at that placement. Fine-line work isn't automatically performed with a single needle, and a tool label doesn't guarantee a delicate healed result.
Arrange a healed assessment if a line looks incomplete once the skin has recovered. Avoid treating every naturally soft line as a defect that needs heavier reinforcement.
7. Chicano-Influenced Black-and-Grey Moth
Choose this direction for smooth tonal transitions, confident dark areas, and a composition that can accommodate script or decorative framing. Respect the Chicano reference as a specific artistic influence, not a catchall label for any shaded moth. Discuss which elements of that visual language you want.
A central moth on the back can support scrollwork without squeezing the wings. On a forearm or thigh, a restrained banner can follow the composition's curve, provided it doesn't cut across the markings that make the moth recognizable.
Build the Main Shapes Before the Script
Start with the moth's silhouette and dark-to-light structure. Fit lettering around those decisions rather than adding a banner wherever space happens to remain.
Separate the focal points: Give the moth and lettering distinct areas instead of making them compete.
Check healed gradients: Look for controlled transitions and readable dark shapes, not just polished fresh photographs.
Plan surrounding work: Reserve space for future sleeve connections or back-piece elements before filling every gap with background shading.
For example, a thigh piece could place the moth above a curved banner, with dark lower wings framing the lettering rather than touching it. Keeping open skin between those elements helps each remain legible.
Large shaded projects may need multiple appointments. Our consultation process lets us discuss placement and timing before committing to the full composition, including where a session can stop without forcing unfinished shading into an awkward boundary.
Don't use background grey only to fill space. An intentional skin break often gives a dark moth more presence than another layer of smoke or scrollwork.
Black and Grey Moth Tattoo Designs at a Glance
Design | Style Approach | Best Placement | Longevity Notes |
|---|---|---|---|
Realistic Black-and-Grey Luna Moth | Photorealistic shading, soft gradients, and fine wing details | Forearm, calf, shoulder, or back; medium to large scale | Solid value shading ages well; fine veins may blur if the design is too small |
Death's-Head Hawkmoth with Skull Marking | High-contrast black-and-grey with a skull focal point and bold outlines | Chest or upper back for symmetry; thigh for extended wings | Contrast holds up well; small skull details may lose clarity |
Moth and Flame in Grey Smoke | Dynamic moth with swirling grey smoke and negative space | Forearm, ribs, or back | Smoke can fade or soften faster than solid black; touch-ups may help |
Ornamental Mandala-Wing Moth | Symmetrical geometric patterns with dotwork, fine lines, and grey shading | Sternum, chest, or shoulder blade | Dense dotwork and fine lines may blur; high-friction areas may need touch-ups |
Grey-Wash Watercolor-Style Moth | Loose brushwork, diffused grey washes, and splatter effects | Ribs, forearm, back, or collarbone | Soft washes may fade or spread faster; sun protection helps preserve them |
Fine-Line Black-and-Grey Moth Silhouette | Minimalist outline with simplified patterns and light shading | Wrist, inner forearm, behind the ear, or ankle | Fine lines can spread or blur; placement and adequate sizing matter |
Chicano-Influenced Black-and-Grey Moth | Smooth gradients, strong contrast, bold outlines, and optional script or scrollwork | Sleeve, back, forearm, or thigh | Properly executed shading ages well; careful aftercare helps prevent uneven fading |
Bring Your Moth Design to Life in Denver
The strongest black and grey moth tattoo isn't necessarily the most intricate one. It's the design whose shading suits your skin, whose wings fit the placement, and whose important features remain readable without relying on tiny details. Choose the style you want, then be willing to adjust its scale and complexity.
Bring clear moth references, examples of shading you like, and a photograph showing any nearby tattoos. Explain what you don't want as directly as what you do: an oversized skull, a heavy outline, crowded ornament, or a background that overwhelms the wings. Those decisions give the artist something concrete to work with.
Arrive with a Direction, Not a Finished Stencil
If you're exploring movement or atmosphere before your appointment, Nim's drawing-to-video workflow offers a way to experiment with a drawing as a moving concept. Treat that as a mood reference, not a demonstration of how tattooed skin will move or heal. The final design still needs to work as a static image on your body.
At our South Broadway studio in Denver, our seasoned artists work across styles and collaborate on composition, placement, and timing before any ink is laid. A complimentary consultation gives you room to compare a realistic moth against a more graphic interpretation, or determine how a central moth could fit into larger work.
We're an 18+ studio, and booking is straightforward by phone or email. Whether you're planning your first tattoo or adding to a collection, arrive ready to discuss size, contrast, existing work, and healing expectations. You don't need every answer beforehand, but you should leave with a clear design direction and an understanding of the trade-offs.
Think Tank Tattoo offers custom work across diverse styles and complimentary consultations to refine your black-and-grey moth's composition, placement, and timing. Visit Think Tank Tattoo to explore the artists and contact our Denver studio by phone or email to plan your piece.
Comments