
10 Tattoo Placement Ideas for Every Design
Where would you put a tattoo if the design looked perfect on paper, but became difficult to hide, painful to heal, or awkward to expand once it met the body? Placement changes the entire experience. The same compass can feel like a private reminder on the upper back, a daily statement on the forearm, or a restrictive design if it's squeezed onto a small area that can't support its detail.
These tattoo placement ideas compare body areas through the decisions clients make: visibility, pain, available canvas, concealment, movement, clothing friction, and future expansion. A good choice should suit the design's scale and orientation, fit your work and wardrobe, and leave room for the kind of tattoo collection you may want later. Before booking, consider how the area moves, how you'll protect it from sun and friction, and whether you'll be comfortable seeing it every day.
Think Tank Tattoo offers complimentary consultations to discuss design direction, placement, and timing. If you're comparing options before your appointment, a 2026 tattoo and piercing studio visit can also help you think through what to ask when you meet an artist.
Table of Contents
1. Forearm Placement for Bold and Visible Designs - Visibility is the main trade-off
2. Upper Arm and Shoulder for Strategic Statement Pieces - Plan the next piece before the first appointment
3. Back and Lower Back for Masterpieces and Concealed Power - Large work needs a long-term appointment plan
4. Ankle and Calf for Delicate Detail - Match the placement to movement and friction
5. Chest for a Bold Personal Statement - Meaning and anatomy need equal weight
6. Ribcage for a Striking Artistic Canvas - Pain and healing are part of the design decision
7. Thigh for an Expansive Hidden Canvas - Comfort does not remove planning needs
8. Neck and Behind-Ear Tattoos for Bold Intimacy - Choose visibility with full awareness
9. Hand and Finger Tattoos for Distinctive Expression - Plan for daily wear, not just the appointment
10. Full Sleeve for a Unified Artistic Vision - Plan the full project before booking sessions
Choose the Placement That Supports the Whole Plan - Use a practical consultation sequence
1. Forearm Placement for Bold and Visible Designs
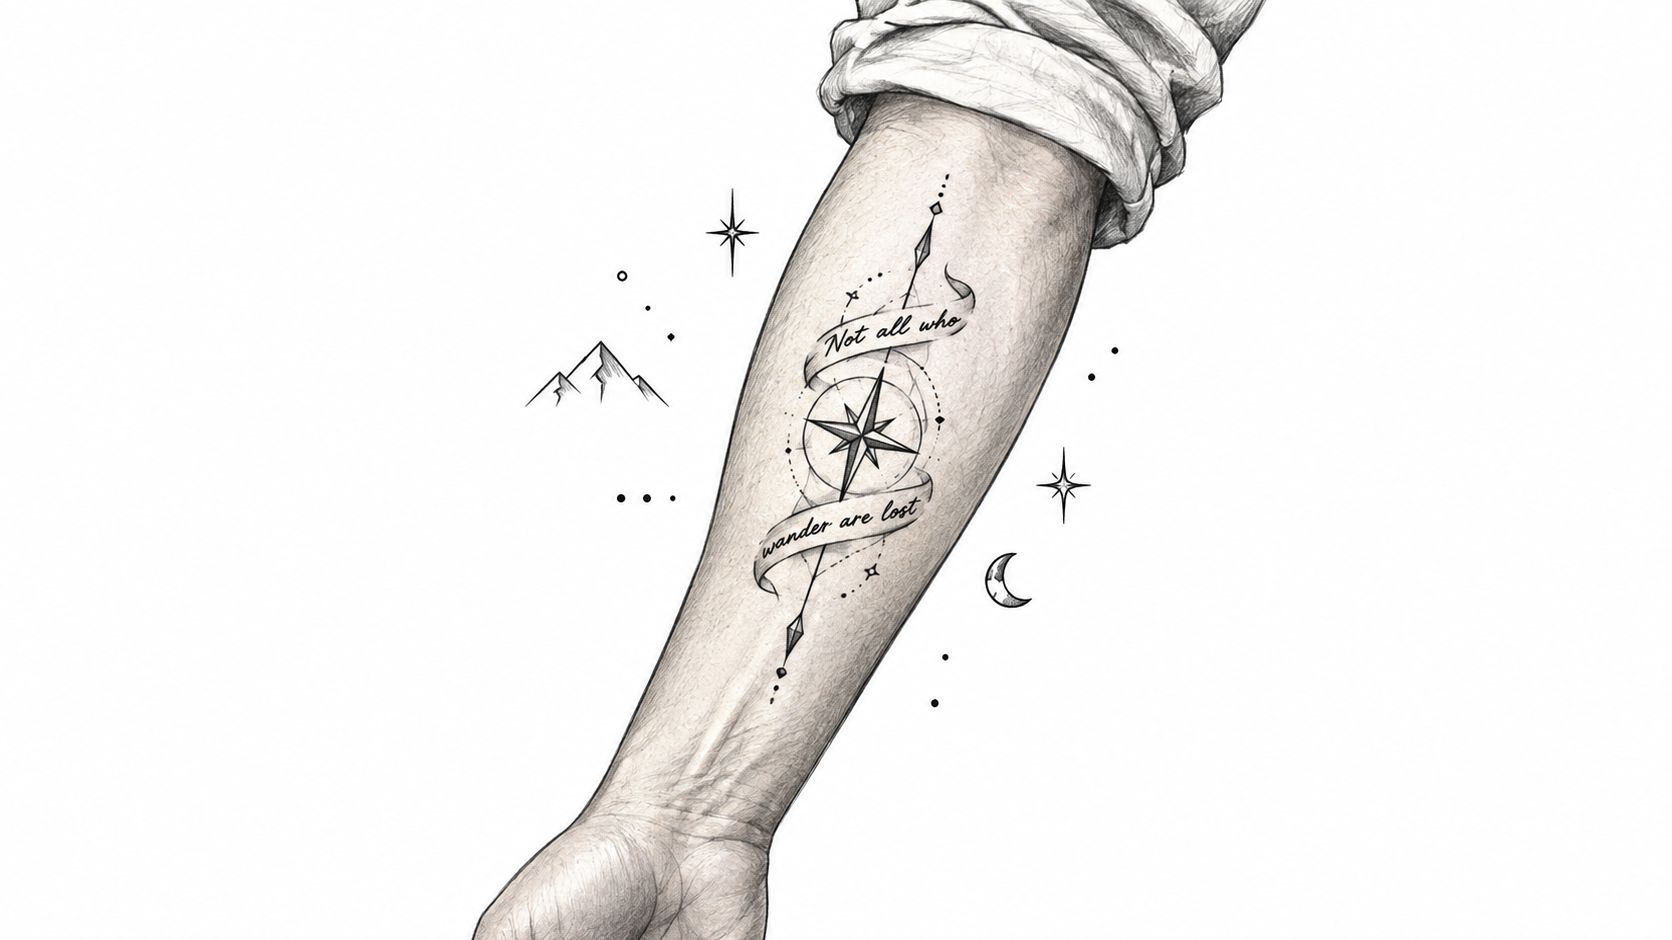
The forearm is one of the most practical choices for a tattoo you want to enjoy regularly. Its long, relatively even surface suits small symbols, vertical artwork, text, botanical designs, and developing sleeve work. The outer forearm generally gives a clearer presentation from across the room, while the inner forearm creates a more personal viewing angle and can be turned away when needed.
A compass with mountains and stars, for example, can follow the forearm's length rather than sitting as an isolated circle. Short text can wrap around the arm, but the lettering needs enough space between lines to remain readable as the tattoo ages. A small geometric shape or animal silhouette can work well too, provided the artist doesn't compress its details to fit a narrow area.
Visibility is the main trade-off
Forearm tattoos are easy to show and only partly easy to cover. Long sleeves conceal them, but short sleeves, rolled cuffs, and many workplace uniforms won't. A 2024 U.S. consumer report found that the arm was the most common tattoo placement, accounting for 63% of placements, while the wrist followed at 37% (tattoo placement data and body-area guidance). That popularity reflects the forearm's useful balance of visibility, flexibility, and design space.
Practical rule: If you might build a sleeve, decide where the first forearm piece should leave breathing room for the next design.
The area also receives regular sun exposure, especially for people who drive, cycle, or work outdoors. Once the tattoo has fully healed, regular broad-spectrum sunscreen helps protect color and contrast. During healing, follow your artist's cleaning and moisturizing instructions, avoid picking at flakes, and reduce friction from tight cuffs.
2. Upper Arm and Shoulder for Strategic Statement Pieces
The upper arm and shoulder offer a strong compromise between presence and discretion. A shirt sleeve can cover much of the work, while sleeveless clothing reveals the design. The rounded shoulder adds a natural focal point, and the outer upper arm provides a broader working surface for portraits, traditional roses, skulls, religious imagery, or the beginning of a sleeve.
This placement works best when the artist designs for the wrap rather than treating the arm as a flat page. A portrait should face the intended viewing direction, and a rose should follow the shoulder's curve instead of appearing tilted when the arm rests naturally. Muscle movement can change how the design reads, so the stencil position matters as much as the drawing.
Plan the next piece before the first appointment
An upper-arm tattoo can stand alone, but it's also a common starting point for larger work. A client choosing a traditional skull may later want roses, leaves, or background filler around it. Someone choosing a colorful portrait may need a consistent palette and line weight across the rest of the arm.
Choose the anchor carefully: Place the most important subject where it remains readable from the front and side.
Protect future space: Don't allow background shading to consume every area around the first piece.
Test the stencil standing: Arm position changes how a shoulder design appears when relaxed, bent, or held beside the body.
Match the visual weight: A heavy black design may need similarly confident elements if it eventually becomes part of a sleeve.
The upper arm is often more manageable for first-time clients because clothing can reduce unwanted attention during healing. Loose sleeves are preferable to tight fabric rubbing a fresh tattoo. Keep the area clean, avoid soaking it, and ask the artist how to position the arm while sleeping if the piece extends toward the shoulder or armpit.
3. Back and Lower Back for Masterpieces and Concealed Power
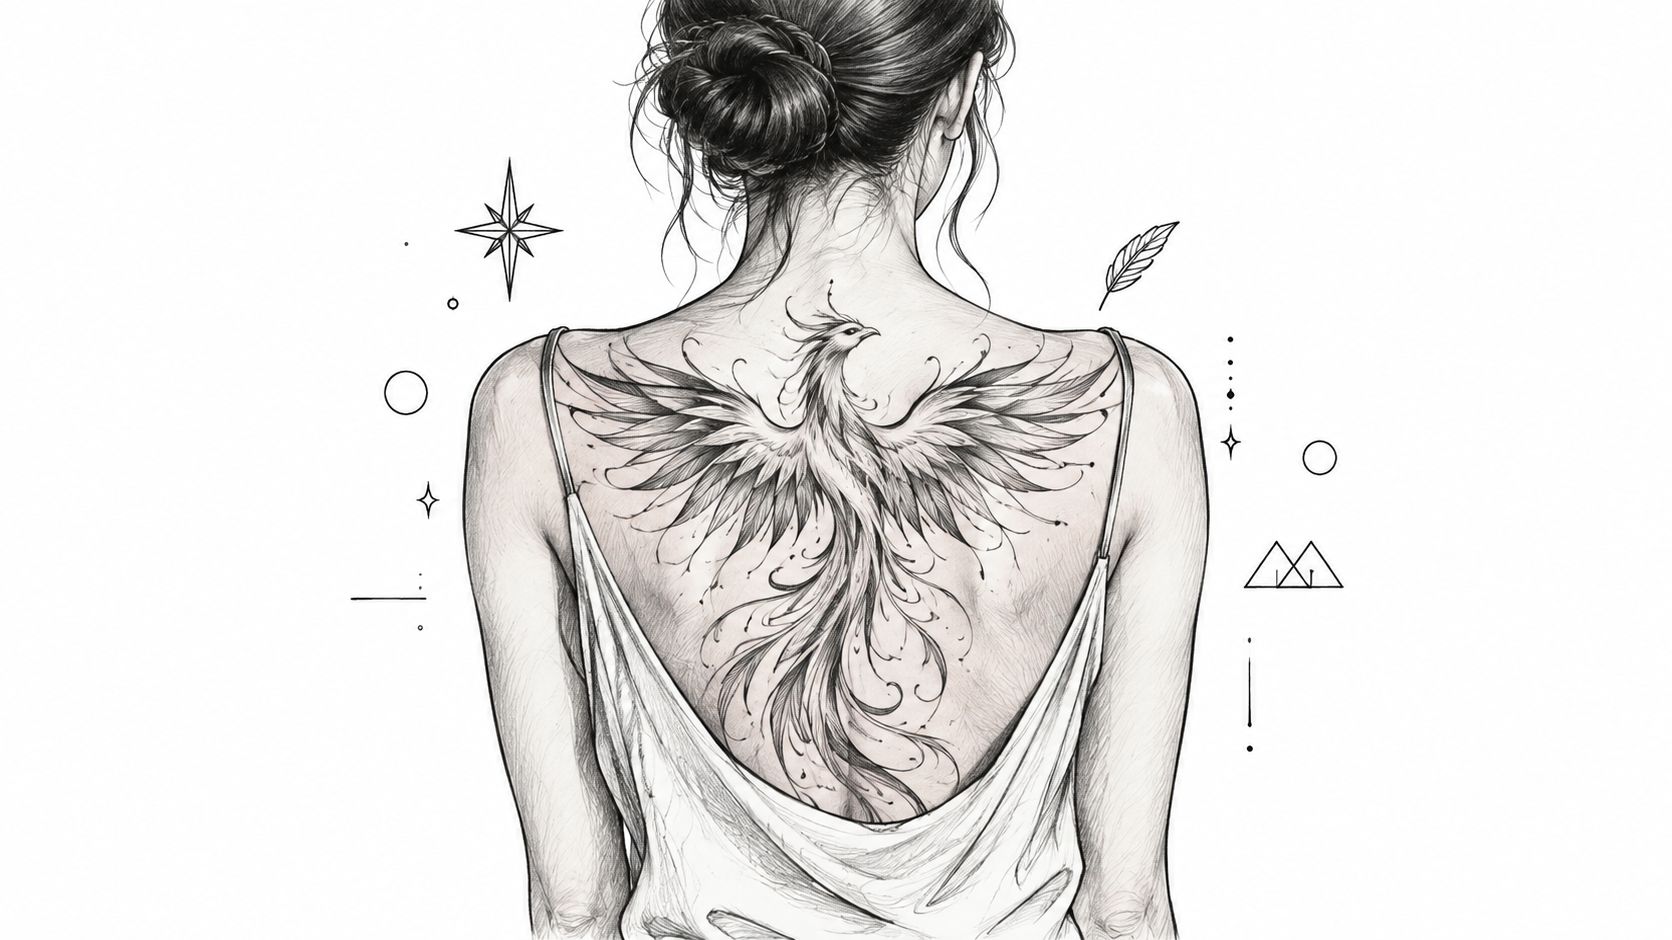
The back gives large compositions room to develop. Upper-back, lower-back, and full-back placements can hold dragons, phoenixes, wings, spiritual imagery, and connected narrative scenes without forcing the artist to reduce every element to fit a small panel. The area also gives you control over when the tattoo appears. Work clothing can conceal it, while swimwear or an intentionally open garment can reveal it.
A large phoenix spanning the upper back needs a composition that works across the shoulder blades and spine. A design can use the natural width of the back for distance and atmosphere. A butterfly or wing design on the lower back can remain symmetrical, while an asymmetrical piece may use the spine as an intentional visual boundary.
Large work needs a long-term appointment plan
Back pieces commonly require multiple sessions, especially when they include saturated color, dense shading, or intricate linework. Your artist should explain how the composition will be divided and whether future sessions depend on the healing of adjacent sections. Bring reference images that show style, subject, and mood, but let the artist adapt the design to your anatomy.
Wear loose clothing that won't press against the tattoo after the appointment. Friction from seams, waistbands, and bedding can make healing more uncomfortable, particularly around the spine and lower back. You may also need to adjust your sleeping position temporarily.
A back tattoo should be planned as a composition, not as a collection of attractive images placed wherever space remains.
The back is a strong option when concealment matters, but it's less convenient for monitoring during healing. Arrange help if you need someone to check hard-to-see areas, and don't apply products beyond what your artist recommends. Taking photos between sessions can help you track how the separate sections are beginning to connect.
4. Ankle and Calf for Delicate Detail
How visible should the tattoo be, and how much room will the design need later? The ankle and calf answer those questions differently. The ankle suits small symbols, coordinates, initials, fine botanical designs, and short text, while the calf gives a floral panel, animal silhouette, mandala, or future leg-sleeve section more space to develop. Both areas can stay covered under trousers, although low shoes and cropped clothing may reveal the ankle.
A small bird near the outer ankle can remain discreet and readable. On the calf, stems, leaves, and negative space have room to breathe instead of being compressed. Text needs extra care around the ankle, where the curve and constant movement can make tightly packed lettering harder to read.
Match the placement to movement and friction
The outer calf usually provides a more forgiving canvas than the inner ankle or back of the calf. Skin closer to bone may feel more intense, while socks, shoes, and boot edges can rub the lower tattoo during healing. Loose socks and footwear with room around the area reduce that pressure.
Before your consultation, review this guide to ankle tattoo placement. It can help you compare a design near the ankle joint with one positioned higher on the calf.
For a first tattoo, choose clear spacing over dense micro-detail. If seasonal visibility matters, place the work where shorts or sandals reveal it naturally. After healing, sun protection helps preserve line clarity, particularly on the outer calf and ankle. During healing, limit tight footwear, friction, soaking, and strenuous movement that repeatedly stretches the skin.
Pain varies by exact location, design density, session length, and personal sensitivity. Tell the artist whether concealment, low shoe visibility, or a larger future project matters most before the stencil is set.
The calf also gives leg work a practical starting point. If expansion is likely, leave visual pathways around the first tattoo so later pieces can connect without awkward gaps.
5. Chest for a Bold Personal Statement
Chest tattoos can be intimate, symmetrical, dramatic, or highly personal. The area suits memorial pieces, portraits, roses, skulls, religious imagery, mandalas, and designs that connect toward the shoulders or sleeves. A small heart-centered symbol may carry private meaning, while a full chest composition can become the central structure for a larger upper-body project.
Placement should be decided precisely. A centered design creates balance around the sternum, a left-sided piece can feel deliberately personal, and an asymmetrical composition may follow the pectoral shape more naturally than a rigidly mirrored design. The artist should review the stencil while you're standing, because a design can shift visually when the chest relaxes or moves.
Meaning and anatomy need equal weight
Chest work may be chosen because the design belongs close to the heart, but the location also involves movement, clothing, and sleep. Tight shirts can rub the area, and sleeping on your front may be uncomfortable while the tattoo heals. Plan loose clothing and avoid swimming or direct sun exposure during the healing period.
Sternum work tends to demand more tolerance because the skin is close to bone. That doesn't mean the entire chest feels identical. The exact location, design density, session length, and individual sensitivity all matter, so ask the artist how the piece can be divided if the central area becomes difficult.
Consider future changes to the body as well. If you expect substantial weight or chest changes, discuss whether the composition can accommodate them. Bold shapes and well-spaced designs generally give an artist more flexibility than extremely tight, delicate detail.
A chest tattoo can stand alone, but it may also become the bridge between a shoulder piece, upper-arm work, or a larger torso composition. Decide whether you want a finished centerpiece or an intentional starting point before finalizing the size.
6. Ribcage for a Striking Artistic Canvas
The ribcage is a dramatic location for designs that need movement. Quotes can follow the rib line, feathers can travel diagonally, and floral or religious compositions can wrap around the side of the torso. The area works particularly well for artwork that should feel elongated rather than compact.
A sentence placed along the ribs needs lettering that remains readable when the body bends. A rose wrapping around the side should account for the front, side, and back views instead of stopping wherever the stencil happens to end. Portraits can work here, but they need enough scale to preserve facial structure across a curved and moving surface.
Pain and healing are part of the design decision
Rib tattoos are commonly treated as a high-intensity choice because the skin moves with every breath and sits close to the ribs. The experience varies, but clients should plan for breaks rather than trying to prove they can finish quickly. Slow breathing, clear communication, and a session plan that respects your tolerance are more useful than forcing endurance.
Loose clothing helps before and after the appointment. Tight waistbands, bra bands, and rough seams can create friction while the skin is tender. Heavy exercise and deep stretching may also make the area uncomfortable during healing, so ask your artist when normal activity is appropriate.
The ribcage rewards designs that follow the body's natural direction. It punishes designs that are forced into a flat, upright rectangle.
This placement is often easy to conceal under everyday clothing, which makes it attractive for clients with professional concerns. It's less convenient for people who need to sleep on their side or wear fitted clothing daily. Choose it because the composition belongs there, not because hidden tattoos seem safer.
7. Thigh for an Expansive Hidden Canvas
The thigh gives large designs the space they need while keeping concealment straightforward. Outer-thigh and front-thigh placements can support portraits, scenic panels, religious imagery, full-color artwork, and the first section of a leg sleeve. Trousers and longer garments can cover the tattoo, while shorts or swimwear can reveal it intentionally.
A panel can use the thigh's width for foreground and distance. A portrait benefits from generous spacing around the face, and a large floral design can follow the muscle rather than being squeezed into a narrow strip. The outer thigh generally provides more usable room than the inner thigh, while the inner area may feel more private but can involve greater sensitivity.
Comfort does not remove planning needs
Loose shorts or relaxed trousers make the first days easier. Tight athletic wear can trap friction and pressure against a new tattoo, and sitting for long periods may be uncomfortable if the design extends across the back or side of the thigh. Sleeping arrangements matter too. Avoid pressing the fresh work against rough bedding or tight clothing.
Thigh placement works well for clients who want a significant tattoo without daily visibility. It also gives an artist room to use stronger contrast, richer color, and more detailed transitions. That doesn't mean every idea should be made large. A small symbol can look intentional on the thigh if it has enough surrounding space, but a tiny design may feel visually lost if it was conceived for a wrist or ankle.
If you may add a thigh panel later, decide whether the pieces should share a theme, style, or background. A first tattoo can remain independent, but a consultation should still consider its relationship to nearby future work.
8. Neck and Behind-Ear Tattoos for Bold Intimacy
Neck and behind-ear tattoos make a clear statement because they sit close to the face and remain visible in many outfits. Behind the ear is better suited to small symbols, dates, initials, minimalist linework, and compact spiritual or astrological designs. The front or side of the neck can hold a slightly larger focal piece or connect downward from chest and shoulder work.
The difference between these locations is significant. Behind the ear may be partly obscured by hair, but it's still revealed by short hairstyles, tied-back hair, and many everyday movements. A front-neck tattoo has much less concealment, which makes workplace expectations and personal comfort especially important.
Choose visibility with full awareness
A 2025 YouGov survey found that 36% of Americans considered arm tattoos always acceptable, compared with 34% for neck tattoos in the broader placement-acceptance findings summarized by Tattoo Body Map (U.S. tattoo placement acceptance and placement data). Acceptance has widened, but individual employers, clients, family members, and professional settings can still respond differently.
Before committing, check your workplace policy and think beyond your current role. A visible neck tattoo may affect interviews, uniforms, client-facing work, or future career changes. If you're building a larger chest or shoulder composition, the neck can become an extension of that plan. If you want discretion, behind the ear offers a more restrained alternative.
Read this guide to tattoo placement behind the ear when comparing size and positioning. During healing, reduce rubbing from collars, hair, helmets, and bedding. Once healed, protect the area from sunlight, since the neck is frequently exposed.
9. Hand and Finger Tattoos for Distinctive Expression
How visible, durable, and expandable should a tattoo be before you place it on your hand or fingers? These areas suit initials, small symbols, commitment designs, matching tattoos, short text, and simple fine-line artwork, but they demand more planning than a protected placement.
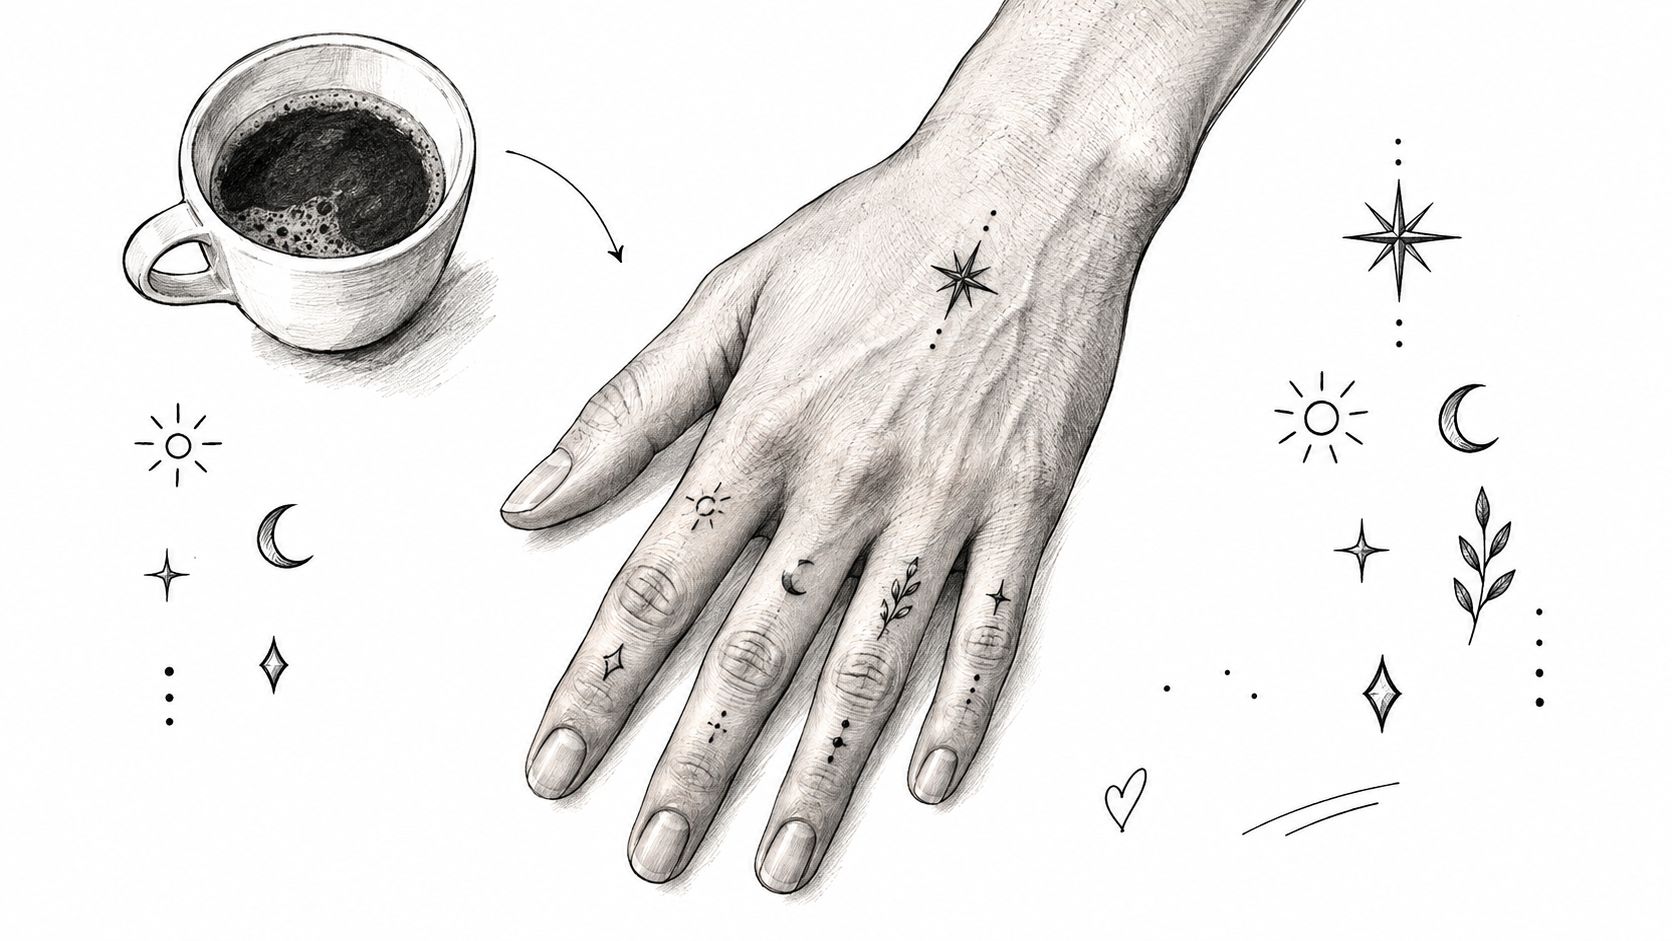
The back of the hand provides a larger, highly visible canvas for a clear symbol or compact illustration. Fingers offer less room and more movement, so ring-finger designs, initials, and short words need spacing that preserves readability. Narrow, intricate artwork can blur or lose definition as the skin flexes and encounters repeated friction from washing, tools, and everyday contact.
Hand placement also affects concealment and future expansion. A small finger mark is easier to keep visually separate, while a hand tattoo can become the starting point for connected work across the wrist or forearm. Decide whether that possibility suits your long-term plan before choosing the final size.
Plan for daily wear, not just the appointment
Hands face frequent washing, sunlight, friction, and work-related abrasion. Touch-ups may become part of maintaining finger tattoos. Choose a design and scale that can tolerate the location instead of expecting it to behave like ink on the upper arm.
During healing: Keep the tattoo clean, follow the artist's aftercare instructions, and avoid unnecessary handling.
For manual work: Arrange time away from gloves, tools, chemicals, and repeated abrasion where possible.
For employment: Consider how the tattoo appears during greetings, meetings, and customer interactions.
For design longevity: Favor clear shapes and confident linework over crowded miniature detail.
A visibility-focused tattoo placement study found that 88% of tattooed participants had at least one tattoo in a visible location, while 54% had at least one in a nonvisible area such as the ribs, spine, lower back, breasts, or genitals. Hand tattoos sit firmly at the visible end. Choose them when daily exposure, maintenance, and possible workplace scrutiny fit your plans.
10. Full Sleeve for a Unified Artistic Vision
Can the whole arm read as one artwork from every angle? A full sleeve connects multiple subjects through a shared style, palette, and flow. Japanese traditional imagery, memorial symbols, nature themes, or black-and-gray shading can all work, provided the visual language is decided early. Color-heavy designs need the same discipline, especially where one section transitions into another.
Placement affects visibility, movement, and future expansion. A sleeve is easy to display in short sleeves, while long sleeves offer practical concealment. The arm provides substantial canvas, but the elbow, inner arm, wrist, and shoulder bend, crease, or narrow differently. Those areas can distort imagery and receive more friction, so they should not be treated as interchangeable space.
A strong plan also controls how the design is viewed. A central animal might face forward, while background elements guide the eye around the arm. Filler should connect separate sessions without overwhelming the main subjects. Leave room for future additions if the sleeve will grow beyond the initial concept.
Plan the full project before booking sessions
Start the consultation with a clear direction for style, theme, color, line weight, and working order. A reference folder helps, but saved images may conflict when placed together. The artist should separate compatible references from ideas that compete for attention.
Discuss how visible the finished sleeve should be in daily life, how the design will move when the arm bends or rotates, and which areas may be more difficult to heal. Schedule the next session only after the skin has recovered and follow the artist's specific aftercare instructions.
Choose the structure: Decide whether the sleeve is subject-led, pattern-led, narrative, or abstract.
Keep the style consistent: Match outlines, shading, saturation, and negative space across sessions.
Check the stencil in motion: Review it with the arm relaxed, bent, and rotated.
Accept measured changes: The artist may adjust scale or placement as the design meets your anatomy.
Explore this guide to tattoo sleeve design before your consultation. Careful planning preserves flexibility while keeping the finished sleeve visually connected.
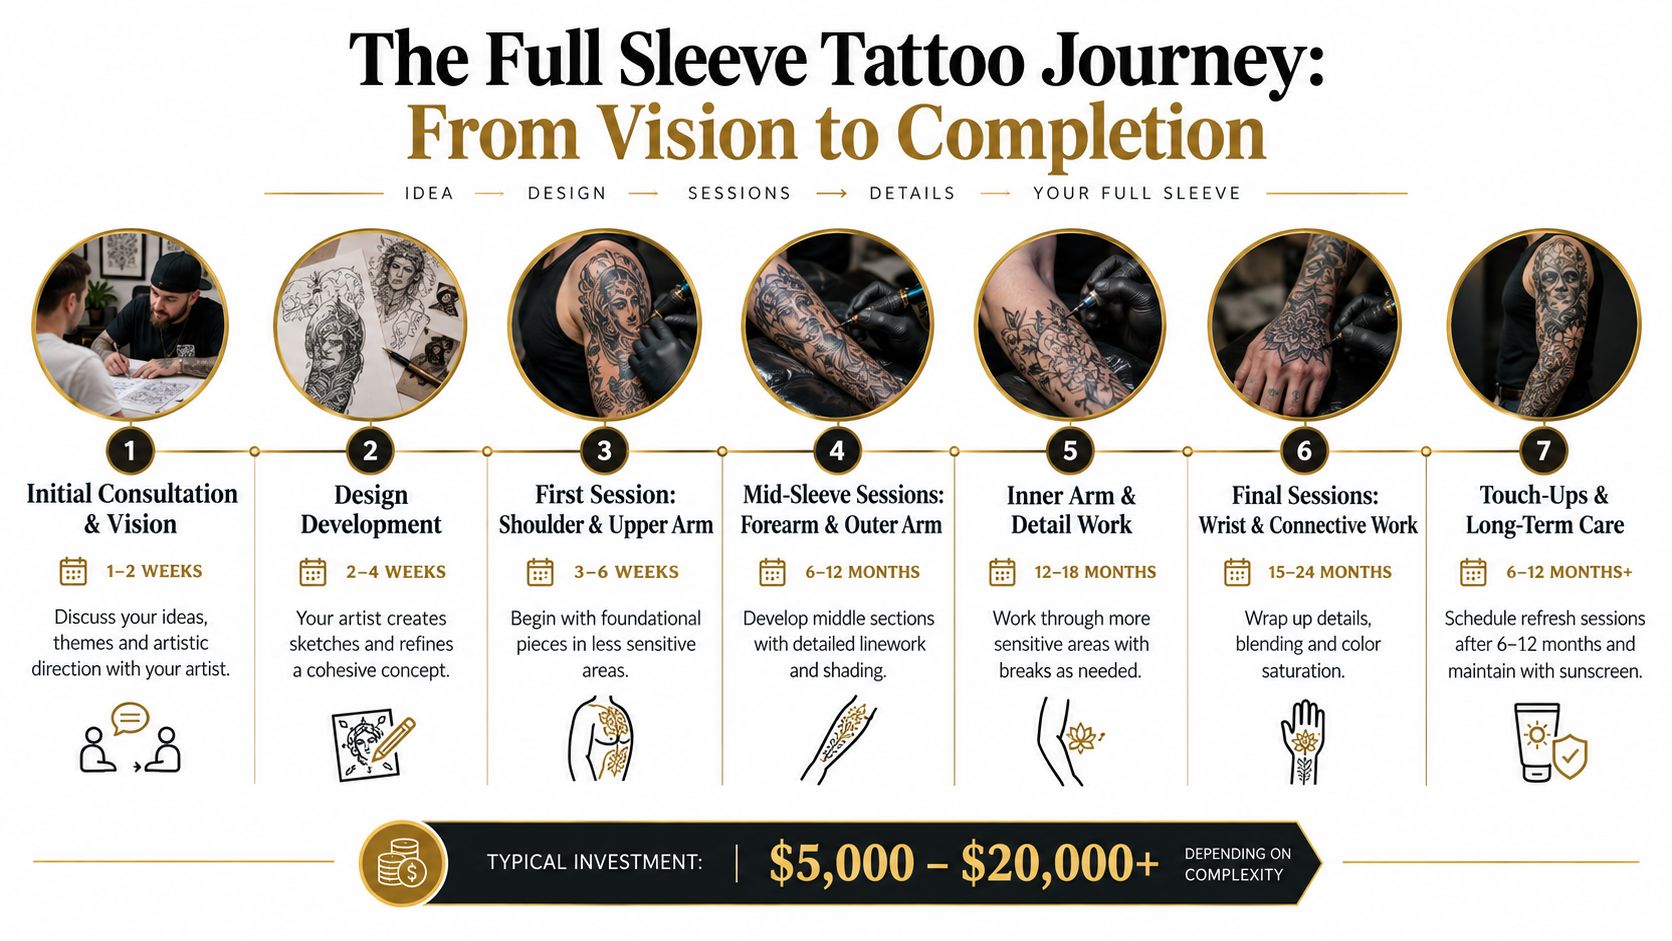
A visual guide shows how a sleeve develops from an initial idea into a connected project.
10-Point Tattoo Placement Comparison
Placement | 🔄 Complexity (pain & skill) | ⚡ Resources (sessions · cost · healing) | ⭐ Expected outcome (quality & longevity) | 📊 Results & Visibility | 💡 Ideal use cases & key advantages |
|---|---|---|---|---|---|
Forearm Placement: Bold & Visible | Moderate, pain 4–6/10; straightforward flat canvas for detail | Low–moderate, single sessions for small work; multiple for sleeves; heals reliably | ⭐⭐⭐⭐, excellent detail, photo-friendly; colors hold with care | High visibility with short sleeves; easy to cover with long sleeves | Great for first tattoos, readable designs, sleeve starts; tip: use high‑SPF sunscreen |
Upper Arm & Shoulder: Strategic Statement Pieces | Low–moderate, cushioned area but curved surface needs skill | Moderate, multi‑session for large pieces; moderate cost; good healing | ⭐⭐⭐⭐, high-quality large work; good color/portrait potential | Moderate visibility (t‑shirts/tanks); easily concealable | Ideal for portraits, traditional sleeves; advantage: low pain and strong concealment; tip: plan wrap and muscle movement |
Back & Lower Back: Canvas for Masterpieces & Concealed Power | High, large area, variable pain (spine/ribs may hurt) and complex composition | High, many sessions (3–6+), higher cost; multi‑session workflow | ⭐⭐⭐⭐⭐, maximum artistic potential and scale | Low visibility by default; big impact when revealed | Best for collectors and narrative pieces; advantage: largest continuous canvas; tip: plan sessions and wear loose clothing |
Ankle & Calf: Delicate Detail Showcase | Moderate–high, ankle near bone (5–8/10); calf easier | Low–moderate, small sessions; healing challenged by friction from shoes | ⭐⭐⭐, excellent for fine line; colors may fade faster on ankle | Moderate–high seasonal visibility (shorts/sandals) | Ideal for small meaningful pieces and leg sleeve starts; advantage: intimate detail; tip: avoid tight shoes during healing |
Chest: Bold Personal Statement | Moderate, outer chest easier, sternum/ribs more sensitive (3–6/10) | Moderate, single to multiple sessions; moderate cost; good healing if managed | ⭐⭐⭐⭐, strong focal point for portraits and symbolic work | High visibility in casual wear; concealable formally | Great for meaningful, bold imagery; advantage: central placement close to heart; tip: discuss placement and weight change |
Ribcage: Striking Artistic Canvas | High, significant pain (7–9/10); curved, demanding surface | Moderate–high, multiple sessions for larger pieces; slower healing | ⭐⭐⭐⭐, dramatic, unique visual effects when executed well | Low visibility; visible in swimwear/shirtless settings | Best for experienced clients seeking striking statements; advantage: wraparound dynamics; tip: plan breaks and breathing techniques |
Thigh: Expansive Hidden Canvas | Low–moderate, roomy, comfortable surface (3–5/10) | Moderate, few sessions for large panels; good healing; cost moderate | ⭐⭐⭐⭐, excellent for large color and detailed work | Moderate visibility (shorts/swimwear); easily covered by pants | Ideal for large single pieces or leg sleeves; advantage: large, concealable canvas; tip: avoid tight clothing while healing |
Neck & Behind Ear: Bold Intimate Placement | Moderate–high, sensitive area (5–7/10); precise work required | Low, usually quick sessions for small pieces; social/career cost high | ⭐⭐⭐, strong statement; best in small, simple designs | Extremely high visibility unless hidden by hair | Best for symbolic, high-visibility choices; advantage: bold impact; tip: consider career implications and choose discreet behind‑ear placement if needed |
Hand & Finger: Distinctive Personal Expression | High, thin skin, nerves, frequent touch-ups; pain 5–7/10 | Low per session but high maintenance, frequent touch‑ups; healing difficult due to use | ⭐⭐, bold daily visibility but faster fading; needs upkeep | Extremely high, constant visibility | Ideal for matching symbols or commitments; advantage: daily reminder; tip: expect annual touch-ups and careful aftercare |
Full Sleeve: Comprehensive Artistic Vision | Very high, complex multi-surface design; variable pain across arm | Very high, many sessions over 18–36+ months; $5,000–$20,000+ typical; extended healing | ⭐⭐⭐⭐⭐, cohesive, high-impact masterpiece when completed | Moderate visibility (short sleeves); concealable with long sleeves | Best for committed collectors pursuing a unified narrative; advantage: ultimate personal statement; tip: invest in consultations and long‑term artist relationship |
Choose the Placement That Supports the Whole Plan
The best tattoo placement isn't the spot that looks attractive in a reference photo. It's the location that supports the design's scale, your visibility preferences, your pain tolerance, your healing routine, and your future plans. A small symbol may feel intentional behind the ear or on the ankle, while a detailed portrait needs the breathing room of an upper arm, thigh, calf, chest, or back.
Start with visibility. Decide whether you want the tattoo visible every day, visible only in certain clothing, or easy to conceal. Research on placement decisions has connected visibility choices with social relationships and future employment concerns, and a counselor-education survey found higher acceptance for upper-arm tattoos than for neck and face placements (research on tattoo visibility, employment, and placement acceptability). Your current job matters, but so does the possibility that your professional context will change.
Next, match the canvas to the design. Long designs need a limb or torso line they can follow. Circular designs may suit a shoulder, upper arm, calf, or chest. Detailed work needs enough space for line separation and contrast. Don't shrink a complex idea into a location that can't support it because the smaller spot seems convenient.
Use a practical consultation sequence
Ask yourself these questions before booking:
How visible should it be: Will you be comfortable seeing and explaining it during work, travel, family events, or interviews?
How will it move: Does the design need to wrap around a joint, follow a muscle, or remain readable when the body bends?
How will it heal: Can you avoid tight clothing, footwear, sports, swimming, friction, and pressure while the skin recovers?
What happens next: Do you want a standalone tattoo, a collection of separate pieces, a sleeve, or a larger back, chest, or leg composition?
How will it age: Is the area exposed to sun, repeated washing, clothing friction, or major body changes?
A 2026 placement guide frames the decision around design size and shape, visibility, work and lifestyle, pain, and fading risk (practical tattoo placement guidance). Evidence-oriented advice also identifies the outer forearm, outer upper arm, calf, outer thigh, upper back, and chest as areas that can hold detail well over time, while describing ribs, sternum, and spine as more demanding placements that should serve the design rather than a passing trend (long-term tattoo placement and touch-up considerations).
Bring reference images, clothing examples if your work has strict requirements, and an honest idea of how much future expansion you want. Think Tank Tattoo's complimentary consultations give Denver clients a chance to discuss placement, timing, and design direction before booking. That conversation can prevent a beautiful concept from becoming a difficult-to-hide, difficult-to-heal, or difficult-to-expand tattoo.
Visit Think Tank Tattoo to arrange a complimentary consultation about your design, placement, and timing. Bring your reference images and questions so the studio's artists can help you choose a location that fits both the tattoo you want now and the work you may plan later.
Comments