
8 Black and Grey Japanese Tattoos: Motifs to Know in 2026
You've saved a dragon or a mask to your phone, and you know you want it in black and grey. What's harder to judge is whether it belongs on your forearm or across your back, how much detail will fit, and whether you're committing to a single appointment or an extended project.
Black and grey Japanese tattoos depend on tonal range, negative space, and line weight rather than color separation. Greywash creates translucent shading; solid black creates anchors. If the subject and its background share the same darkness, even an elaborate drawing can become difficult to read on skin.
The visual foundation matters, too. The Pitt Rivers Museum's history of Japanese irezumi describes how tattooed heroes in Kuniyoshi's woodblock prints helped popularize large pictorial tattoos during the Edo period. That relationship between subject, background, and overall composition remains useful when planning monochrome work.
Planning principle: Choose the size that preserves the subject, not the smallest space into which the drawing can be squeezed.
Hannya, koi, dragons, waves, oni, Kannon, Fujin and Raijin, and peonies each demand a different approach. Consider each through style, placement, size and session planning, and the questions to ask before booking. A recognizable motif is only the starting point. The finished tattoo also needs to work when your body moves and when the shading has healed.
Table of Contents
1. Hannya Mask (Noh Theatre Demon) - Give the Expression Enough Room
2. Koi Carp Climbing the Waterfall (Koi no Takinobori) - Build the Water Around the Fish
7. Fujin and Raijin (Wind and Thunder Gods) - Give Each Figure a Clear Silhouette
8. Peony (Botan) with Wind Bars - Match the Flower to Its Job
How the Eight Black-and-Grey Japanese Motifs Compare on Placement, Session Needs, and Meaning
Choosing Your Motif and Booking the Right Session - Bring References That Answer Different Questions
1. Hannya Mask (Noh Theatre Demon)
A hannya succeeds or fails at the face. Its horned silhouette establishes the subject, but the expression depends on the relationship between the brow, eyes, cheekbones, and open mouth. Associated with jealousy and anguish in Noh theatre, it deserves more consideration than making everything look aggressive.
In black and grey, reserve the deepest black for selected recesses, such as the mouth and areas beneath the brow. Let lighter transitions describe the forehead and cheeks. If every hollow receives equally heavy shading, the mask loses dimension.
A centered chest design can emphasize symmetry, while an outer upper-arm placement can support a slightly turned mask. For a back panel, clouds can frame the face without pressing against every horn and fang.
Give the Expression Enough Room
Ask for a stencil test while standing naturally, then look at it with your arms relaxed. A mask that looks balanced on a flat drawing may distort across a shoulder or chest contour.
Size decision: Keep enough room between teeth, eyes, and facial creases that they remain separate.
Session decision: A contained mask may suit a single appointment; framing, extensive black packing, or a larger panel can require staged work.
Consultation question: Ask which areas will remain open skin and which will receive solid black.
Smooth shading doesn't make the piece less Japanese. Middlebury's account of Japanese tattoo art provides context for traditional pigment use and the relationship between Japanese imagery and contemporary tattoo practice. Judge the composition as well as the rendering technique.
For a standalone upper-arm hannya, prioritize the expression before adding flowers, smoke, or decorative texture. Those additions increase coverage and shading time without necessarily improving the central image.
2. Koi Carp Climbing the Waterfall (Koi no Takinobori)
An ascending koi needs a route through the tattoo. The familiar perseverance narrative works visually when the fish appears to push against water, rather than float inside unrelated splashes. Start with the direction of movement before discussing individual scales.
This illustration offers a useful starting point for discussing silhouette and water movement.
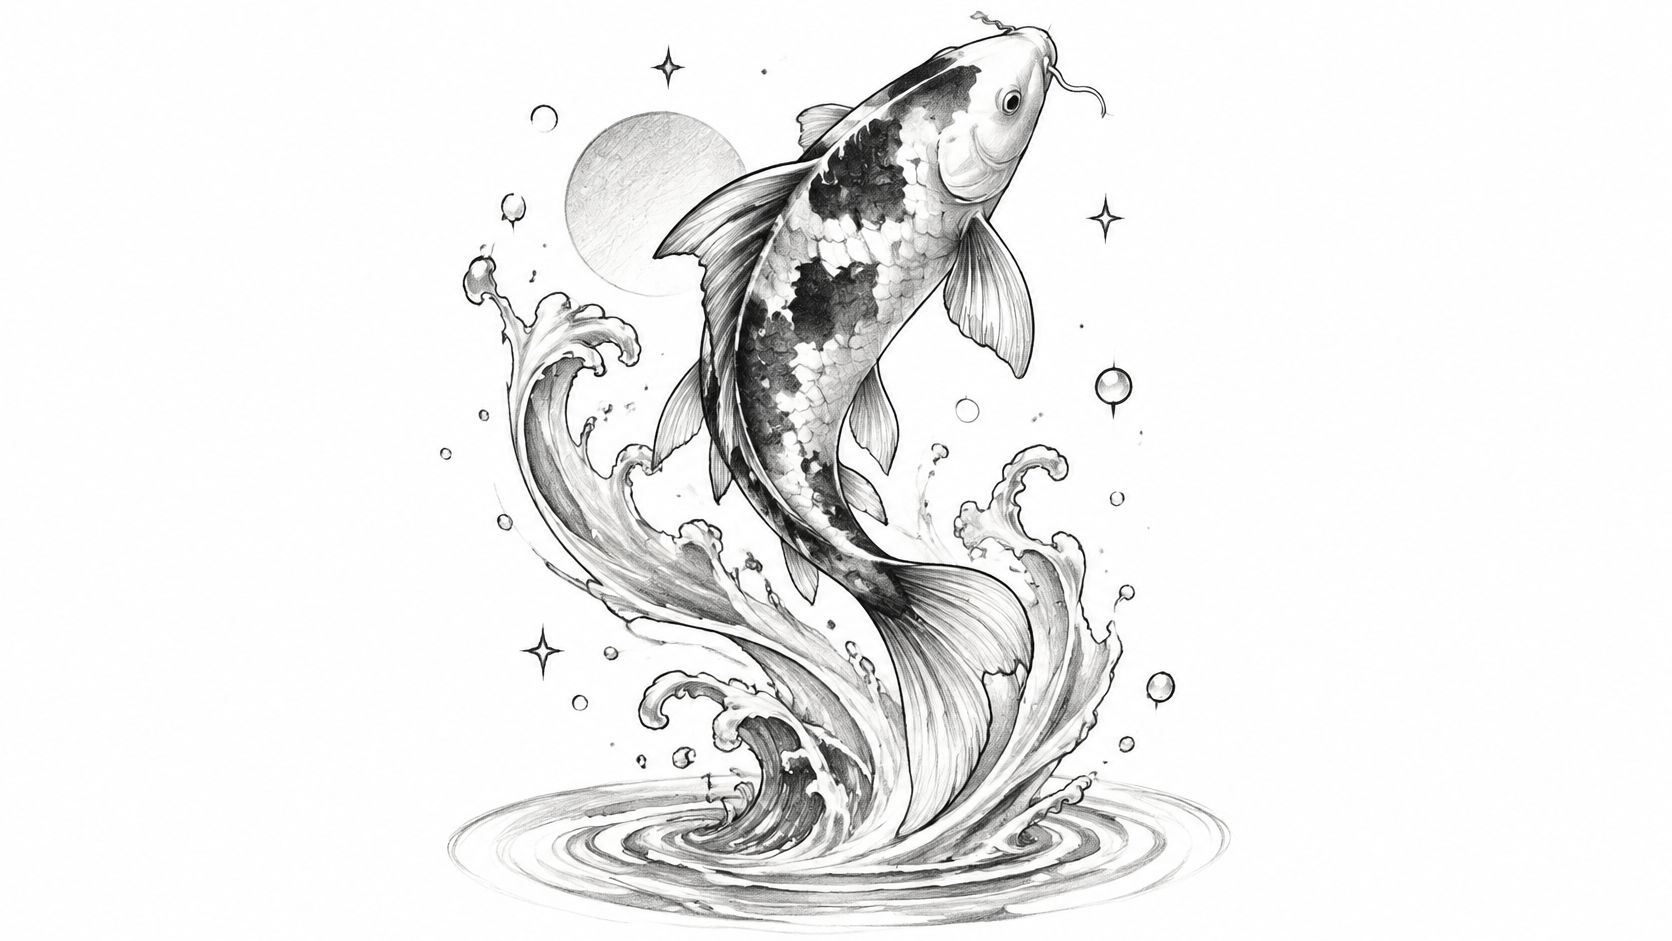
Separate the fish from the waterfall through value. A darker back can sit against pale water, while open highlights along the body keep the koi from merging with nearby rocks. Outlining every scale heavily can make the body look rigid rather than muscular.
Build the Water Around the Fish
For a sleeve, let the koi rise along the arm's length and check where its head lands when the elbow bends. On a back piece, a rising diagonal can provide more movement than placing everything directly along the spine.
Our guide to paired koi fish tattoos can help you consider whether another fish adds useful balance or crowds the available space.
Keep scale detail selective: Emphasize the body's turn rather than filling every surface equally.
Request a value sketch: The fish and water should remain distinguishable without color.
Plan the full coverage: A waterfall sleeve or back composition needs multiple sessions, not just time for the fish.
Microscopy research on tattoo pigment describes particle redistribution and dispersion in the dermis, supporting a cautious approach to tightly packed detail. It isn't a clinical test of koi tattoos, but it reinforces a useful design decision: leave breathing room between scales, foam, and background shadows.
3. Dragon in Clouds (Ryu)
Draw the dragon's route before drawing its scales. A convincing dragon needs a continuous body that you can follow through the clouds. Extra coils won't rescue anatomy that disappears into an unclear knot.
Japanese dragon imagery often connects water, sky, and protection. For the tattoo, decide whether that dragon is the main subject or a framing element around something else. That choice determines how much room the head, claws, and body need.
Use this illustration to discuss the balance between the dragon and its surrounding clouds.
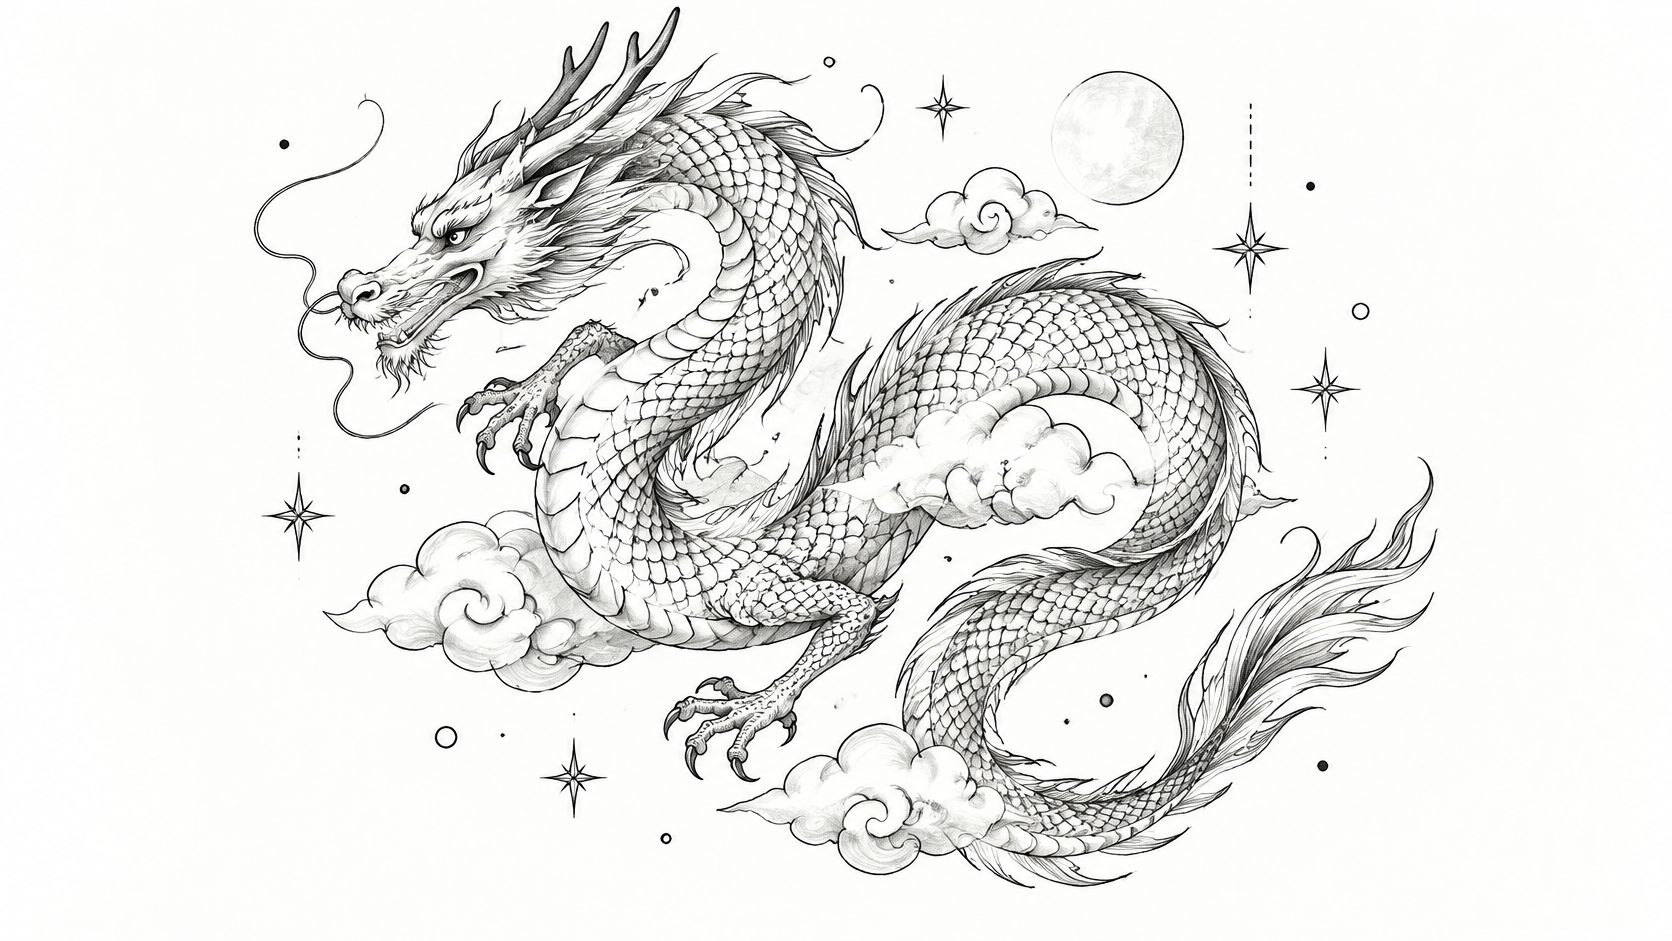
Fit the Coils to the Body
A back provides room for broad turns and a prominent head. A leg sleeve offers a long wrapping route, while an arm requires careful decisions about which features face outward. Our Japanese arm tattoo guide is useful for considering that relationship between coverage and placement.
Say you want a dragon wrapping from the upper arm toward the forearm. Keep its face away from the deepest elbow fold, and check that the body still makes sense from the side. Don't spend the entire detail budget on tiny scales while shrinking the head.
A dragon should remain readable when you stop inspecting the scales.
Clouds can conceal transitions, but they shouldn't conceal weak planning. Ask the artist to identify the darkest areas and explain how the dragon will separate from them.
A large dragon requires staged outlining, background work, and shading. Dense scales, claws, whiskers, and full background coverage all add working time. Request a project estimate after the composition and coverage are settled, rather than treating dragon tattoos as a fixed-session category.
4. Great Wave (Inspired by Hokusai)
A wave tattoo doesn't need every line from Hokusai's The Great Wave off Kanagawa to retain its character. The recognizable elements are the rising mass of water, the curling crest, and the tension between heavy water and light foam.
The illustration below can help establish which parts of that composition you want to preserve.
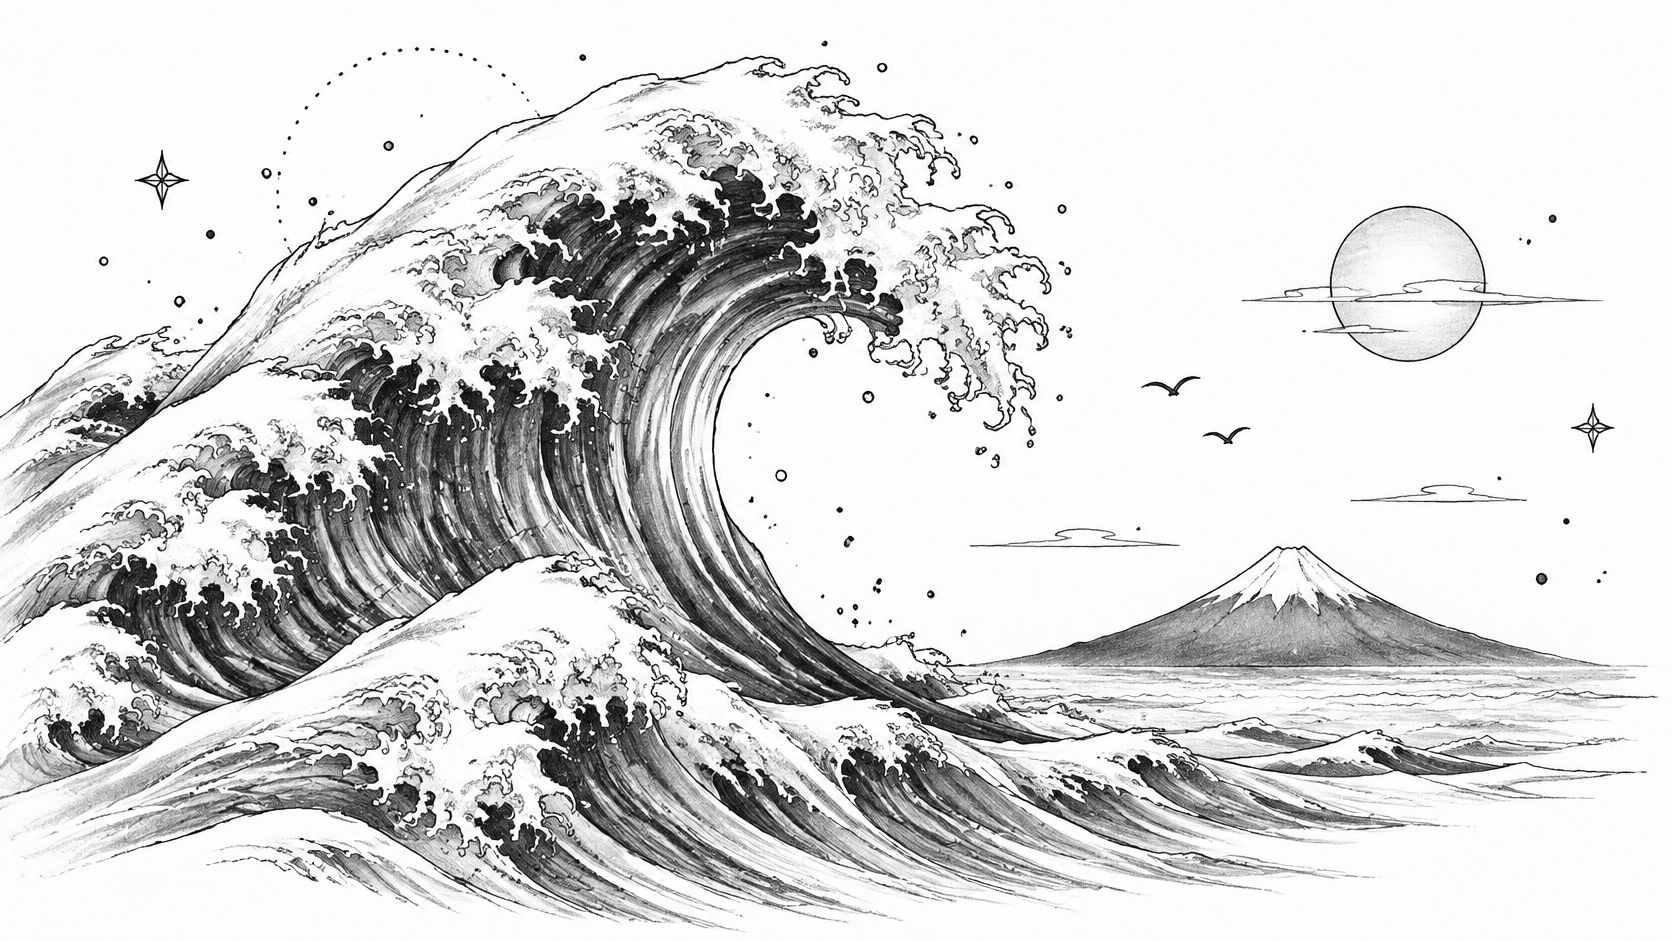
Adapt the print to the body instead of treating skin like a rectangular page. On a forearm, the main crest can follow the outer curve while supporting water wraps around the sides. On a back, a broader composition can leave room for a distant mountain without shrinking it into an incidental mark.
Keep the Foam Open
The principal trade-off is between foam detail and lasting separation. Tiny hooks and narrow channels may look intricate in a drawing, but they leave little room between neighboring lines.
For a compact piece: Use a clear crest, broader foam shapes, and restrained interior texture.
For a larger panel: Add overlapping water masses in areas that support the main wave.
For the consultation: Ask to see the wave without its smallest details. The silhouette should still feel complete.
Greywash can distinguish the underside of the crest from the body of the water. Solid black works best as a deliberate structural accent, not an automatic fill for every trough.
A contained forearm wave may be suitable for a single appointment if the design and skin response allow it. A wraparound composition with extensive shading may need separate visits. Coverage and density determine the schedule more reliably than the motif's name.
5. Oni Demon Mask
An oni mask gives you room for a forceful expression, heavy horns, and substantial black. The danger is overfilling it. When the eyes, nose, mouth, and framing clouds all become dark, the face can lose its structure.
Compared with a hannya, an oni can support a broader, heavier facial treatment. Still, don't choose between them on symbolism alone. Compare the actual silhouettes and expressions you want to wear, and discuss the reference's context rather than assuming every demon image means the same thing.
Marquette University's overview of Japanese tattooing places the imagery within a wider history of composition, social meaning, and technique. That context is more useful than treating Japanese motifs as a fixed dictionary of meanings.
Use Heavy Black Selectively
Consider an oni on the shoulder with its horns extending toward the upper arm. The shoulder can support the mask's mass, but the face should remain visible when the arm hangs naturally. A centered chest arrangement needs the same expression check across the body's contours.
Our discussion of tribal and Japanese tattoo design offers another reference point for comparing bold pattern with pictorial structure.
Protect the expression: Leave lighter planes around the eyes and cheekbones.
Control the background: Don't surround a dark mask with an equally dark, tightly packed frame.
Budget for packing: Large solid-black areas require working time even when they contain little fine detail.
A contained mask can be a shorter project than a mask with clouds extending across the chest and shoulder. Ask whether the face and framing should be completed separately, and whether reducing background coverage would better match your available appointments.
6. Kannon Bodhisattva
Kannon demands restraint. A serene face, deliberate posture, and flowing robes communicate something different from a mask built around tension. Heavy outlines and deep shadows can still belong in the design, but they shouldn't overwhelm the expression.
Choose the specific depiction before choosing the decorative frame. Kannon's pose, attributes, and surrounding imagery deserve informed reference selection. Bring material that identifies the figure clearly, and discuss whether you want a more traditional rendering or a contemporary interpretation.
A full-back design can accommodate the face, hands, robes, and lotus elements without compressing them. A chest panel may require a simpler presentation, particularly if the design includes detailed hands or a surrounding halo.
Plan Around the Face and Hands
Say you want a seated Kannon above lotus flowers. Establish the figure's proportions first, then determine how much space remains for petals, clouds, and robe folds. Enlarging the flowers shouldn't force the face into a size that cannot support its intended expression.
Artist's recommendation: Simplify the surroundings before sacrificing the face or hands.
Soft gradients can model the cheeks and fabric, while darker robe folds provide separation. Avoid giving every fold the same depth, which can make the garment visually busier than the figure.
A full-back Kannon is a multi-session commitment, not a design to rush through one prolonged sitting. Research using a human-skin model documents inflammatory and regeneration responses to tattooing, but it doesn't establish a universal appointment interval. Let recovery and the artist's assessment guide the schedule.
Ask how the artist will stage the face, robes, and background, and when they'll evaluate the healed greywash. Fresh darkness isn't the final tonal result.
7. Fujin and Raijin (Wind and Thunder Gods)
Putting Fujin and Raijin together creates an immediate space problem. You're accommodating expressive figures, Fujin's wind bag, Raijin's drums, and the surrounding atmosphere. Reduce them too far and their identifying features compete for the same patch of skin.
Choose the hierarchy before adding clouds. The gods can dominate a back piece, or they can frame a central subject or focal point. Trying to make every element equally important usually produces a crowded composition.
Give Each Figure a Clear Silhouette
For a full back, place the figures so their gestures relate across the body without forcing identical poses. A more contained upper-back design may need simplified anatomy and fewer surrounding details.
Consider the composition while standing, sitting, and reaching forward. Shoulder movement changes the spacing between figures, and a drum or hand that sits neatly in a flat layout may land awkwardly near a body crease.
Separate the bodies: Use open channels and distinct grey values between limbs, fabric, and clouds.
Keep attributes visible: The wind bag and drums should remain identifiable without close inspection.
Resolve the center: Decide whether the space between the gods stays open or contains another subject.
This is a substantial project when both figures appear with full backgrounds. Anatomy, expressive faces, repeated drum shapes, and atmospheric shading each require attention, so reducing the design to a tight appointment budget can mean simplifying the scene.
Ask for a staged plan showing what happens during outlining, figure shading, and background completion. A believable schedule follows the actual drawing, not a generic promise about how quickly a back piece can be finished.
8. Peony (Botan) with Wind Bars
Peonies can work as the main subject rather than leftover filler. Their layered petals offer plenty of opportunity for greywash, while leaves and wind bars can direct movement around an arm, shoulder, or larger composition.
This illustration provides a starting point for discussing petal density and background weight.
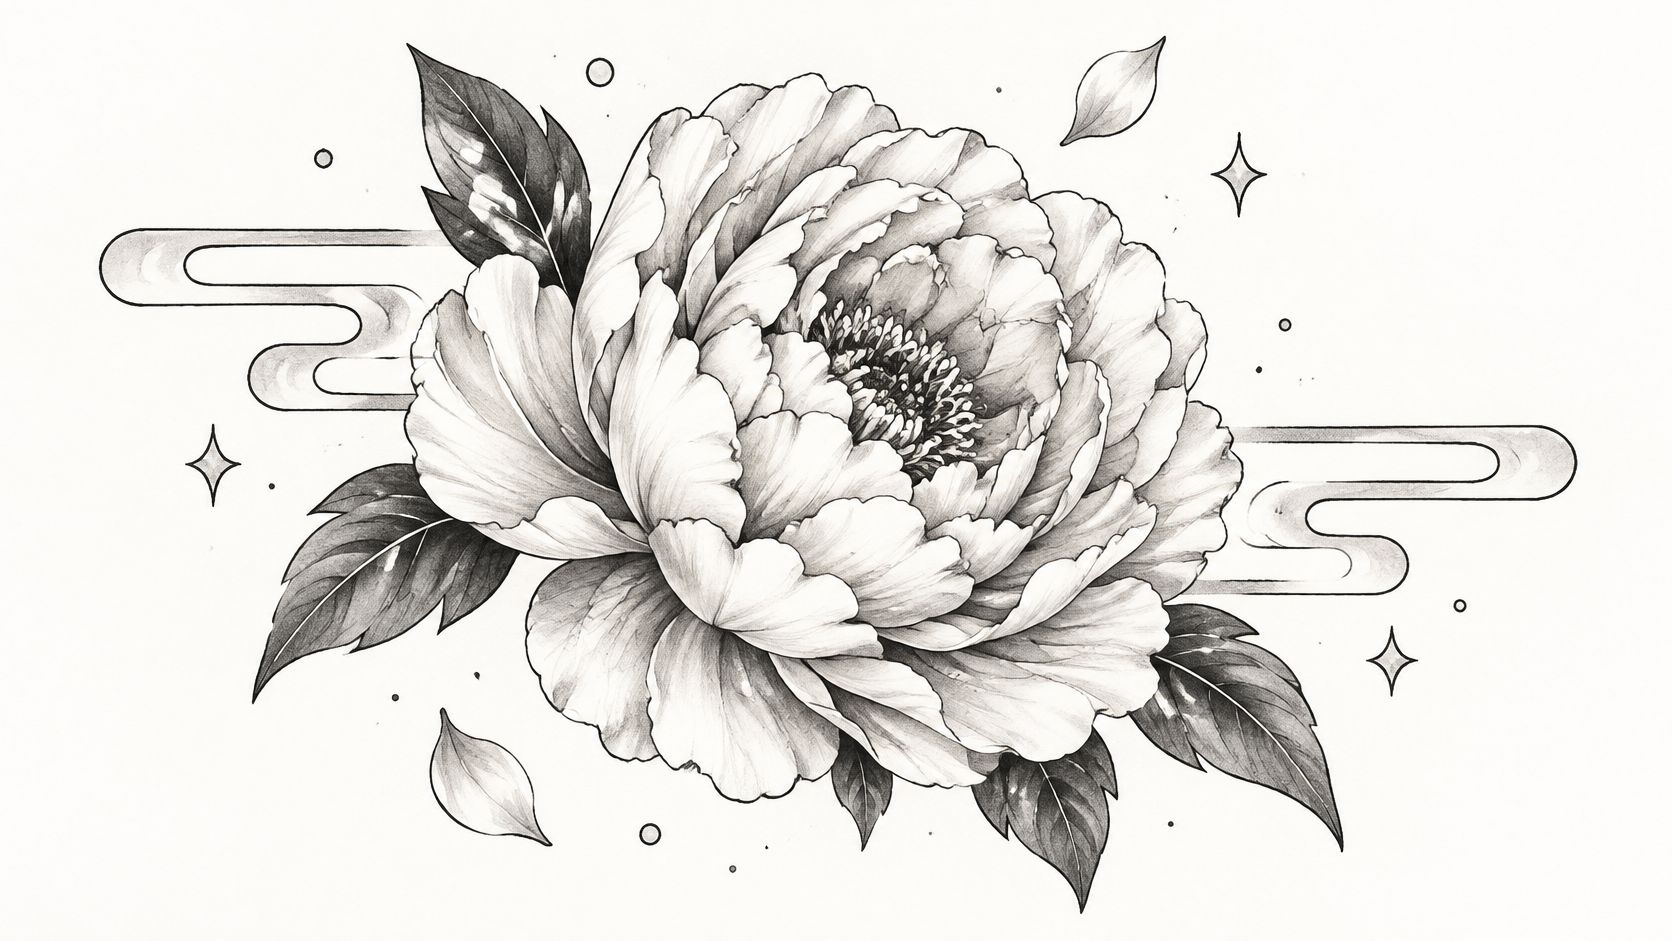
Keep the petal surfaces light enough to separate from the folds. Soft shading doesn't mean weak contrast everywhere. Selected dark recesses can establish depth while broader pale areas preserve the flower's shape.
Match the Flower to Its Job
A shoulder peony can use the rounded placement to support an open bloom. A forearm design may benefit from a slightly turned flower, with leaves extending along the arm rather than forcing the bloom into a narrow oval.
If the peony connects existing tattoos, draw its full structure before fitting it into the gap. Squeezing isolated petals around neighboring subjects often produces an unclear flower.
Standalone bloom: Give the outer petals room and keep the background subordinate.
Connecting element: Coordinate line weight and shading with the surrounding tattoo.
Larger floral arrangement: Vary the flowers' angles rather than repeating identical front-facing blooms.
A contained peony may fit a single appointment. Multiple flowers, wrapping wind bars, and extensive background shading can turn it into staged work.
Before booking, ask which petal boundaries depend on lines and which depend on shading. Also ask how the flower will separate from a nearby dark dragon, mask, or water background. Adding more petals isn't always the best use of extra space. Sometimes a larger, simpler bloom makes the stronger tattoo.
How the Eight Black-and-Grey Japanese Motifs Compare on Placement, Session Needs, and Meaning
Item | Common Placements | Session Planning | Core Symbolism |
|---|---|---|---|
Hannya Mask (Noh Theatre Demon) | Chest, back, thigh | Test stencil and choose a size that preserves facial detail | Jealousy, rage, and emotional transformation |
Koi Carp Climbing the Waterfall (Koi no Takinobori) | Sleeves, back | Plan upward flow; large designs may need multiple sessions | Perseverance, courage, and success |
Dragon in Clouds (Ryu) | Back, sleeve, leg | Balance clouds with the dragon; large designs may need multiple sessions | Protection; water and sky power |
Great Wave (Inspired by Hokusai) | Forearm, calf, back | Adapt the reference; follow the body's curve and keep foam details bold | The force of nature and cultural artistry |
Oni Demon Mask | Chest, shoulder, arm | Balance solid black and grey; choose placement to showcase the expression | Protection from evil and misfortune |
Kannon Bodhisattva | Back, chest | Research iconography; full-back designs may require a long session | Compassion and spiritual devotion |
Fujin and Raijin (Wind and Thunder Gods) | Back, upper back, chest | Plan composition for body shape; schedule multiple sessions for large designs | Wind, thunder, and mythological storytelling |
Peony (Botan) with Wind Bars | Forearm, shoulder; larger compositions | Plan flower placement and use as filler to connect elements | Wealth, honor, and bravery |
Choosing Your Motif and Booking the Right Session
Start by narrowing your shortlist to the motif you most want to wear, not the one with the most impressive reference photograph. Then choose between a standalone subject and a connected composition with substantial background. That decision affects coverage, working time, and your options for future additions.
A mask with a restrained frame is a different commitment from a mask embedded in a sleeve. The same applies to a koi with a few water accents versus a waterfall extending across the back. If your appointment availability is limited, reduce the coverage or complexity rather than shrinking every detail.
Bring References That Answer Different Questions
Bring a small selection of references that show the subject, the shading treatment, and the placement you prefer. Explain what you like about each image instead of asking the artist to combine everything exactly.
Ask about greywash: Which areas will heal light, and where will the artist use dense black?
Ask about negative space: Where will open skin separate the subject from its background?
Ask about staging: What will each appointment accomplish, and how will healing affect the next booking?
Ask about healed work: Look for examples with comparable density, placement, and skin tone where available.
Long-term planning also includes skin monitoring. Dermatology literature on tattoo reactions describes potential inflammatory complications and the difficulty pigment can create when examining skin lesions. Black ink isn't risk-free, and a large tattoo shouldn't become a reason to ignore a changing spot.
Discuss existing moles before finalizing coverage, and seek dermatological advice about suspicious or changing lesions. Follow the artist's aftercare instructions, protect healed work from sun exposure, and let the skin settle before deciding that a pale area needs more ink. Don't treat an immediate post-appointment photograph as the final result.
At Think Tank Tattoo, we offer complimentary consultations with one of our eight artists to discuss design direction, placement, and timing. We require a $100 non-refundable deposit to reserve an appointment, but don't send a deposit until an artist or staff member directs you to do so. Bring your preferred motif and an honest sense of the coverage and appointment commitment you can manage.
We offer custom tattoo planning and complimentary consultations to help translate Japanese motifs into black-and-grey work suited to your body. Visit Think Tank Tattoo to explore artist portfolios, then call or email us to discuss your design, placement, and booking.
Comments