
Tattoo Design Advice: How to Plan Art You'll Still Love
A tattoo that looks right on the stencil can still fail a decade later, when the lines soften and the story no longer fits. Strong tattoo design advice treats that future as a drawing problem, solved before the appointment, not as a note on the aftercare sheet. Excitement is not a design constraint. Time is.
Table of Contents
Why Your Tattoo Design Must Work for a Decade - Three filters, then a yes
The Ten-Year Design Test at a Glance - What a failed row looks like
How to Build a Design Brief Step by Step - Why the drawing is the permanent decision
Placement, Scale and Session Planning - Sessions and warning signs for large work
Designing Around Meaning, Culture and Change - Culture, impulse, and a cooling-off check
Book Your Consultation With a Finished Brief - Questions worth asking out loud
Why Your Tattoo Design Must Work for a Decade
A 2023 U.S. study of 3,033 adults, from an approximately census-matched sample, found that 35.3% had at least one tattoo. Among tattooed participants, 18.2% regretted one or more. Time tracked with that regret. People reporting it had possessed their tattoos for an average of 18.4 years, compared with 14.7 years among those without regret. In the same study, 52.1% of tattooed respondents were interested in removing, covering, or revising at least one tattoo.
The chair rewards a pretty stencil. The next decade does not. Imagery, lettering, scale, placement, and style have to stay meaningful and readable long after the fresh photo.
Three filters, then a yes
Hold every concept to three filters before anyone calls it finished.
Still yours later: The subject should survive a shift in taste, work, or relationship.
Readable where it sits: Shapes and words have to hold at the actual size and viewing distance.
Able to grow or be covered: Later additions should not smash the original composition.
First tattoos need a harder look at visibility. A piece on the neck, hand, or forearm shows up in family photos and job interviews. A piece on the ribs or upper thigh does not. Say both settings out loud, including whether you might add to the work later.
Practical rule: If a design fails any one of the three filters, it is not approved. Change the idea before you change the calendar.
The Ten-Year Design Test at a Glance
I run every drawing through seven checks before it leaves the page. A warning on one row means adjust the design. It does not always mean throw the idea out. Size and line spacing cause the most trouble later, so those come first. Lettering and placement come next.
Factor | What to check | Warning sign |
|---|---|---|
Size | Draw it at final dimensions and view it at arm's length | Details merge when the piece is scaled down |
Line weight and spacing | Keep lines thick enough and gaps open enough to hold shape | Hairline work whose gaps close at final size |
Contrast and negative space | Keep strong value steps and clear white space between shapes | Subtle shading that depends on tiny value differences |
Lettering | Use a simple, widely spaced font and check every letter at scale | Script with thin connecting strokes |
Color | Limit the palette and favor saturated, high-contrast combinations | Pastels or close hues that blend into skin tone |
Placement and movement | Test on the body in motion, including bends and folds | Key elements across joints or folds |
Sun, friction and expansion | Plan sun protection, check clothing rub zones, and leave room to add or cover | Single-session composition with no room to add or cover |
What a failed row looks like
Size fails when a portrait that sings at eight inches turns to mud at three. Draw it at the final dimensions and step back an arm's length. If the eyes merge, enlarge the piece or drop detail.
Line weight fails when hairline gaps are too narrow for the finished size. Those gaps close as skin ages. Thicken the lines or open the spacing. The trade-off in fine line and bold line tattoos is mostly this. Delicate work reads now. Heavier line holds later.
Lettering fails when thin script connectors blur faster than block letters. If you can't read every letter at scale on paper, you won't read it on skin in year eight. Pastels fade toward skin tone sooner than saturated color, and tiny grey steps do the same. Add contrast, cut a hue, or both.
A passing design has strong shapes, clear gaps, text you can read at the intended size, and open skin where a later piece could join. If two rows fail, enlarge it, move it, or simplify it before you book.
How to Build a Design Brief Step by Step
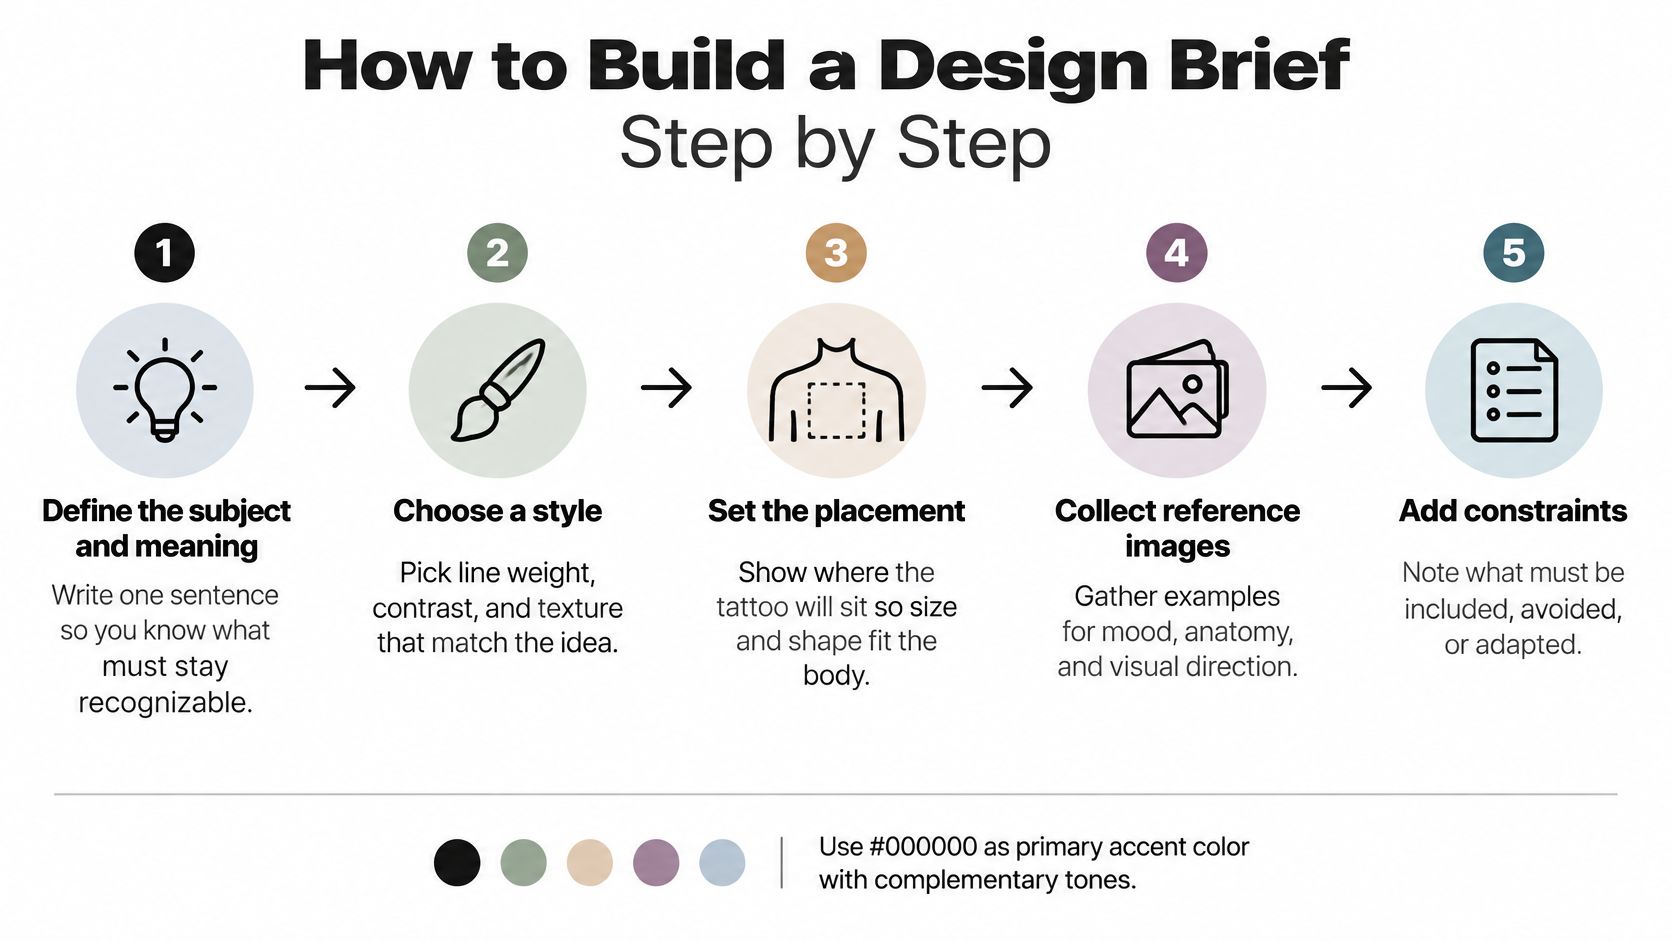
A brief turns a feeling into a drawing the body can keep. Work these steps in order. Skipping one is how a pretty reference becomes a tattoo you fight with later.
Write the subject and the meaning in one sentence. That sentence is what must stay recognizable. If you can't say it, the drawing will wander.
Pick a style whose line, contrast, and color fit the spot. Bold traditional outlines forgive a moving ribcage. Fine line on the same ribs needs fewer elements and more open space, because the skin shifts with every breath.
Map the drawing to curvature and movement. A straight banner bends on a calf. A face wrapped over the shoulder splits when the arm lifts. Draw on the body, not on a flat rectangle.
Cut details that only read up close. Drop lines that vanish at conversation distance. Keep the silhouette.
Check real scale before you book. Place the drawing on a body photo or a stencil and look from phone distance, the way other people will see it.
Why the drawing is the permanent decision
Tattoo pigments sit in the dermis as low-solubility particles about 6 to 800 nm in size and can persist for years as the body retains or redistributes them. A review of how tattoo pigment behaves in skin is why these choices are effectively permanent, not like surface printing. No validated pigment-density number predicts inflammatory risk, so I won't call a line width, a color, or a saturation medically risk-free. Tell us about allergies and skin conditions, and leave with aftercare steps plus a clear point for medical help.
Copying a reference without fitting it to anatomy, packing tiny details, running critical lettering across a fold, and pairing colors that differ only by a slight value are the usual failures.
If the design still reads at the stencil stage, it is ready for review. If it only reads in the zoomed file, it is not ready.
Placement, Scale and Session Planning
Placement decides how much detail survives. Plan the drawing and the body area together, or the prettier option on paper loses.
Placement | Main design risk | Planning note |
|---|---|---|
Forearm | Visibility and sun exposure | Keep anchors away from inner wrist folds and plan sun protection |
Ribs | Stretching with breathing and sleep | Use bolder, simpler shapes and expect a longer healing period |
Hands and fingers | Fast fading and frequent contact | Keep detail low and expect touch-ups over time |
Ankles and feet | Friction from shoes and socks | Avoid fine detail and plan sizing around footwear |
Upper arm and thigh | Gradual softening from sun | Good for finer detail and well suited to medium pieces |
Back and sleeves | Large scale needs several sessions | Divide into sessions with recovery time and anchor key elements first |
Forearms sit in the sun and in every photo, so keep faces and dates off the inner wrist crease. Ribs stretch with breath and with sleep, so a dense portrait there fights the body. Hands and fingers fade under washing, gripping, and bumps, which means simple shapes and later touch-ups. Ankles and feet take shoe and sock rub. Upper arms and thighs hold finer work better than those high-wear spots.
Sessions and warning signs for large work
Split a sleeve, a back piece, or heavy color into sessions with recovery between them. Mark zones that see repeated friction or sun, and keep the main anchors away from likely distortion. One long sitting on an oversized design tires the skin and the person in the chair. Outline and key shapes first. Shading and color can wait until the area has settled.
The written plan should cover hygiene, wound care, sun protection, and signs that need a clinician. Published surveys estimate roughly 0.5% to 6% of tattooed people experience an infection, and one review cites cutaneous complication estimates from 2% to 43%. A clinical review of tattoo complications treats those ranges as non-interchangeable, because the methods and definitions differ. Persistent swelling, spreading redness, fever, pus, or worsening pain is not normal healing.
Don't tattoo over irritated, infected, or diagnostically important lesions, and don't ignore medication or immune-status disclosures. The consult should record placement, scale, session timing, and a follow-up path, not only the style name.
Designing Around Meaning, Culture and Change
The useful question isn't whether the meaning feels good today. It's what happens if that meaning changes.
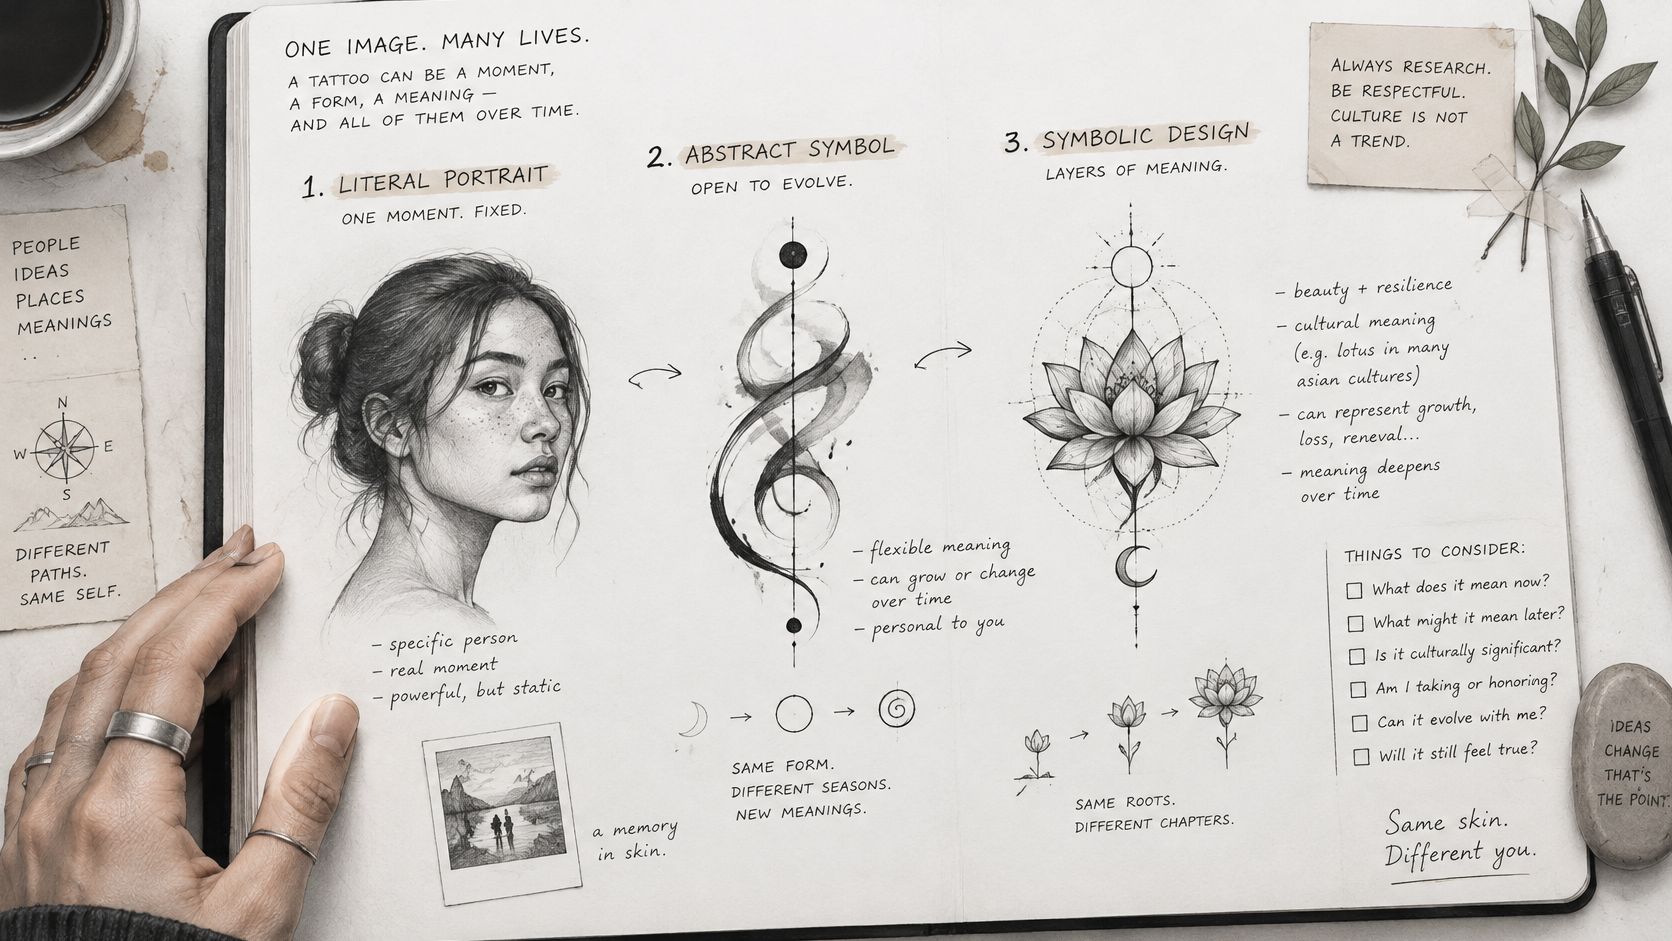
A literal portrait locks the tattoo to one face and one moment. A name or a date is even tighter, and it can hurt when a relationship or a job changes. A symbol carries meaning that shifts as culture shifts. An abstract motif lets the story change without forcing the art to change with it.
I would aim for meaningful but not over-specific. A flower tied to a place usually ages better than a dated portrait of someone you may see differently later. A short line from a song usually ages better than a full lyric that only made sense in one season.
Culture, impulse, and a cooling-off check
Learn the origin of culturally loaded imagery before it becomes decoration. Talk with people from that culture. Leave sacred or ceremonial motifs alone if you want them only as a pattern. A custom Polynesian tattoo design is a clear case, because those marks carry obligations, not just a look.
People remove tattoos after changing tastes, relationship changes, employment shifts, and cultural second thoughts. Impulsive, trend-driven choices keep showing up as avoidable dissatisfaction. Regret is real, and it is sensitive to the question asked. A 2026 YouGov survey found 14% of tattooed British adults expressing regret, while other surveys land much higher. Treat that spread as a planning signal, not a verdict that regret is inevitable.
For a highly visible or hard-to-reverse spot, cool off on purpose.
Wait several weeks before you book, even if the idea feels urgent.
Redraw it from memory. If you can't, the meaning isn't stable yet.
Ask the changed-life question. Would you still choose it if your job, relationships, or tastes moved?
Temporary layout work can sharpen that test. Magic Genie's henna design workflow is a practical way to arrange motifs, spacing, and cultural references on a plan you can still revise, before any permanent line is committed.
Pressure-test the idea against a moving body, not only a flat sketch.
Book Your Consultation With a Finished Brief
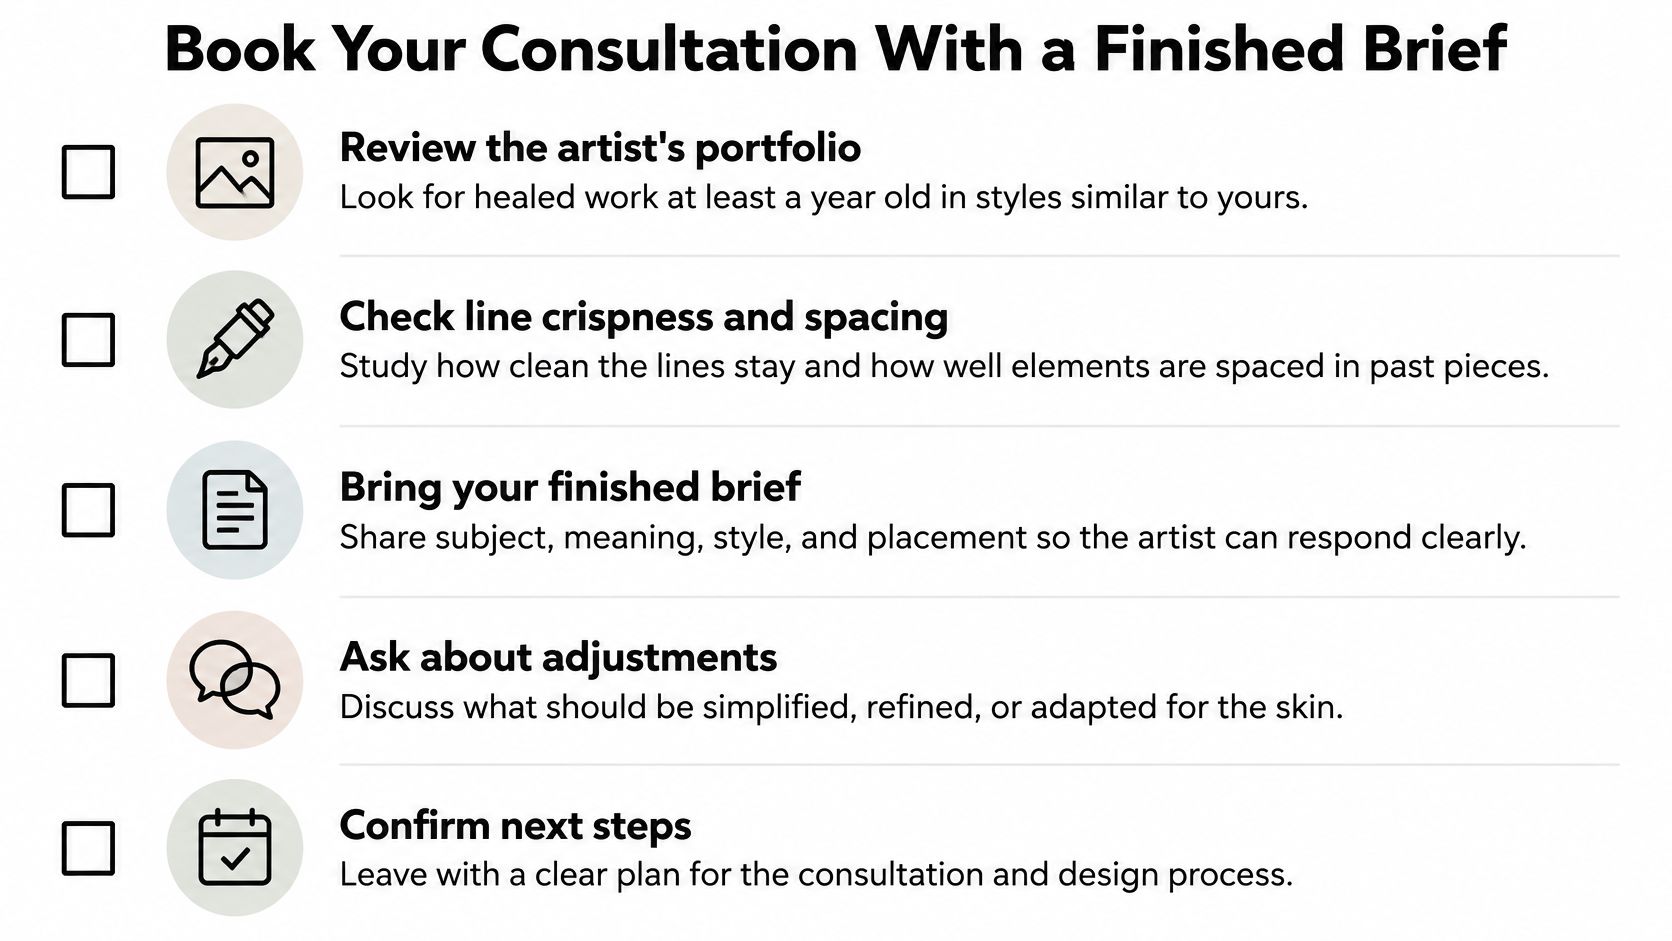
Start with healed work, not a fresh Instagram crop. Look for pieces at least a year old in styles close to yours. On tattoos that match your placement, check whether the line stayed crisp and whether the gaps between shapes are still open.
Bring a finished brief, not a mood with no edges.
References with notes: Two or three images, plus one line on what you like in each.
A placement photo and a size in inches: "Small" and "medium" are not measurements.
Your ten-year answers: Where the design passed, and what you already simplified.
The meaning in one sentence: So we know what has to survive a revision.
Questions worth asking out loud
Ask these in order. What would you simplify at this size? How will these lines age in this area? What session plan do you recommend, including recovery time? What does the aftercare plan include, in writing?
If we propose a change, ask whether it serves legibility or only a house style. A good collaborator can name the trade-off. Our design feedback process is built for that back-and-forth, so the drawing changes on paper instead of on you.
Disclose allergies, skin conditions, medications, and immune issues before the design is locked, and ask for a written aftercare sheet plus a warning-sign list. Think Tank Tattoo is 18+ only. Appointments are booked by calling or emailing the shop, and we offer complimentary consultations at 172 S. Broadway, Denver, CO 80209. Don't send a deposit until an artist or staff member tells you to.
Book when the three filters pass, the placement plan is written down, and you can say the meaning in one sentence. A clear brief shortens the first session and makes the tattoo easier to live with.
Think Tank Tattoo has done custom work in Denver since 2002, and a consultation is where we pressure-test meaning, placement, and how the lines will age before any stencil is final. Bring your brief, your placement photo, and answers to the three filters. Visit Think Tank Tattoo and call or email the shop to start that conversation.
Comments